- Qualcomm Launches Snapdragon 4 Gen 2 Mobile Platform
- AMD Launches Ryzen PRO 7000 Series Mobile & Desktop Platform
- Intel Launches Sleek Single-Slot Arc Pro A60 Workstation Graphics Card
- NVIDIA Announces Latest Ada Lovelace Additions: GeForce RTX 4060 Ti & RTX 4060
- Maxon Redshift With AMD Radeon GPU Rendering Support Now Available
SilverStone TJ09
SilverStone is one of the premiere case builders in the market today. From their hugely popular Temjin tower series to the elegant LaScala series of HTPC cases to everything in between like the Sugo LAN case, SilverStone has something that’s sure to fit the bill. SilverStone is long known to produce masterpieces of design and thermal engineering, today we look at their latest effort and see if it is indeed their best effort yet.
Page 4 – Closer Look Cont.
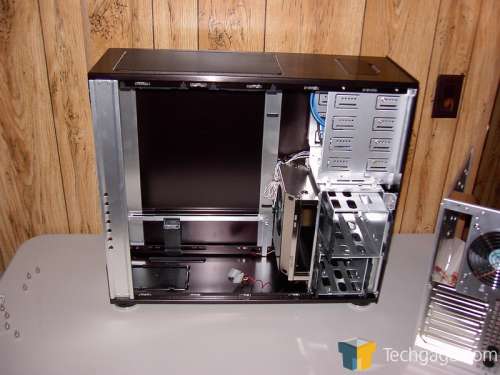
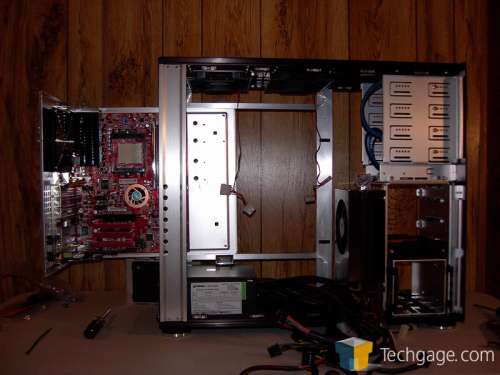
Here’s a look at the case with the mobo tray out. While we’re looking at the case opened up take a look at the bottom rear of the case. There’s mesh under the PSU mounting location. This allows you to mount bottom fan equipped power supplies in this case with the fan facing down so that it can draw fresh air in through the mesh rather than warm case air. Nice touch.
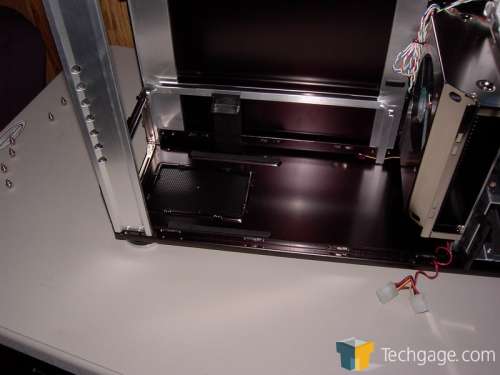
The PSU mount is drilled to support a PSU mounted with the "bottom" of the power supply facing down or up. This is a cool thing since it can make the difference between the cables coming from the power supply being pulled too taught or not going to a distant power connection.
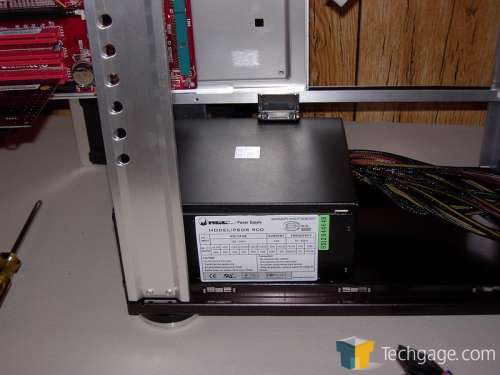
I want to point out a couple of things here, comment on something else and ridicule something else. A closer look at the PSU mounting location shows a pair of rails stamped into the case bottom that are rubber topped to isolate noise from the PSU fan from the case floor AND to protect the finish of the power supply. Taking a peek at the rails for the mobo tray reveals that they’re inlaid with what looks like black delrin plastic. Delrin is a self lubricating plastic and they really do give the motherboard tray a nice easy ride out of the case.
Now, what I think is really kind of silly is the support for the power supply. This support snaps over the top of the PSU and holds it down to the bottom of the case. Yes, I know that it’s to hold it tight to the rubber pads but I’ve tried it with and without it in the case and gravity does a dandy job of holding the power supply down.
The rear plate for the PSU is not at any sort of angle to the case (other than 90 degree) so when the power supply is fastened down it is not being pulled up from the case floor. Looking at the intake fan we can see that it’s placed high enough in the case to blow air over the power supply and right into the PCI area of the mainboard.
If you look in the opening for the fan in the second picture you’ll see that there’s a mesh (you see the edge of it, sorry I didn’t get a good shot of it from another angle. My camera wouldn’t focus on it) that is in front of the fan. I’ve found that this mesh does impede the air flow from the front fan by a good margin but I’ve also found that removing it helps in some ways but hinders in others. More on that in a bit.
I’d also like to point out that unlike some cases with removable mobo trays the TJ09 doesn’t have a removable pigtail for the LED’s and switches. Slight annoyance in that every time that you pull the mobo you have to unplug each switch and LED connection rather than just one single connection.
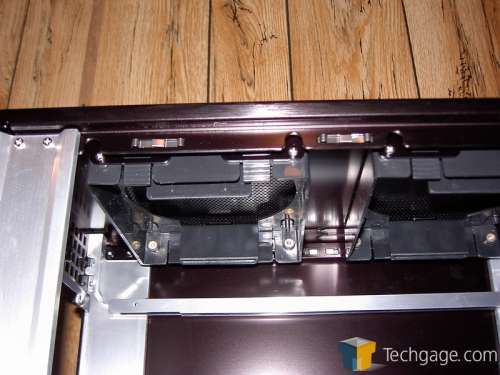
At the top of the case we see two more snap in fan mounts. I’ve filled them with a pair silent 120X25mm fans.
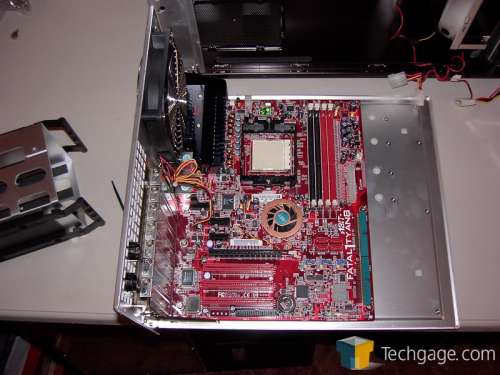
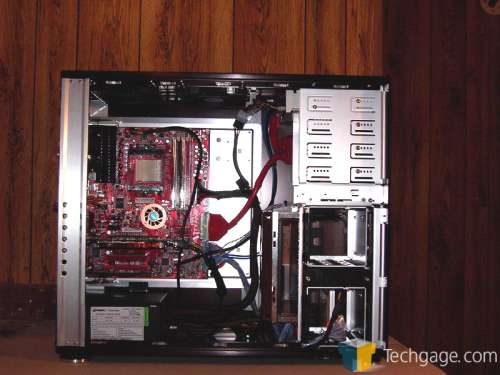
Here’s a look at the mobo mounted on the tray. Take my word for it, you can put a very large HSF on your mobo out of the case and still slide the tray into the case.
The mobo fits nicely above the PSU area. There’s quite a bit of room between it and the bottom PCI slot so there’s no worries about jamming the bottom PCI card into the PSU when you slide it home.
After installing the video card (EVGA 7950GT) I install the optical drive and begin routing cables. The cables are a bit of a pain in this case thanks to the fan duct. This is in regards to the HDD cables. The duct actually comes in quite handy for tucking excess power cables up under.
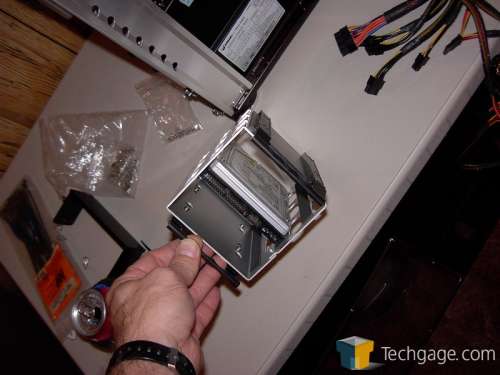
Here’s the test drive used for the test system. It’s an older 7200RPM Western Digital IDE drive.
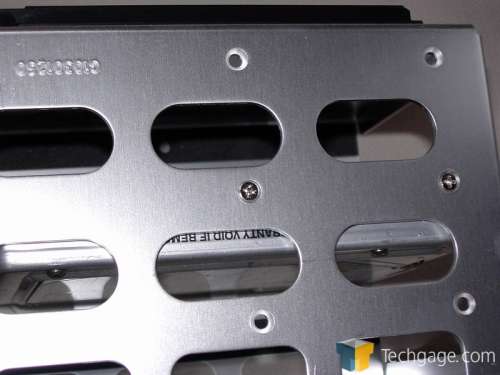
The drives mount using small counter-sunk screws not unlike the screws used with the ICY-DOCK triple SATA enclosure I reviewed a while back. These are needed to allow the drive cage to slide in and out of the drive cage mount. This way there’s no need for any holes cobbled into the drive casing.
|
|
Support our efforts! With ad revenue at an all-time low for written websites, we're relying more than ever on reader support to help us continue putting so much effort into this type of content. You can support us by becoming a Patron, or by using our Amazon shopping affiliate links listed through our articles. Thanks for your support!


