- Qualcomm Launches Snapdragon 4 Gen 2 Mobile Platform
- AMD Launches Ryzen PRO 7000 Series Mobile & Desktop Platform
- Intel Launches Sleek Single-Slot Arc Pro A60 Workstation Graphics Card
- NVIDIA Announces Latest Ada Lovelace Additions: GeForce RTX 4060 Ti & RTX 4060
- Maxon Redshift With AMD Radeon GPU Rendering Support Now Available
Spire VertiCool II CPU Cooler
Summertime. We can’t get enough of it, but our computers absolutely hate it. So, we have another Spire cooler on the test bench, and this one looks promising. However, though it did a good job at what it was sent out to do, the installation hassle really holds back from this being a favorable cooler.
Page 2 – Further Look
Before we get into the meat of the review, let’s take a look at the spec sheet provided by Spire themselves.
- Technical Specs
- Socket 754 / 940 / 775 / 939 Cooling kit
- Dimensions Heat sink: 95’65’100 mm (l ‘ w ‘ h)
- 12VDC Fan: 80’80’25 mm
- Rated speed 2300 RPM +/-10%
- Rated power 1.56 W
- Noise level 19.0 dBA
- Air flow 25.78 CFM at 2,300 RPM
- Current 0.13 A
- Life hours Ball: 50.000
- Features Blue transparent spider fan, 2 heat-pipes, Aluminum Micro-Fin, Copper base
- Connector 3 pin, mainboard
- Celeron D ~ 2.93 GHz (340J)
- Pentium 4 ~ 3.73 GHz (775 Prescott)
- Pentium D ~ 3.4 GHz (775 Dual-Core)
- Pentium EE ~ 3.73 GHz (775 Dual-Core)
- Athlon 64 ~ 4800+ (K8)
- Athlon 64 FX-51 (K8)
- Athlon 64 FX-53 (K8)
- Athlon 64 FX-55 (K8)
- Opteron ~ 2.6 (K8)
- Sempron ~ 3300+ (K8)
- Thermal resistance 0.21 (AMD) & 0.23 (INTEL) ‘C/W
- Bearing Ball bearing
- Application Intel:
- AMD:
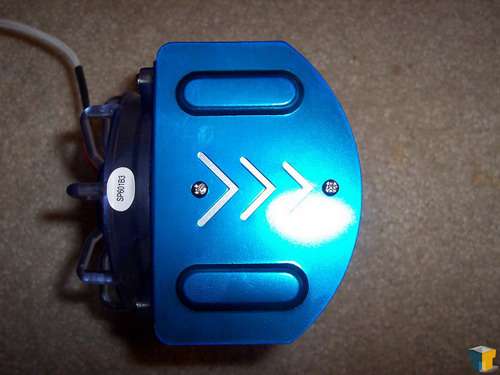
On the top of the cooler, there is a nice blue cover with three arrows on the top. This is either for looks or to tell you which way the air is being pushed.
Installation of this cooler can be done on either an Intel processor or an AMD. I am currently running an AMD system so a hardware switch will have to be done. In the following picture, you can see how the socket adapters are interchanged.
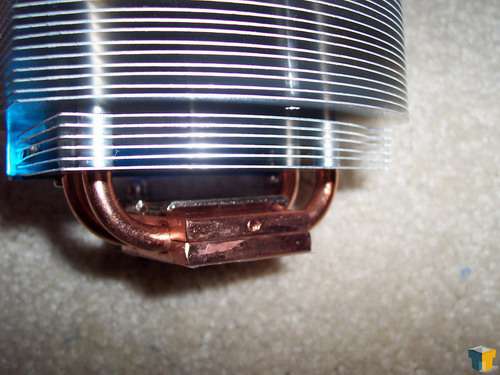
Here you can see the gap in between the copper plate and the aluminum piece there to hold the socket adapter in. You also see a hole. This is there so once you have the adapter in place, you can screw it in place to keep it from coming out.
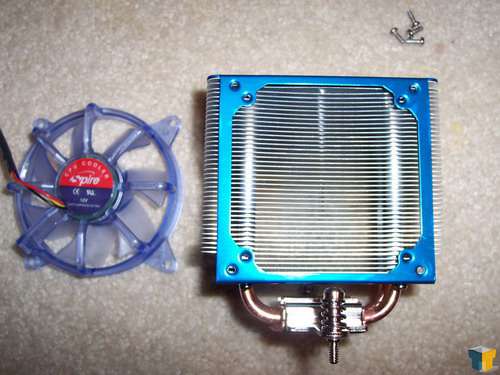
Once we have the adapters in place, we can install the cooler on the motherboard. To install this cooler, I am keeping the stock DFI back plate on the motherboard and will install the cooler onto it. Before I install this cooler, I would like to take one final look at the cooler and its fan.
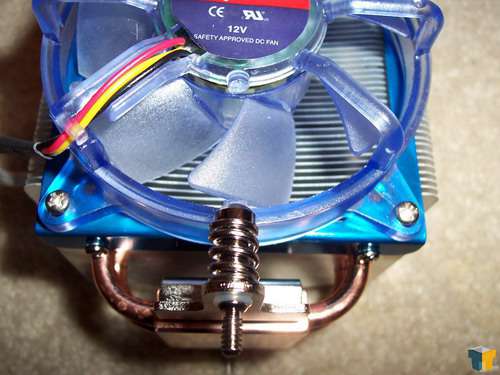
There is one glaring problem that I see right here and it’s that I will have to remove the fan before can screw the cooler into the motherboard back plate. This will prove to be a problem but I would like to see if I can get around this somehow. Hey, I know how I can do this; I will cut some plastic up. It’s unfortunate that any end user has to modify their cooler to fit their system but thus was the case here and now.
As you can see, I cut the bottom fan guard in order to get the screwdriver into the mounting screw to install this. This is something that no end user should ever have to do.
As you can see, this cooler was designed with dual core processors in mind. It is stated for Intel but AMD dual core processors can also be cooled by the VertiCool II. I do not currently have my dual core processor available to cool so my trusty 3700+ San Diego will have to once again, stand in.
|
|
Support our efforts! With ad revenue at an all-time low for written websites, we're relying more than ever on reader support to help us continue putting so much effort into this type of content. You can support us by becoming a Patron, or by using our Amazon shopping affiliate links listed through our articles. Thanks for your support!


