- Qualcomm Launches Snapdragon 4 Gen 2 Mobile Platform
- AMD Launches Ryzen PRO 7000 Series Mobile & Desktop Platform
- Intel Launches Sleek Single-Slot Arc Pro A60 Workstation Graphics Card
- NVIDIA Announces Latest Ada Lovelace Additions: GeForce RTX 4060 Ti & RTX 4060
- Maxon Redshift With AMD Radeon GPU Rendering Support Now Available
Social & RSS Feeds
Latest Videos


Latest News
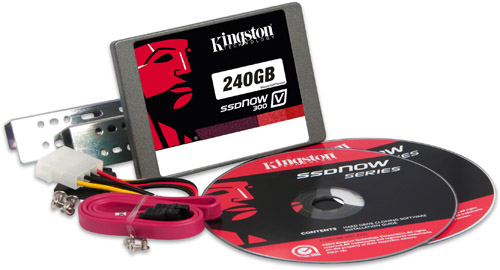
SSDs at the Office – Trials, Tribulations and Still Worth It
by Brett Thomas on February 15, 2013 in Editorials & Interviews, Storage
In advance of the busiest season at the office I work at, I wondered if adding an SSD to the slightly-aging Dell I use would offer a considerable gain in performance, and thus make the onslaught of work easier to deal with. Little did I realize, upgrading a Dell business PC requires a lot of patience, planning and snacks.
Page 2 – Moving to the SSD, Recovery Notes & Final Thoughts
Once the backup is made, it’s time to get our hands dirty. Shut the system down, pop open the case and swap the old hard drive out for the SSD. Close it up, hit the power button and…
…immediately proceed to enter your BIOS (“Setup” for those who are uninitiated) by doing the tap-dance of hitting Del or F1 (or both) in rapid succession. You’re going to go to your storage settings (in Dell’s most recent BIOSes, this is simply called “Storage”) and make sure that your “method” is set to RAID/AHCI or AHCI and not Legacy, IDE, PATA, ATAPI or anything else that might be there. AHCI stands for “Advanced Host Controller Interface” and it is a HUGE step up in how hard drives communicate with systems, and is a big part of the SSD speed boost. All RAID modes support AHCI automatically, so if you don’t see AHCI specifically then you can set your system to RAID mode instead. Don’t worry, it won’t mess anything up if you’re not using RAID.
With that change, you are now safe to boot back into Acronis. However, before we can get to restoring your partition, you’re going to need to prep and add your new drive – so go down to Utilities and select Add Drive, and choose your SSD. You can then create a new partition on the drive – I simply made a basic NTFS partition that takes up the whole drive. Save your changes and let it do its magic, and we can move on to the next step.
Our final task in Acronis is to restore the backup partition to the newly created NTFS partition, and it’s pretty straightforward. Go to “Recover,” then select your backup file. You’ll need to choose where to put the partition next, which is a little counter-intuitive because it doesn’t make that step perfectly clear – the menu language makes it sound like you’re still talking about the backup file when you’re really talking about where to restore to. So make SURE that you are selecting the NEW partition that you just created in this step, and not the drive where the backup file is contained (or bad things will happen).
Acronis will then ask if you want to “Restore the MBR” from the backup, and you definitely want it to. Again lacking in the documentation, Acronis is not actually going to restore the original MBR (which would be bad) – what it’s asking is whether it should create a new one for the drive based on the new partition (or partitions, if you have more than one) that you’re restoring, thus making it bootable. If you do not select this option, the drive will not boot and you will need to either repeat this whole process or grab your Windows DVD (which, if you’re like me, you don’t have because Dell installed it for you) to fix it.
Now, it’s time to click “Start” and go make yourself another sandwich. Once again, Acronis will get to work on its tedious process of moving files over your USB or eSATA bus, and it will take every bit as long as the original backup process did. For those following along at home, that’s about 6 hours total copy time (between backup and restore) for 100GB over USB 2.0 on my system – that’s nearly an entire day that the system is down. However, when I re-tested using a 1TB 7200RPM drive in an eSATA enclosure for my intermediary drive, that time shaved down considerably (about 20m per transfer).
After the restore is complete, the system should be bootable – remove the external drive and DVD, and reboot. When it fires up, you may see that the C: partition is the same size as it was on the old drive. You can reclaim your new space by simply going back into the Disk Management tool (where we originally revealed the recovery partition), right-clicking on your OS partition and clicking “Expand.” In three different runs, I had differing outcomes as to whether this step was necessary or already performed for me by Acronis. Once finished, you are ready to re-enable BitLocker (if desired) and move on to the next machine!
A couple quick “recovery” notes
Just in case not everything goes as smoothly as it should when you reboot to your new SSD, I figured it may not hurt to talk about recovery fixes. Most likely, this issue will arise from boot files being copied incorrectly from the original system, though it’s possible that Acronis may not have rebuilt your MBR correctly. To fix these, you simply need your Windows Vista / Windows 7 DVD and … oh, you bought a pre-built with pre-installed OS, and the only disks you have are the branded “recovery” ones, huh?
Fear not! You can download the DVD image (in ISO format, if you care) straight from Dell’s partner Digital River, and then burn it to DVD (or even better, put it on USB!) using the Microsoft tool designed just for this. SP1 is even already included, as you may be unable to recover an installation that has SP1 installed by using original media. I keep a bootable USB of my office’s installation handy at all times for emergencies.
Once you have recovery media, you can boot to it and let Windows try to repair your installation. This most likely will work if you let it – the repair will require three separate reboots and re-runs of the tool though, as it only fixes one thing per step. Alternatively, you can use the “recovery environment command prompt” to fix your hard drive by navigating to it with the following commands:
- Type: c:
- Type: bootrec /fixboot
- Type: bootrec /fixmbr
- Type: bootrec /rebuildbcd
This should fix the problem.
Was it worth it? Yep.
In performing the incredibly long backup/restore process and having several failed attempts under my belt, I now have the “How to move a pre-installed proprietary computer vendor OS to an SSD” concept nailed down. With an eSATA external enclosure that has a 7200RPM drive in it, the entire process takes under an hour instead of over six – a tremendous difference that brings it within the realm of feasibility for most businesses.
Of course, even an hour is still downtime and SSDs are not free, so this needs to come with some benefits for the system – and boy, does it ever. Gamers look at things like level loading times and OS boot-up times to weigh the benefits, but offices have a much different benchmark – loading up a part of the Microsoft Office Suite or opening up Intuit Quickbooks can take what feels like eons. Adobe reader, a simple piece of software installed on most business machines, can leave you sitting and waiting as it accesses all the myriad files necessary to finally load up that PDF you clicked on. If you bounce routinely between these types of files, you often get stuck in the habit of leaving the software pre-loaded and just waiting for you to try and use a document so you’re not stuck waiting for the ridiculous load multiple times per day.
On an SSD, all of these giant pains go away. My wait for MS Excel went from about 10s to under 1s. Quickbooks, which used to take more than 1m to load (yes, over a full minute!) is now at about 20s. The OS itself feels snappier in most every way, and obviously the OS boot time is drastically reduced as well (though I never felt it loaded all THAT slowly). It’s enough of a difference to make me feel like this system would hold out an extra year or two on my desk, which is a big savings.
Further, I have the ability to put the SSD in a new system if and when I do feel inclined to upgrade, saving me from paying the upgrade charge at that time as well. A large enough drive would easily last for two systems. For my needs, 240GB is plenty but 128GB would likely not be… but for security purposes, my office requires each desktop to hold most of its own data and we don’t allow cloud applications or storage. Depending on how much your office machines store vs. run from the network/cloud, 128GB may be plenty to get away for a couple upgrades!
Overall, I think this project is well worth the time and investment from a business standpoint, due to the low cost of SSDs now. If you’re looking at 5-10 systems, it can be painful to think of tossing another $500-1,000 at already existing hardware – but delaying or even skipping a round of spending $4,000-8,000 for a new suite of systems that won’t function that much faster than your current ones is money well spent.

Support our efforts! With ad revenue at an all-time low for written websites, we're relying more than ever on reader support to help us continue putting so much effort into this type of content. You can support us by becoming a Patron, or by using our Amazon shopping affiliate links listed through our articles. Thanks for your support!