- Qualcomm Launches Snapdragon 4 Gen 2 Mobile Platform
- AMD Launches Ryzen PRO 7000 Series Mobile & Desktop Platform
- Intel Launches Sleek Single-Slot Arc Pro A60 Workstation Graphics Card
- NVIDIA Announces Latest Ada Lovelace Additions: GeForce RTX 4060 Ti & RTX 4060
- Maxon Redshift With AMD Radeon GPU Rendering Support Now Available
SteelSeries Sensei Pro-Grade Gaming Mouse Review

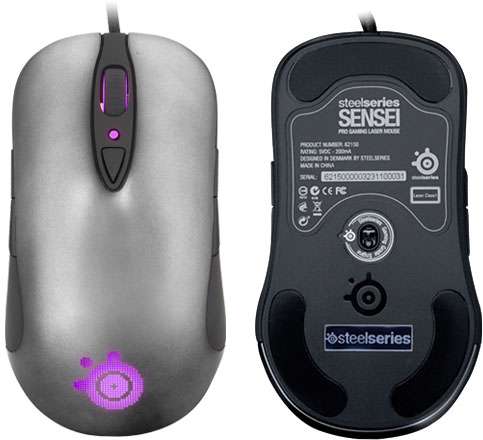
SteelSeries takes gaming seriously, as evidenced by its high-end Xai mouse released two years ago. Developed with the help of pro gamers, the Xai boasted high-end specs, unique features and looked good. The Sensei is the Xai’s replacement, and with it comes even beefier specs, a CPU under the hood, and interesting aesthetics.
Page 2 – Features
When the Sensei was first announced, the most interesting feature was the fact that it had a real CPU under the hood. That CPU is an ARM 32-bit offering, and according to SteelSeries, at 75MHz it’s as fast as the original Intel Pentium 75MHz, released in 1994. That in itself doesn’t impress me – after all, smartphones today are faster than computers of just a few years ago. What’s impressive is that a CPU like this is in a gaming mouse. Overkill? SteelSeries doesn’t think so.
In its words: This reference may sound like overkill, but it’s this type of power that allows us to do sophisticated calculations directly on the mouse – without the need for software drivers and without having to rely on the user’s computer.
For normal mouse use, the CPU might not do much at all. It might be part of the reason a super-high CPI level can be used, but the biggest benefit will be seen with the small LED menu screen on the mouse’s belly. On the Xai, a lack of a real CPU resulted in slower operation of said menu, while on the Sensei, it’s about as fluid as it can get.
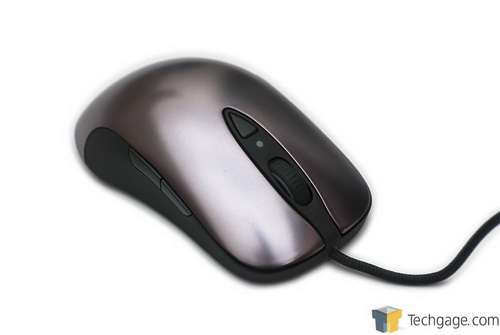
The Sensei is designed to cater to gamers of all stripes, and for that reason it’s ambidextrous. As someone who never liked most other ambidextrous mice in the past, this worried me, but SteelSeries has done a masterful job with the design here. The Sensei doesn’t quite contour to the shape of your hand, but it still manages to become one of the most comfortable mice I’ve ever used.
In terms of buttons, the mouse has two thumb buttons on either side, a CPI-change button, a scroll wheel that can be clicked, and of course, the left and right mouse buttons. By default, the left thumb buttons act as a forward/back, while the ones on the right control the Windows volume. All buttons can be reconfigured for other purposes, as expected.
As more and more gamers are moving to multi-monitor setups, higher CPI (or DPI) levels are beginning to see a real use, and for that reason the Sensei has a range of 1 – 11,400 CPI. Yes, I said “1”. In the spirit of absolute accuracy, you’re able to configure the CPI level with increments of 1. That’s hardcore. At 11,400 CPI, I can go move my cursor from one edge of my 1920×1200 monitor to the other by moving the mouse just over half an inch on the mousepad.
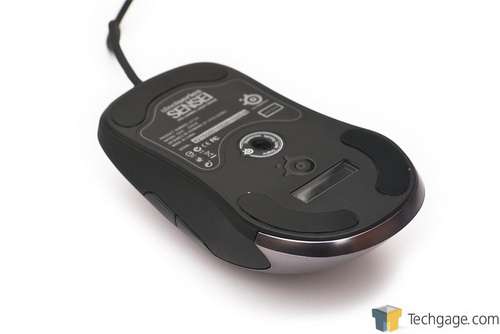
Something that sets both the Xai and Sensei apart is the LCD screen on the bottom that can be used to display a logo and configure settings. As it’s hard to photograph, I am opting to just use a stock photo here to show the screen in action, since it’s an accurate representation:

This black and white LCD is 128×32 in resolution and accepts BMPs for replacing the default SteelSeries logo. In our testing, simple logos featuring a flat shape and single color look fine. The 3D “T” in our logo didn’t come through well at all, but the “Techgage” portion did. SteelSeries has a good example of a logo that’s both simple but still good-looking.
To use the mouse’s built-in menu on this screen, the CPI button has to be held down for 4 or 5 seconds and then let go. Then, the mouse wheel can be used to scroll through the options, while clicking it will apply the chosen setting. Clicking the CPI button again will act as a “back” in the menu, and after pushing it a couple of times, you’ll be back at your logo, with the settings applied.
In the software, you have the ability to drag and drop profiles back and forth. However, I never was able to copy an edited profile off the mouse and put it back on the PC, as each time I’d be greeted with the error “Mouse profile data download failed”. I was however able to alter profiles on the PC and copy them over to the mouse afterwards.
In the software, you will have the ability to drag and drop profiles back and forth from the PC to the mouse, although I never managed to save settings on the mouse and then have them be retained when I opened up the SteelSeries software.
Speaking of software, most of the other features the Sensei offers are tied to it, so let’s tackle that next.
Support our efforts! With ad revenue at an all-time low for written websites, we're relying more than ever on reader support to help us continue putting so much effort into this type of content. You can support us by becoming a Patron, or by using our Amazon shopping affiliate links listed through our articles. Thanks for your support!


