- Qualcomm Launches Snapdragon 4 Gen 2 Mobile Platform
- AMD Launches Ryzen PRO 7000 Series Mobile & Desktop Platform
- Intel Launches Sleek Single-Slot Arc Pro A60 Workstation Graphics Card
- NVIDIA Announces Latest Ada Lovelace Additions: GeForce RTX 4060 Ti & RTX 4060
- Maxon Redshift With AMD Radeon GPU Rendering Support Now Available
Synology DiskStation BeyondCloud Preconfigured NAS Review

Pre-built NAS appliances might be easier to set up and use than a DIY server, but could they be even easier? Synology seems to think so. Its just-released BeyondCloud NASes come preconfigured with hard drives and provide a straightforward setup process. That’s right – your excuses for not owning a NAS just became fewer.
Despite all of our NAS coverage over the years, the concept of network-attached storage is still a nebulous one to a lot of people whom I speak with. The convenience and accessibility of shared storage is something that can easily be overlooked when not familiar with the concept.
Do I plug it into my computer? Is it a hard drive? These are all questions we’ve received over the years in response to our reviews. Perhaps the questions speak more to the reviews themselves, but regardless of the reasoning, it’s apparent that there is some gray area for many.
To help clear some of this up, Synology hopes to make NASes more accessible to the masses by bundling everything end users need into one simple SKU. Well, actually three, but we will touch upon this shortly. With its BeyondCloud brand, Synology has taken aim at the more novice user’s desk space.
By building out its exemplary Disk Station Manager (DSM) 5.1 operating system with the most relevant packages and imaging it onto devices with drives pre-installed, the company is looking to ship a solution that will fit the needs of all but power users. To aid in both the understanding of BeyondCloud, and NAS in general, Synology has also been working to publish how-to videos to its YouTube channel.
The gist is simple. BeyondCloud is Synology’s attempt to make NAS approachable to novice users by removing the setup, including pre-installed drives and removing the guess-work for which applications to install. Out of the box, the product is almost entirely ready to go. The only real work required by the end-user is installing the Synology assistant (available on its webpage) or going to http://find.synology.com and letting it scan the user’s network for Synology devices.
Synology has three flavors of BeyondCloud. The BeyondCloud 2TB ($180) is a single drive NAS based on the BC115j. The BeyondCloud 3TB ($240) is also a single drive NAS, based on the BC115j. The third and final NAS in the lineup is the BeyondCloud Mirror ($350). This is the one we are reviewing today; it ships with a pair of 3TB drives that are mirrored together. What this means is that every file you save to the NAS gets stored on both drives. File A gets stored on drive 1 AND drive 2. This is 6TB of storage in all, but since it’s mirrored, you only can use half. Should one of the drives fail, you can still access your data and replace the failed drive. It’s just another protection measure to prevent data loss.
Before we get to the simple setup process, let’s look at the device itself.
A Tour Of The Hardware
Based on the DS214se, the BeyondCloud Mirror won’t set the world on fire with raw performance, but it does provide a suitable platform to host the excellent DSM 5.1, and with it comes access to the entire Synology ecosystem of apps.
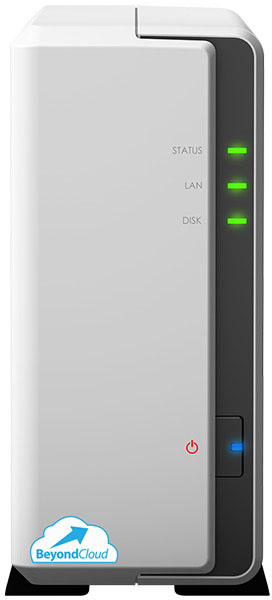
The BeyondCloud Mirror is a closed system, meaning that the drives are not hot swappable as the chassis is of a clam shell design. This harkens back to the days when all of the Synology devices were of this closed design. With the BeyondCloud Mirror being based on the DS214se, the chassis is white, with the status LEDs that we’ve come to expect running vertically down the right side of the front. Gone is the USB port that many other models sport, with a lone power button being the only way to interact physically with the NAS from the front.
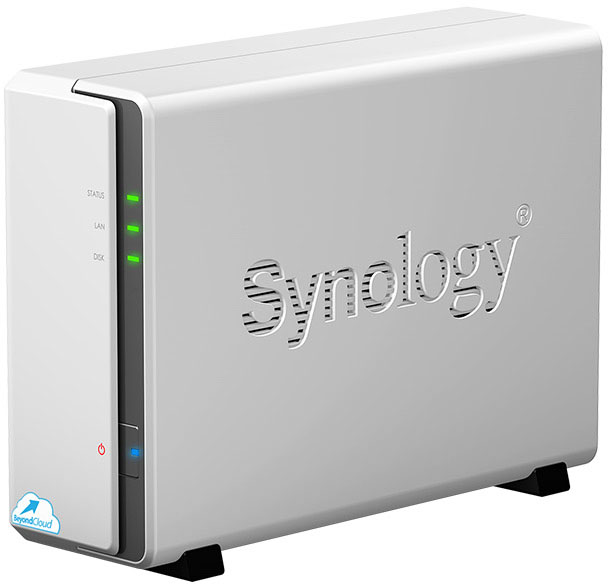
For ventilation, the sides of the BeyondCloud Mirror have the company logo in block letters that decrease in thickness as they move towards the back. Inside those letters are open slits for cool air to enter into the NAS. In my personal experience, these quickly can fill up with dust (I swear my house is clean), so you’d want to wipe them down every month or so to prevent air flow from becoming restricted.
The back of the BeyondCloud Mirror, like the front, is devoid of any bells and whistles that many have come to expect on Synology NASes. This, like everything else about the unit, is by design. Dominating the rear of the NAS is a 92mm fan, rated at 18.4 dB(A). Just below it are a pair of USB 2.0 ports, one Gigabit Ethernet NIC, and a power port. Like most small electronic devices, there is a Kensington lock port as well.
NAS Setup
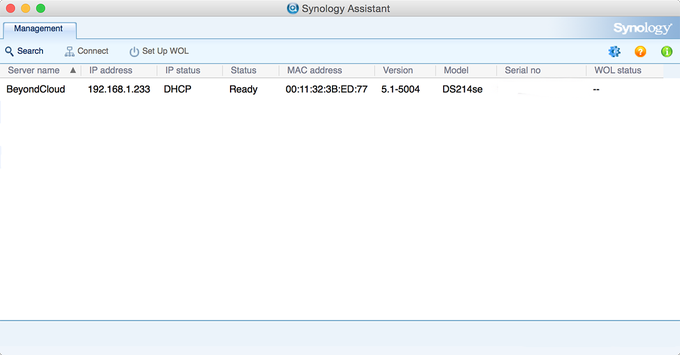
There are two ways to find the BeyondCloud that we just connected. You can either point your browser of choice to http://find.synology.com or download the Synology Assistant. For this review, we have gone with the assistant tool, but both approaches will allow us to accomplish the same result. With help from the Synology Assistant, we quickly find the unit. With a default hostname of “BeyondCloud”, there is little question as to which device we are looking for. In this case, it was the only one on our test network, but should you have other Synology devices, this will be the easiest way to determine which device you want to interact with.
The primary detail to take note of is the IP address. You can either enter that IP address into your browser of choice, or you can simply double-click it on the device in the list. Alternatively, you can also right-click on the NAS and connect that way.
You will instantly be greeted by a welcome page in your browser.
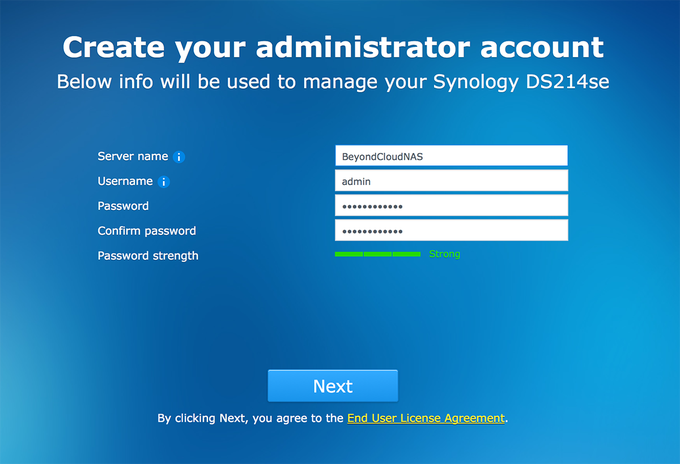
With any accessible device on your network, you will want to provide a username and password. You will also provide a hostname for the NAS. This will be its easily identifiable name on your network.
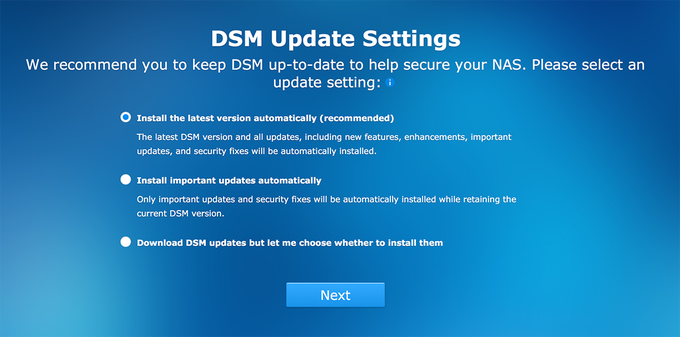
Like with a Windows desktop, Synology wants to make updating your BeyondCloud easy. You are given the options to let the NAS install updates on its own, install only important updates on its own, or download updates when they are available and allow you to apply them on your own time. For novices, I would recommend the second option. This will force your NAS to take care of itself at whatever proactive or reactive pace Synology takes, by patching vulnerabilities automatically. If you feel like you will be in the UI on a weekly basis, the last option is preferred. If you’re streaming a movie and the NAS reboots, you’re going to be down for a handful of minutes.
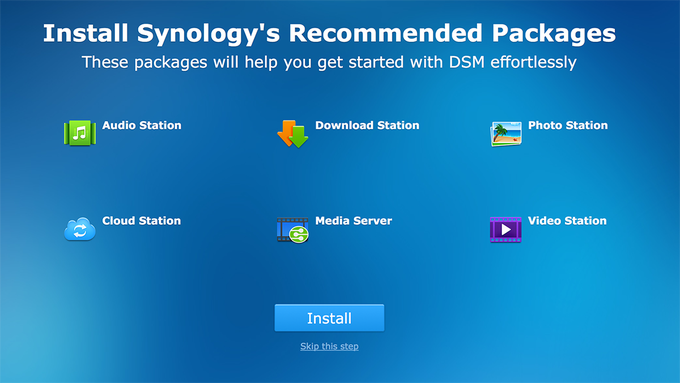
Next we see the Synology recommended applications (also referred to as packages). These include:
- Audio Station
- Download Station
- Photo Station
- Cloud Station
- Media Server
- Video Station
These made up the core features of the BeyondCloud offerings. They are only suggestions and you can pick and choose what you want to install if you would like. Given that they take up very little space, and the BeyondCloud line ships with either 2TB or 3TB (single drive NAS) or 3TB (dual drives that are mirrored), I see little reason to omit any of these. For sake of time, installing all six is simple and fast.
That’s it. You are literally done. While that’s not all there is to it, that’s all the setup that you need to do. Plug it in, provide a device name, user name, and password, and then click next until you are done. With most anything, you don’t have to do that start to finish. You can set up the BeyondCloud NAS manually, as you would any other Synology NAS… but that’s kind of defeating the primary purpose of the product (and secondary and tertiary purposes as well, but whatever).
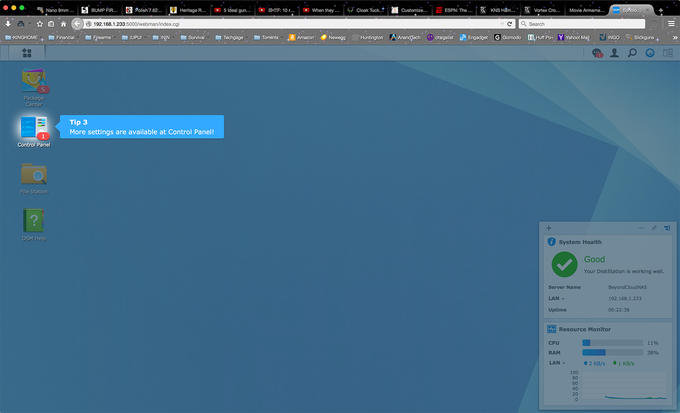
Once you have that done, you will be brought to your NAS’ user interface (UI). You can get to this in the future by entering in the device name or the IP address of your NAS. Or, you can use the assistant tool each time. The options are there… you choose what’s easiest. On the “desktop” of the UI, you have a few options and you’re also given tips. These provide a very simple walkthrough of the UI. I will touch upon this more in a bit.
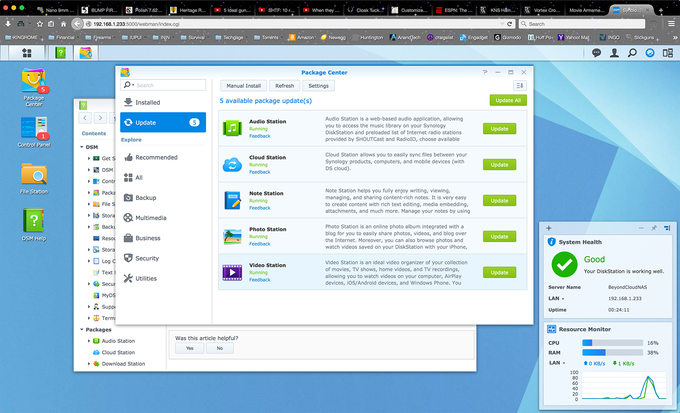
If we click on the Package Center icon, we are brought to the Synology app store (not a “store” because the packages are all free, but for comparison, think of it as such). You are able to browse for additional packages that you can install on your BeyondCloud NAS to increase its functionality. You can also view installed packages and ones that are in need of updating. It’s worth mentioning that if a package needs to be updated, it will still function in its out-of-date form, but it can be updated when the user feels the time is right. In the “Update” section, you can update packages individually or all at once. If you select “update all”, it will run through each package and download and update then sequentially.
That’s it. Enjoy your BeyondCloud.
Performance
In the past, we have conducted straight file copies to and from the NAS devices. Using large single files and directories with thousands of smaller ones, we were able to get a real-world idea of read and write speeds when averaging out multiple run. This has treated us well, and is a method still used by others, but going forward, we have a new tool in our belts.
A few years ago, Intel created their own benchmarking tool for NAS devices called NASPT. Short for NAS Performance Toolkit, NASPT is, to quote Intel, “a file system exerciser and analysis tool designed to enable direct measurement of home network attached storage (NAS) performance.” Essentially what the company did was create a tool that mimics day-to-day workloads, such as video playback, content creation and office productivity.
By creating this tool, Intel has made it extremely easy on those of us tasked with benchmarking NAS devices. You install NASPT on a host machine (their recommended specs are 32-bit XP SP2 and 2GB of RAM), map a drive on that host that points to the NAS and decide which tests you want to run. These are the specs that I used when building out our test machine.
- Dell Optiplex 755
- Intel Core 2 Duo E6550
- 2GB DDR2 RAM
- 320GB Seagate 7200K
- Integrated Video
- Intel PRO/1000 PT Dual Port NIC
Our test bed is a simple, everyday machine that I happened to pick up cheap on Craigslist. It’s a capable PC and one that worked perfectly for the NASPT test. While getting a bit long in the tooth, we continue to use it to keep our results consistent and comparable. This will be changing soon but for now, this is what was used.
| Robocopy | |
| Read | 94.8 MB/s |
| Write | 56.9 MB/s |
| Intel NASPT | |
| HD Playback | 77.5 MB/s |
| 2x HD Playback | 98.2 MB/s |
| 4x HD Playback | 96.1 MB/s |
| HD Video & Record | 89.8 MB/s |
| HD Playback & Record | 76.9 MB/s |
| Content Creation | 9.1 MB/s |
| Office Productivity | 44.2 MB/s |
| File Copy to NAS | 87.6 MB/s |
| File Copy from NAS | 79.1 MB/s |
| Directory Copy to NAS | 11.3 MB/s |
| Directory Copy from NAS | 15.6 MB/s |
| Photo Album | 8.1 MB/s |
Final Thoughts
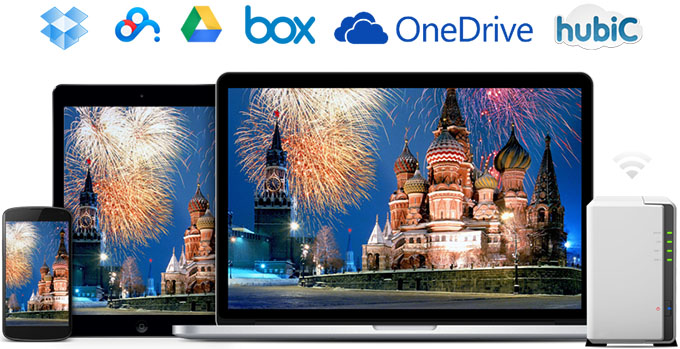
The BeyondCloud initiative by Synology is a refreshing attempt to reach out to a potential audience that would not normally adopt NAS in their daily computing lives. But, as more and more devices become “smart”, the opportunities to share your stored media grow along at the same pace. From the NAS, movies can be shared on the living room television. From the same NAS, pictures can be shared with other devices on the network. Synology even makes it easier to connect to your NAS from places outside the home. All of this is done with the power of software, and that’s a premise that Synology has embraced for a long time now.
The performance of the BeyondCloud Mirror isn’t incredible, but it’s able to stand on its own compared to other NAS on the market in this price point. This NAS will justifiably be overlooked by power users, as more powerful units are available, but for novices to network storage, what the BeyondCloud offers should resonate. You have the ability to back up your important data and then share that data with whomever you would like.
The argument can be made that someone could just purchase the DS214se by itself and roll their own storage experience – and I am sure many will. But the BeyondCloud platform is not for those users. Its aims squarely at those users who are new to the concept of network storage. It provides a solid platform to users who just want to power it on, connect it to their network, and start using the thing. The units are priced right and the experience is still top of the list when it comes to NAS.
If Apple can be lauded for its powerful yet simple-to-use devices, Synology deserves to be as well.
Pros
- Extremely easy setup process.
- Simple to use.
- DSM 5.1… enough said.
- Expandable functionality through Package Center.
- Mirrored drives provide data redundancy.
Cons
- Marvell Armada 370 CPU is slow and a simple package update will consume 100%.
Synology DiskStation BeyondCloud NAS
The 2x3TB Model is available from Amazon for around $350 and similar prices from Newegg; lower capacity models available for less (see links).
Support our efforts! With ad revenue at an all-time low for written websites, we're relying more than ever on reader support to help us continue putting so much effort into this type of content. You can support us by becoming a Patron, or by using our Amazon shopping affiliate links listed through our articles. Thanks for your support!


