- Qualcomm Launches Snapdragon 4 Gen 2 Mobile Platform
- AMD Launches Ryzen PRO 7000 Series Mobile & Desktop Platform
- Intel Launches Sleek Single-Slot Arc Pro A60 Workstation Graphics Card
- NVIDIA Announces Latest Ada Lovelace Additions: GeForce RTX 4060 Ti & RTX 4060
- Maxon Redshift With AMD Radeon GPU Rendering Support Now Available
Synology DS207 2-Bay NAS Server
While there are many NAS products available, there are none that we’ve crossed that have matched the feature-set of Synology’s DS207. There are too many features to mention in a small intro, so read on to learn more about the product we had a difficult time finding a fault in.
Page 2 – The DS207
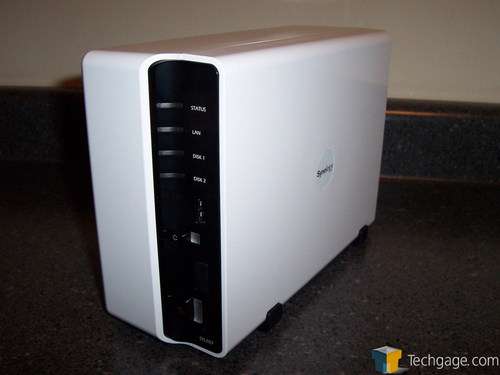
Out of its protective packaging, we get our first look at the DS207. With the incredible popularity and consumer allure to anything Apple-ish, it’s not surprising to see more and more companies adopt their white look. This was true of the D-Link DIR-655 that we reviewed a few months back and it’s true of the Synology lineup of products, this DS207 included.
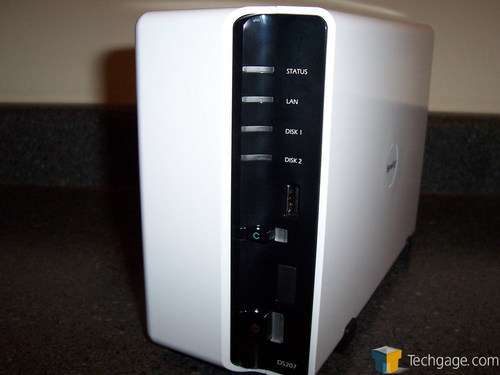
Taking a closer look at the front, we see four lit indicators that show the devices status, network connectivity and activity as well as the activity of the hard drives. Directly below the lights is a single USB port used for convenient thumb drive backups. Moving down there is a set of buttons. The top button is marked with a “C” and is used to initiate the thumb drive copy should an actual flash drive be installed. Just below it is the power button and a light to alert the user if the device is power on or not.
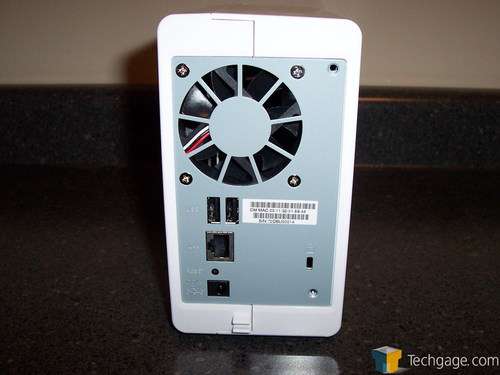
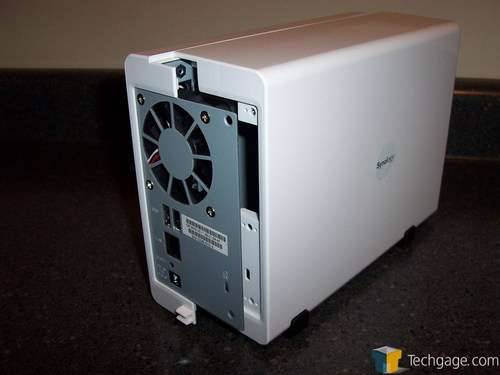
The back of the DS207 is where the remaining I/O ports are located. At the top of the DS207 is a large fan (relative to other NAS boxes that we have seen) used to keep the internal system temperatures at a reasonable level. Under it we have a pair of USB 2.0 ports, a 10/100/1000 Ethernet port, a small reset button and power port.
Molded into the body of the DS207 is a power cable clip. It should be mentioned that should your network support it, the Ethernet port on the DS207 supports jumbo frames in increments of 1000 to 9000. Most either wont know what jumbo frames are or simply wont need them but for those that can use it, its there.
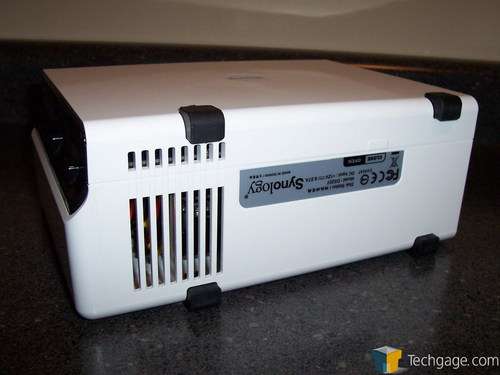
On the bottom of the DS207, there are small ventilation slots to allow air from the mounted fan to flow across the hard drives and expel out the bottom of the chassis. There are also four rubber feet to keep the DS207 in one place as well as dampen the device’s vibrations.
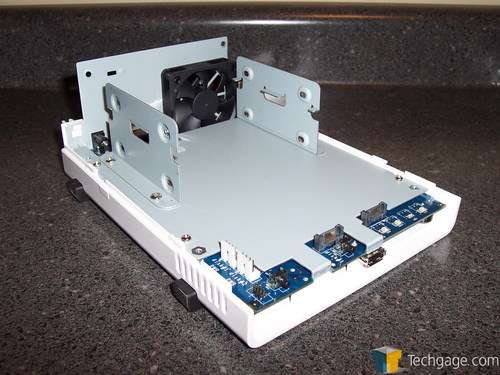
To install a hard drive or hard drives if you have two, there isn’t much to getting the DS207 apart. There is a set of small screws, located at the top and bottom on the back, that need to be removed. Once these screws are taken out, the left side of the DS207 (if our facing the back) will be gently pulled back while the right side is push forward. It will split apart like so.
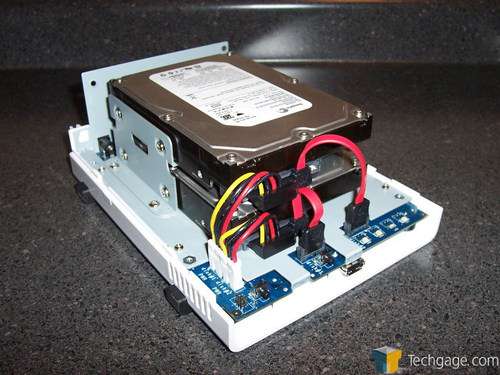
With the side off of the device, we can get a good look at what we are working with. Using a pair of “shelves,” the hard drives will simply sit on these metal tabs and then be secured with the provided screws.
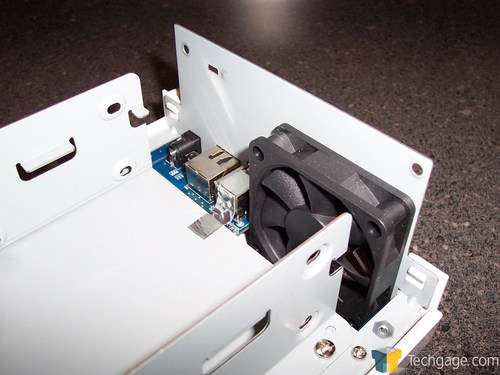
To circulate air across the drives, there is a 60mm fan on the back of the unit, just behind the area where the hard drives will be installed.
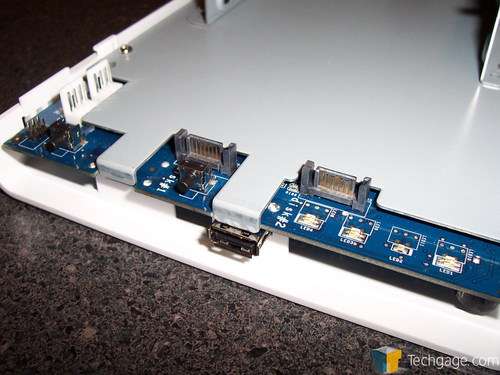
At the front of the NAS, we can see the internal LEDs that will light up the front panel lights as well as the front USB port and the power and reset switches. Along the front of the PCB there are the two SATA II connectors and on the far left, there is a pair of 4 pin power connectors. These have SATA power connectors on the end and will provide the 12v power to the hard drives.
With the hard drives installed into the device, secured with the provided screws, we can now connect the data and power cables. As stated earlier, Synology has provided the cables and it’s good that they did. The two cables that they have included are of different lengths. This makes installed the cables in the cramped area inside the NAS simple as the shorter cable obviously is connected to the lower drive and the longer… on the top drive.
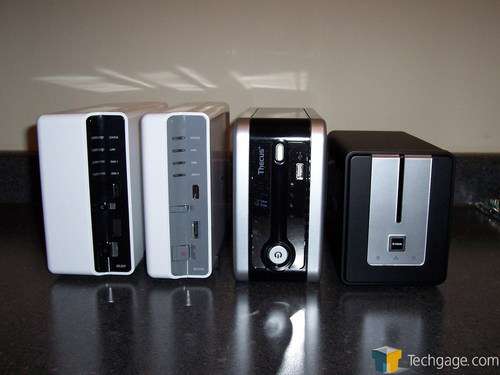
With everything in place, we place the two sides of the DS207 back together and secure them with the pair of screws we originally removed. To get an idea of how the DS207 stacks up in terms of size compared to the other devise we have worked with, below is a picture with it next to its small brother, the DS107e, the D-Link DNS-323 and finally, the Thecus N2100.
As you can see, the two Synology NAS boxes are a bit taller than the Thecus and tower over the D-Link. The DS207’s width is just under the D-Link’s and a bit more than the Thecus. All in all, it’s a simple, compact design.
Support our efforts! With ad revenue at an all-time low for written websites, we're relying more than ever on reader support to help us continue putting so much effort into this type of content. You can support us by becoming a Patron, or by using our Amazon shopping affiliate links listed through our articles. Thanks for your support!


