- Qualcomm Launches Snapdragon 4 Gen 2 Mobile Platform
- AMD Launches Ryzen PRO 7000 Series Mobile & Desktop Platform
- Intel Launches Sleek Single-Slot Arc Pro A60 Workstation Graphics Card
- NVIDIA Announces Latest Ada Lovelace Additions: GeForce RTX 4060 Ti & RTX 4060
- Maxon Redshift With AMD Radeon GPU Rendering Support Now Available
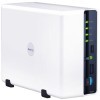
Synology DS207 2-Bay NAS Server

While there are many NAS products available, there are none that we’ve crossed that have matched the feature-set of Synology’s DS207. There are too many features to mention in a small intro, so read on to learn more about the product we had a difficult time finding a fault in.
Page 4 – Setup and Features Cont.
In an attempt to regulate the overall length of this review, we are not going to go too far into the core features with pictures but rather, we are going to list them all, including each options sub features along the way.
The first screen that we come to is the INFORMATION menu. The options found on this screen are what one would expect to find in a menu titled “information.”
| Specification | Basic information about the DS207, temperatures, IP address, System and total operational time |
| Status | MAC address, IP address, DNS, Gateway, Workgroup, hard drive and USB disk information |
| Log | System, Connections, Current connections, backup, USB and network backup logs |
| About | Copyright information concerning the DS027 and Synology |
Moving down the menu, we get to the SYSTEM screen. This screen houses the settings for the device itself such as factory reset, email alerts for failed hard disks and firmware updates.
| LAN | Server name, IP Settings, Link Status, Jumbo Frame |
| Time | Time Zone, Time Server, Manual Setup |
| Notification | SMTP Server, Email Alert |
| Power Management | Power Recovery, HDD Hibernation |
| Restore Defaults | Format with Current Settings, Format to Factory Defaults, Reset SQL Database Password |
| Firmware Upgrade | Upgrade Firmware |
The next menu is titled STORAGE. This menu gives us the option to change the way not only store our data on the DS207, but to also divide up the disk space to allow personal folders for as many users that you want to access the volumes.
| HDD Management | Write Cache Support |
| Volume | Volume Information, Creation |
| Share | Shared Folders for PC & Mac users |
Moving down the list, the next one is something that I find quite enjoyable… PRIVILEGES. When setting up any storage device on a network, there are undoubtedly files that are sensitive enough that you don’t want stray eyes wandering across them.
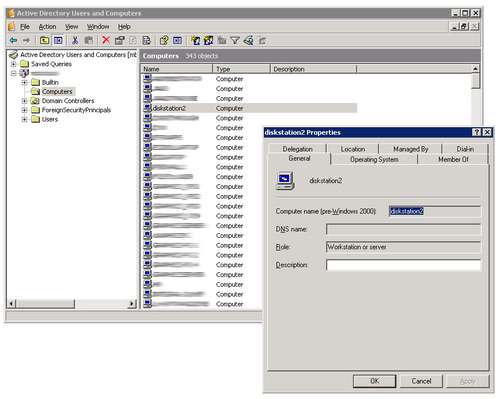
Fortunately, Synology has thought of this and allowed the device’s admin to create users and groups, as well as assign privileges to each user created on the DS207. This is where the joys of active directory come in. For those that might be unaware of what Active Directory is, it’s simply a way to authenticate and authorize services, assign policies and apply critical updates centrally as opposed to laying hands on each and every PC that needs to be modified.
While I have only been a network admin for a little over a year now, I am so comfortable with active directory, and well aware of what it brings to the table compared to networks before AD, it honestly makes company wide network administration quite simple. The fact that Synology has included the option to use Active Directory places the DS207 well above any other NAS that we have reviewed to date.
| User | Set up users, either local or tied to a domain |
| Group | Set up groups for local and domain users |
| Privileges | User and domain privileges include no access, read only and writable |
With any NAS, there are always features that set the device apart from other offerings from other companies. In the case of the DS207, the features are its most appealing selling point. From the NETWORK SERVICES area of the GUI, most of the features are available to activate or disable. These features include:
| Win/Mac | WIN: workgroup/domain, WINS Server, Apple Network |
| FTP | Setup FTP, Restrict Bandwidth, IP Block |
| Web | HTTPS, Additional HTTP Ports, Photo Station, Webstation, My SQL |
| Multimedia | Enable Multimedia Service, UPnP, DMA |
| iTunes | Start an iTunes Server, Password Protect, Playlist |
One of the most appealing services that a NAS can provide is the ability to backup critical and important data easily and conveniently from anywhere on the network. With the DS207’s BACKUP section in the GUI, this can all be setup. Backups can be directed into particular volumes on the drive to further segregate the data coming into the NAS.
| Configure Backup | Backup user, group and shared files to a .dss file |
| Local Backup | Backup HDD contents to an attached USB storage device |
| Network Backup | Setup a network backup recover |
In the EXTERNAL DEVICES section, the DS207 gives us the option to manage all devices that are connected to the NAS. This includes USB hard drives, printers, thumb drives and if applicable, uninterruptible power supplies.
| USB Disk | Manage connected USB devices |
| USB Printer | Setup the DS207 as a print server |
| USB Copy | Copy contents of an attached USB thumb drive |
| UPS | Uninterruptible Power Supply |
The last menu option is the DOWNLOAD SERVICE. Here we can manage our downloads as well as enable the download station. We will get more into the download station in a bit but for now, lets take a look at what this area of the GUI has to offer.
| Download Management | Setup a download |
| Download Service | Enable the Download Station |
Support our efforts! With ad revenue at an all-time low for written websites, we're relying more than ever on reader support to help us continue putting so much effort into this type of content. You can support us by becoming a Patron, or by using our Amazon shopping affiliate links listed through our articles. Thanks for your support!


