- Qualcomm Launches Snapdragon 4 Gen 2 Mobile Platform
- AMD Launches Ryzen PRO 7000 Series Mobile & Desktop Platform
- Intel Launches Sleek Single-Slot Arc Pro A60 Workstation Graphics Card
- NVIDIA Announces Latest Ada Lovelace Additions: GeForce RTX 4060 Ti & RTX 4060
- Maxon Redshift With AMD Radeon GPU Rendering Support Now Available
Synology DS207 2-Bay NAS Server
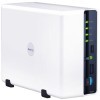
While there are many NAS products available, there are none that we’ve crossed that have matched the feature-set of Synology’s DS207. There are too many features to mention in a small intro, so read on to learn more about the product we had a difficult time finding a fault in.
Page 5 – Added Features
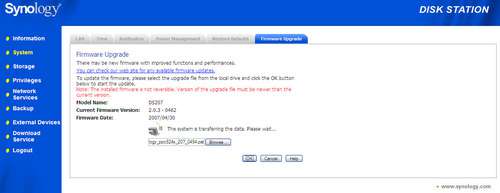
Halfway through our testing of the DS207, we received a notice from Synology concerning an upgraded firmware/software that not only improved the existing features of the NAS, but added a considerable amount of value to the overall package. After downloading the file from Synology’s website, we quickly installed the file and started poking around the new and improved feature set.
Once we successfully upgraded the firmware of the DS207 to the latest version, we noticed a few extra options on the sign in screen. Instead of the basic login screen that allowed us to log into the management area of the DS207, we now had the ability to log into Synology’s Audio Station, File Station Web Station and Photo Station.
We plan on looking at all of these “stations” and hope to find that the actual functionality of the extra options is worth the upgraded firmware. There are also pair of programs that come along with the DS207 that we will take a look at as well. One allows us to set and control downloads to the NAS while the other one is simply a backup program used to store our most sensitive data.
The first feature that we are going to work with is the Audio Station. In this “station,” Synology has given the users the ability to expand the capabilities of what would be a boring NAS to most. Adding the capability to play music directly from the NAS does add more functionality as you can play the music stored on the DS207, as well as stream internet radio stations through the NAS and play directly from an attached iPod.
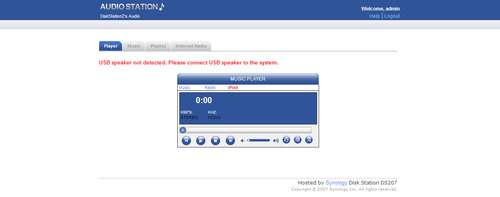
There are four main pages to the Audio station that are represented by tabs at the top of the page. The “music player” is found on the first page/tab. This is where the current song playing will be shown as well as additional information about the station or song that is being played. Notice that there are links at the top of the player for music, radio (internet) and iPod. This allows us to quickly switch between audio sources.
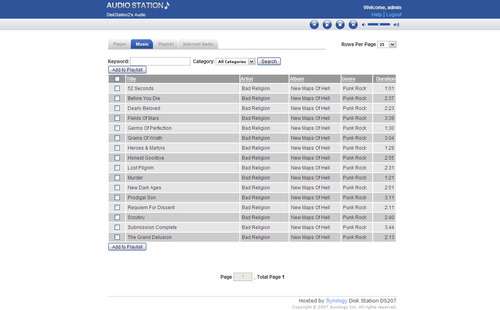
The following screen is the music page. This is where we can see then contents of the music folder in its entirety. The columns are dynamic and therefore can be adjusted according to their numerical or alphabetic value. I do wish that the categories could be manipulated more such as bringing up individual albums; perhaps allow the file tree to be displayed much as it is in the File Station (which we will see shortly).
The Audio Station allows us to create our own playlists as well. On the third page, we can select which list we would like to play.
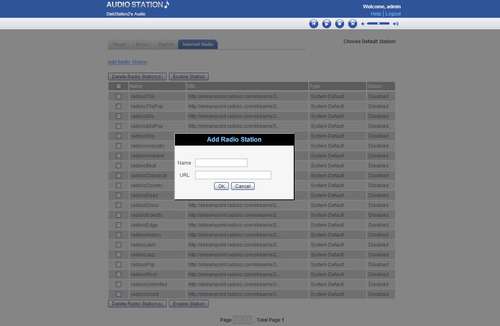
Finally, we get to the internet radio section. There are quite a few stations preloaded onto the DS207. There is also the option of adding your own stations should you have a list of favorites that you would like to listen to through your DS207. In our case, we chose to add ESPN radio to the list.
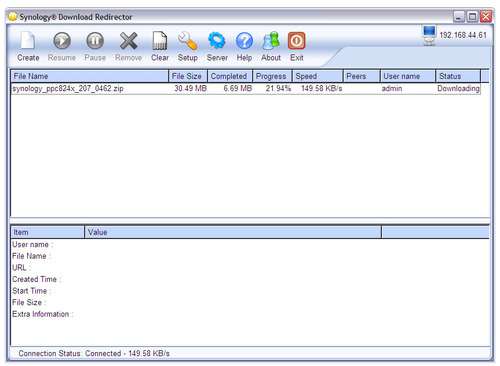
The next feature worth mentioning is the Synology Download Redirector. This is included on the disk that ships with every Diskstation and can also be downloaded from the Synology site as well. This program allows a download to be schedules without the need for a host PC to be present. The DS207 only needs to be provided with the URL of the desired file and from there, a time and date needs to be given to let the NAS know when it needs to seek out the file and download it. It’s a simple and relatively painless process.
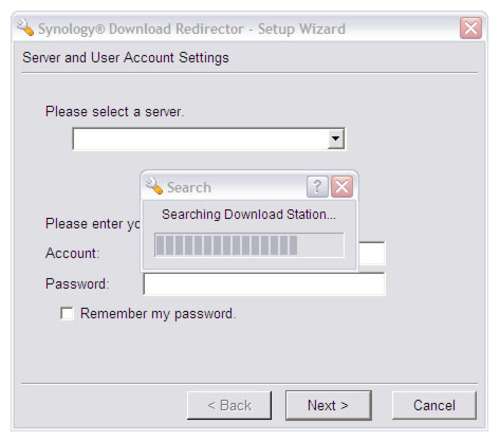
To initiate a scheduled download, the Redirector first needs to find the Synology device on the network. It will scan the entire network until the proper device is found.
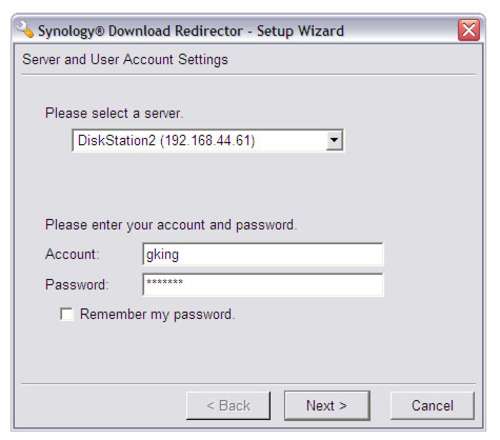
Once found, we need to log in using our already setup logon credentials. Thanks to the DS207’s ability to work with active directory, my profile was already created. All we needed to do was set my permissions.
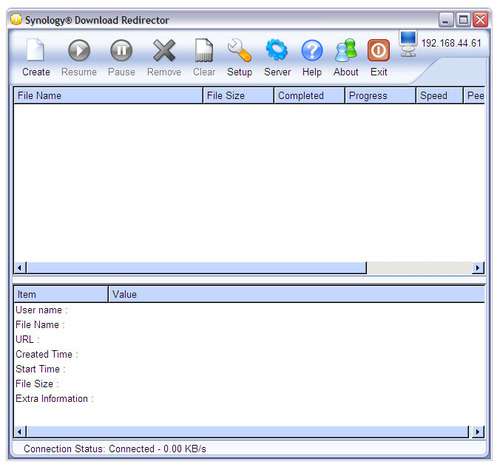
Once we are logged in, the program itself is a colorful piece and easy to navigate.
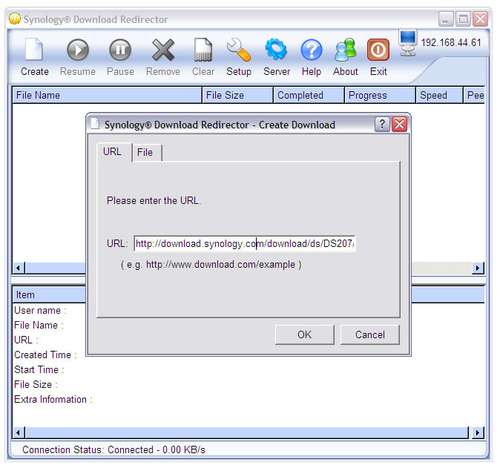
For our example, we went to Synology’s site and grabbed the URL for the latest firmware of the DS207. By entering the link into the field, we have now told the DS207 where to look to complete the download.
As the file downloads, we can follow the progression of the transfer and see how quickly (or slowly dependant on your connection speed) the file is downloading.
Next we are looking at the File Station. In this feature, we can explore the contents of the drive and move files between folders, all through a web browser.
One of the most appealing features of any NAS is that it’s a convenient and simple place to dump important files that you might not necessarily want to loose. Not only will your data be backed up, but if your network is broad enough, you can store the NAS in a location somewhere away from anyone that might pose a threat to the device.
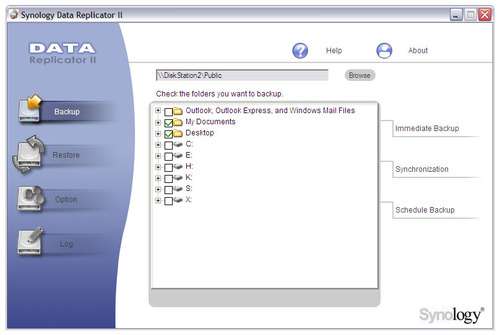
To help keep our data safely backed up, Synology provides Data Replicator II. Once the program is installed, we can get right into setting up a backup schedule that will keep our data secure and safer from disaster. At first, we are greeted with window with the entire file tree of the DS207. From here, we can select anything from entire folders, all the way down to individual files.
We can also select if we want to do a quick, immediate backup or if we would like to schedule one to occur at a later date and time. If you have a folder that is constantly updated, you can set the Diskstation to simply synch up the folder on the DS207 with the folder on your PC that you constantly update.
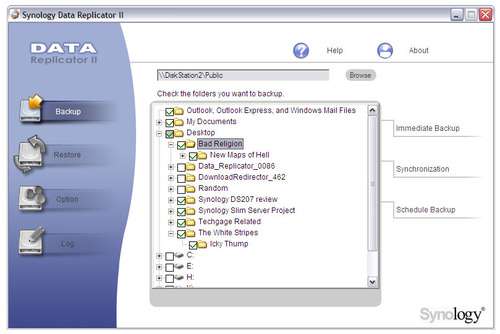
If you don’t want to backup an entire drive, you can expand the tree down to grab individual files if you want, or you can select any subfolders in between.
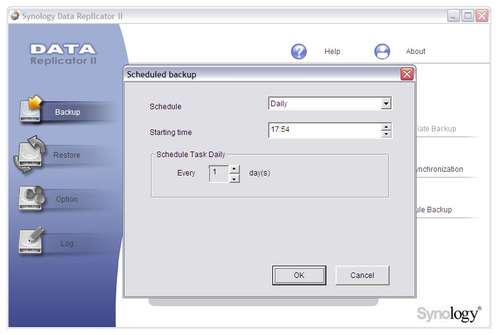
Once the files that we want to backup are selected, we can now pick a time that we want the backup to run. In our example, we have told the Data Replicator II to backup the selected folders everyday at 5:54 pm. We went with that time simply because it was a few minutes past the current time during testing.
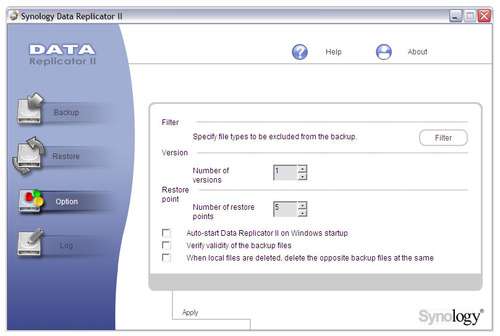
If you want to get precise, you can even select file types that you do not want to have backed up. You can also set the number of restore points that are stored, have the program validate the backup once it’s completed and delete any files on the DS207 that do not match up with the drive of the client PC.
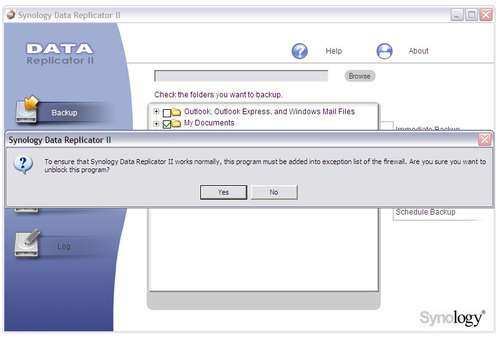
As with anything that wants to either get in or out of your PC, Data Replicator II must be registered with the built in Windows firewall. Before you can finalize your scheduled backup, you will be prompted with this choice to add the program to your firewall’s exception list.
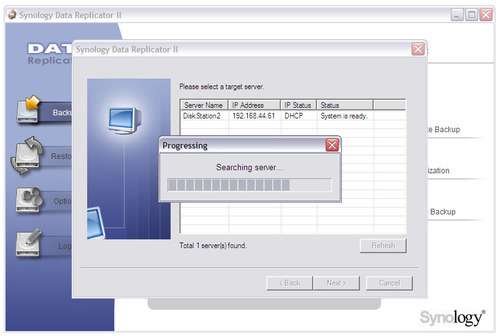
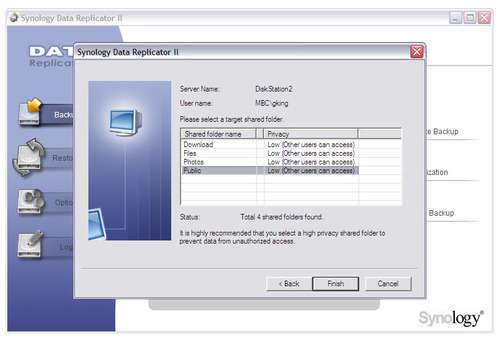
When we are finished registering the program with the firewall, all that is needed is to choose a destination folder for the backup to be stored in. The Data Replicator II will then scan the Diskstation for all available folders. Once it is finished, it will allow you to choose where you want to house the backed up files.
Its as simple as that. We now sit back and let the DS207 do its job. While it was backing up our critical files (songs) we were still able to work with the device and grab files as we went. There was a small delay in response but nothing unreasonable as we were still able to stream music normally.
Support our efforts! With ad revenue at an all-time low for written websites, we're relying more than ever on reader support to help us continue putting so much effort into this type of content. You can support us by becoming a Patron, or by using our Amazon shopping affiliate links listed through our articles. Thanks for your support!


