- Qualcomm Launches Snapdragon 4 Gen 2 Mobile Platform
- AMD Launches Ryzen PRO 7000 Series Mobile & Desktop Platform
- Intel Launches Sleek Single-Slot Arc Pro A60 Workstation Graphics Card
- NVIDIA Announces Latest Ada Lovelace Additions: GeForce RTX 4060 Ti & RTX 4060
- Maxon Redshift With AMD Radeon GPU Rendering Support Now Available
Social & RSS Feeds
Latest Videos


Latest News
Taking Back Control Of Windows 10 Updates
by Jamie Fletcher on February 10, 2016 in Editorials & Interviews, Software
This guide will help you take back control of Windows 10 by stopping auto updates and enable selective updates with the help of the Group Policy editor for Pro users, and Windows Services for Home users. Also prevent unexpected reboots, and disable the installation of bad updates or drivers.
How To Control Windows 10 Updates
Windows 10 arrived, and with it came both good and bad. On the one hand, the upgrade was free, there was a whole bunch of new features, and is generally a rather good OS. On the other hand, there are some shockingly invasive privacy concerns (albeit optional), and the switch to a forced update cycle which you have little say over.
Privacy is one thing, as a lot of the options can be disabled (at the expense of losing Cortana), but forced Windows Updates has made a very clear division in opinion. Forced security updates are generally a good thing, as they not only prevent immediate exploitation, but can help prevent the spread of exploits; herd immunity if you will. However, bundling often old and buggy drivers into the forced update, as well as Microsoft’s history of releasing less than optimal patches (OS-destroying in some cases), has a number of users, myself included, concerned. So what are the options?

Originally, there was a sigh of relief in that Windows 10 Pro and Enterprise users could defer updates. Unfortunately, this turned out to only include non-essential updates and feature upgrades, e.g. service packs. Even then, defer only delayed the installation of the service packs by a few months; they were still required to be installed at some point. Pro and Enterprise still had mandatory security updates and drivers.
Later on, Microsoft quietly introduced a feature that allowed certain updates to be uninstalled and blocked until further notice. However, this still required the update or driver to be installed first, by which point the damage could have already been done (oh the joys of fixing broken drivers).
One issue has already started its rounds with a forced update that fails to install successfully: the system reboots, detects there’s an update, tries to install it, fails, reboots, and repeats the cycle over and over again. Not a good start, Microsoft.
Windows Update can be disabled, but it’s more of an all or nothing approach. Once disabled, you lose access to the Microsoft Store and can no longer install new feature upgrades or security patches until you re-enable Windows Update.
What other options are there, and how can you stop the auto update in Windows 10 (or at least have some control over it)? Can you get some control with selective updates? The answer to these questions is not absolute, as it depends on the version of Windows 10 you are running. If you are running Windows 10 Pro, you’ll be in luck, as steps 2a and 2b will allow you to delay updates with a manual download and install, and selectively install updates (even if it is a bit of a hack). Windows 10 Home users get the short-end of the stick and will only be able to follow steps 1 and 3, which is schedule or stop them altogether. In either case, it’s important to enabled scheduled updates first, which is covered below.
Step 1: Schedule Updates
This should be a default option set by Microsoft, but unfortunately, it is not. Back with Windows 7 and 8 (and even as far back as XP), there was always the ability to be notified of updates, but selectively install them as required. Old drivers could be blocked, bad security updates could be postponed until further notice. Generally, the user (or admin) controlled when the system updated, rather than having it reboot in the middle of work.
Windows 10 Update does allow for scheduled reboots for updates, even for Home users, and it’s strongly recommended that you enable this. By default, Windows Update will install updates and reboot when it deems the system idle. What Windows and users think as idle, though, are often very different things. There have been a number of outbursts of anger from some very influential people over the years at these ‘idle’ reboots.

Enabling scheduled reboots is easy. From the start menu, select settings, then select Updates & Security. On the Windows Update tab, click on Advanced Options, then change the drop-down menu from automatic to scheduled. Windows will now ask when you wish to install the updates. They will still be downloaded automatically, but at least you will have some control as to when.

If you have a copy of Windows 10 Pro, there is one more trick you can do to stop Windows updates downloading automatically to begin with. Be warned that this requires access to the Group Policy Editor; if you can not gain access to this tool (i.e. you are a Home user) then you will not be able to perform the following actions. It doesn’t allow full control over selective updates, but it is the first step.
Step 2a: Stop Windows 10 Auto Update With Group Policy
You don’t need to be a sysadmin in order to use Group Policy, but the tool can be dangerous in the wrong hands (think registry editor level tools). While it’s unlikely that you will completely break your system by making accidental changes, there is a chance, so make backups as per usual.
As mentioned previously, in older versions of windows, users could enable a notify when system updates become available. This allowed full control as to when updates were installed, even down to the individual updates themselves. You will not be able to get the exact same level of granularity with Windows 10, but you can stop Windows 10 automatically downloading bad updates when they are released into the wild.
First of all, you will need to launch Group Policy. There are a couple ways to do this, but the simplest is to hit the start button (or Windows key on your keyboard) and type group policy – you will see the application listed in the right panel. Another method is to launch the run command Win+R, then type gpedit.msc to launch Group Policy. If you get a warning that states that this tool does not exist, then there is a good chance you are running the Home edition of Windows 10 and you will not be able to perform this action.

Inside the Group Policy Editor, there will be a monumental amount of options presented as you dig through the settings. If you’ve ever used the registry editor or admin tools in the past, things will look familiar. You will need to navigate to the following branch in the left panel:
Computer Configuration > Administrative Templates > Windows Components > Windows Update
In the right panel, you’ll see a bunch of options, the one you’ll want is Configure Automatic Updates. Double click it to open up its settings. There are various levels which you can set the updates, the one you’ll want is 2 – Notify for download and notify for install. Make sure to check enabled as well. Apply, OK and close Group Policy.

To confirm if things are set up correctly, go check the Windows Update advanced options area, and a new message will appear above the ‘how updates are installed’ section:
Some settings are managed by your organization.

When the big patch day comes, you’ll get a message in the Windows Notification area. Clicking it will take you to Windows Update and you’ll see the listed updates. If you click on details, this will take you to a new screen where all available updates can be seen, and a message below each, saying Waiting for download. Click this and it will show you more details about the update.

Step 2b: How To Enable Selective Updates
Unfortunately, that’s about as much information and control as you will get (natively). Notice that you can not deselect each update; you have to install all of them or none at all – however, there is a trick you can perform while in this position. Remember the Windows Update prevention tool for disabling/hiding bad updates? We can use it to stop Windows downloading updates and drivers, before installing everything, and get some semblance of selective updates.
On slide three below, you can see there are a number of updates that can be disabled. None of these updates were previously installed. This means that you can effectively restore the functionality of the previous OS selective update system – if you have Windows 10 Pro. First of all, download the show or hide update utility from Microsoft, then follow the slides below.
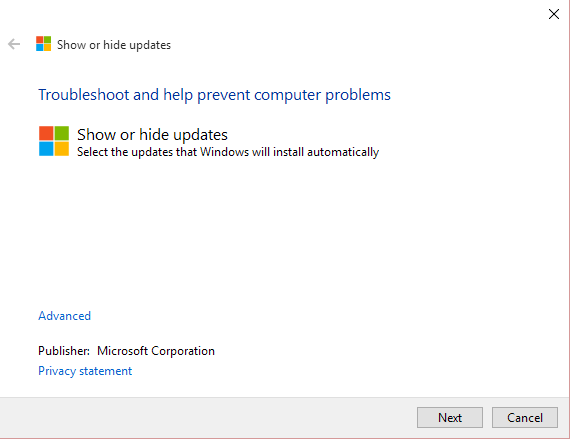
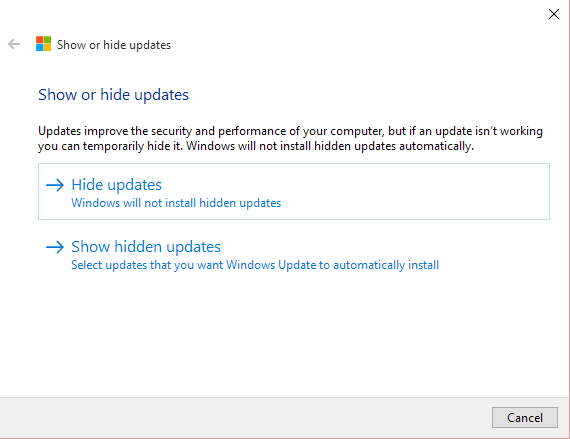

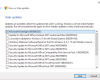

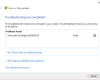

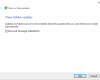
When the notification pops up for Windows Update, you can look through the list and see if there’s something that’s likely to cause a problem, such as a bad driver or a known patch that will cause a problem. If you spot it, you can run the prevention tool, tell it to hide the update, then Windows will no longer try to download and install that update. If you wish to install that update at a later date, simply run the prevention tool again, this time select show hidden updates, and you can reactivate that update.
This is not ideal and hardly convenient, but it does give you back some of that freedom and control to pick and choose updates as and when you want, even if there are a few extra step in between. The catch, however, is you need to be running Windows 10 Pro with Group Policy available/enabled as outlined above.
Step 3: Disable Update Service (Optional)

For Windows 10 Home users, your options are significantly limited. Windows Update can be disabled and periodically enabled, but you will lose access to the Microsoft Store. To disable updates, perform the run command Win+R and type in services.msc – alternatively, open Task Manager (right click the task bar or launch through CTRL+ALT+DEL) go to the services tab, find and select wuauserv, then click open services. This will open the admin center for background services. Scroll to near the bottom, double click Windows Update and change the Startup Type to Disabled. To re-enable, go back to services and change it to automatic.
In either case of Home users with disable the update service, or Pro users with Group Policy, Windows 10 has become a lot more complicated to manage updates. While you can regain some control, it’s not like it used to be. While Windows 10 Pro has the advantage with Group policy, it’s an expensive upgrade from Home for just a single feature – a feature that existed with previous operating systems. Perhaps in time, Microsoft will reverse it’s policy once it releases one too many bad updates or dodgy drivers.
If you are interested in purchasing Windows 10 for a new system (existing systems can get a free upgrade, but you still need to purchase a licenses for new systems), you can obtain various version from Amazon and Newegg. OEM licenses are cheaper, but are restricted to a single device and are non-transferable. Retail licenses typically offer the ability to install on a new system later. Most people should be fine with Windows 10 Home, but if you want full control over updates, you’ll have to cough up for Pro (at least for the time being).
Addendum: Windows 10 ‘Get Updates’ Pop-UP
With Windows 10 Pro and the group policy edit enabled to stop auto updates, it introduces a new nag prompt that can be extremely disruptive. Typically after a few days of a new update being released, auto-update will start to launch a notify pop-up banner once or twice a day. This banner prompt will tab out of any application, fullscreen video, and worst of all, games.
The banner pop-up takes full control of the user interface, greying out the background, and there is only a single button to click – Get Updates. This will launch Windows update where you’ll be prompted to install everything listed. This will keeping popping up daily until you install the updates, tabbing out in the middle of games or watching a movie – talk about intrusive nagware Microsoft.
This issue was harder to figure out and stop that we would like. In fact, it required some deep google searches to figure out the root of the issue. Luckily, folks over at SuperUser managed to figure out a method to stop the nag screen Get Updates pop-up by disabling access to the executable that launches the notify system – MusNotification.exe.
You will need to open an elevated command prompt to do this; you can go to the start menu, type CMD then either right-click Command Prompt and Run as Administrator, or hold CTRL+Shift+Enter. At the prompt, type or paste in these commands one at a time.
Note: Please check that the quotation marks are correct when copying the text below – some systems may incorrectly interperet the symbols. Please use double quotes.
cd /d "%Windir%\System32"
takeown /F MusNotification.exe
icacls MusNotification.exe /deny Everyone:(X)
takeown /F MusNotificationUx.exe
icacls MusNotificationUx.exe /deny Everyone:(X)
This will stop the notify splash screen completely for all users on the system – it’s a bit heavy handed, but it works to stop the rather intrusive notify system. If at a later date you need to re-enable the notify system, you can use the following commands to revert access.
cd /d "%Windir%\System32"
icacls MusNotification.exe /remove:d Everyone
icacls MusNotification.exe /grant Everyone:F
icacls MusNotification.exe /setowner "NT SERVICE\TrustedInstaller"
icacls MusNotification.exe /remove:g Everyone
icacls MusNotificationUx.exe /remove:d Everyone
icacls MusNotificationUx.exe /grant Everyone:F
icacls MusNotificationUx.exe /setowner "NT SERVICE\TrustedInstaller"
icacls MusNotificationUx.exe /remove:g Everyone
At least now you can take back some control of Windows 10 auto updates, and stop the nag screen too.

Support our efforts! With ad revenue at an all-time low for written websites, we're relying more than ever on reader support to help us continue putting so much effort into this type of content. You can support us by becoming a Patron, or by using our Amazon shopping affiliate links listed through our articles. Thanks for your support!

Jamie Fletcher
Jamie has been abusing computers since he was a little lad. What began as a curiosity quickly turned into an obsession. As senior editor for Techgage, Jamie handles content publishing, web development, news and product reviews, with a focus on peripherals, audio, networking, and full systems.
