- Qualcomm Launches Snapdragon 4 Gen 2 Mobile Platform
- AMD Launches Ryzen PRO 7000 Series Mobile & Desktop Platform
- Intel Launches Sleek Single-Slot Arc Pro A60 Workstation Graphics Card
- NVIDIA Announces Latest Ada Lovelace Additions: GeForce RTX 4060 Ti & RTX 4060
- Maxon Redshift With AMD Radeon GPU Rendering Support Now Available
Thecus N2560 Dual-bay SOHO NAS Review
For either the home or home office, a NAS can be a boon for those looking to have a no-nonsense, feature-rich storage solution. Of course, not everyone has needs for a ton of storage, and in many cases, a simple dual-bay would suffice. And as far as those go, Thecus’ N2560 is definitely worth checking out.
Page 2 – Software & Performance Testing
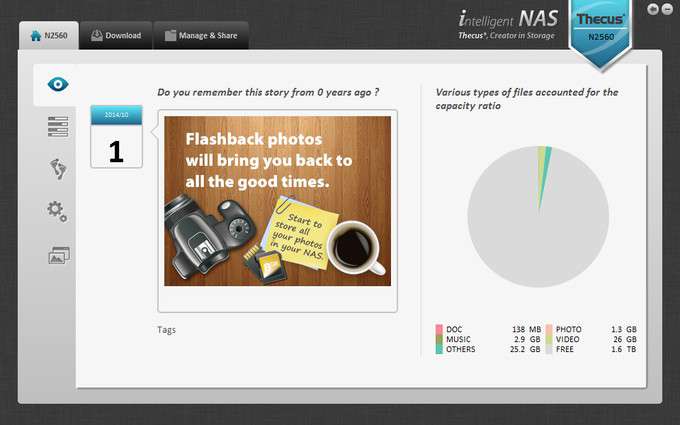
We kicked things off by downloading the latest version of Thecus’ Intelligent NAS rather than install an older one from the included disk. While administration will be done from within the Web UI, which we’ll get to in a moment, this neat little application gives quick access to files, a brief storage overview, displays a list of any upcoming copy tasks and recent activities, allows torrent files to be added, and allows you to connect to and upload directly to Facebook. It also serves as a quick and easy way to find the IP address of the NAS.
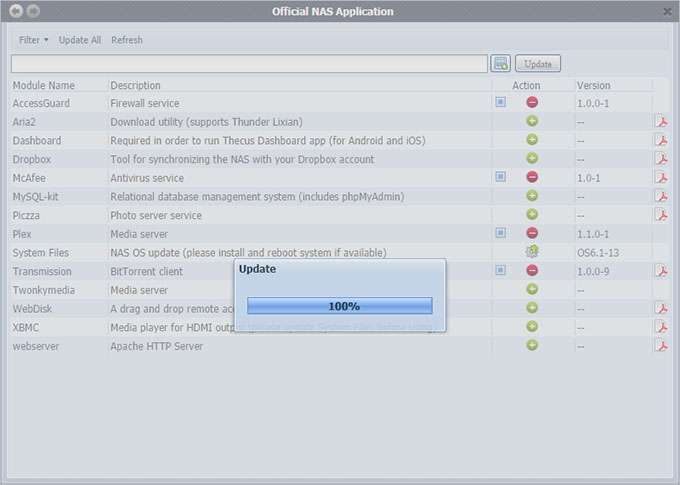
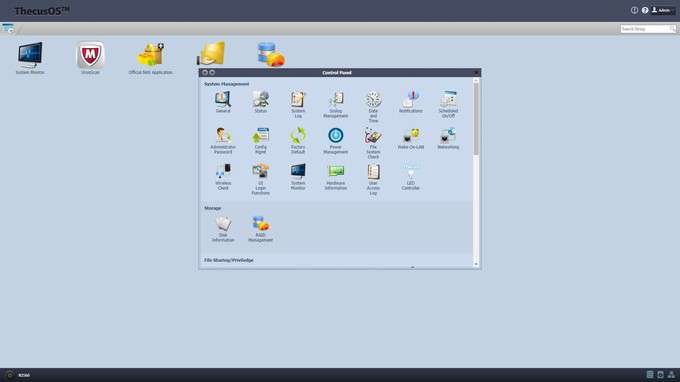
By punching the IP address into a Web browser and logging in with the default credentials we were greeted with a sparse interface initially made up of only the Shared Folder and RAID Management icons. After the flashing icon in the upper right corner notified us of an available upgrade to OS6.1-13, which was easily done by following the on-screen prompts and rebooting the NAS, we began to poke around a bit.
The Control Panel is where in-depth administration can be done, as well as assign shortcuts to the main page. The options are ‘System Management’, where information about the NAS can be pulled up and its operation controlled; ‘Storage’, where the disk information and RAID management is accessed; ‘File Sharing/Privilege’, for those who want to set up permissions to specific resources; ‘Network Service’, to configure the various protocols; ‘Application Server’, where official apps such as Plex Media Server or iTunes Server can be download and 3rd party apps added; ‘Backup’, which includes uploading data to Amazon’s S3 service; and finally, ‘External Devices’, for the management of printers and UPS monitoring.
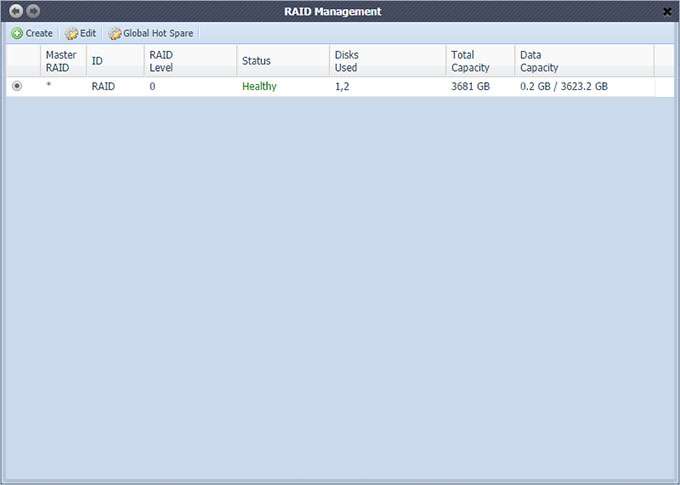
Before we played with any of that, our first task was to set up a brand-new volume by accessing RAID management. Following the on-screen prompts was easy, and we were up and running with brand new JBOD and RAID 0 configurations in a matter of seconds. Creating a RAID 1 volume can be done just as quickly so long as the Quick Raid option is chosen. This is for users starting out with blank drives and not recommended for drives with existing partitions. Not selecting the Quick RAID option means the volume is built slowly; it took 8 hours total on our 2TB WD Red drives.
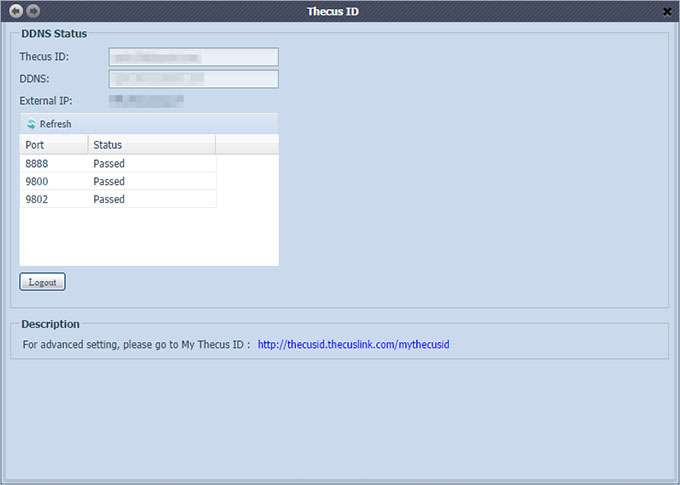
After adding a few icons to the main screen that will help us better monitor, configure, and administer the NAS, we decided to configure one of the more highly touted features, remote access. Once a Thecus ID has been created, you can just plug the information into the Web UI, download the T-OnTheGo mobile app, configure it, and you’re off to the races. There might also be some port-forwarding involved as well as enabling uPnP on the router, as was the case with our setup, but within a few minutes our test data was available within a browser from a computer on another network, and while on-the-go.
The Web UI is pretty straight-forward and user-friendly, but there were some minor annoyances, such as the fact that the icons trade places with each other when dragged and dropped rather than the single icon moving to the location specified. Also, each time an icon is added, removed, or moved, the official NAS application window opens up, which again is annoying, but not intolerable; but, this appears to have been fixed in the OS6.1-13.1 upgrade, which was available October 1st.
For more information on the plethora of configuration and administration options, the user manual is available on Thecus’ website. We decided to only scratch the surface of this well-rounded interface and its options so that we could get down to business and see how well this smaller NAS performs.
Performance
OK, let’s get started. The only way to truly find out how long you’ll have to sit and watch the progress bar is to begin moving data, and that’s what we plan on doing. Our test files consist of a 10GB compressed archive, a 50GB compressed archive, and a 10GB folder containing 5,730 files of varying sizes.
The 10GB archive acts as a solid file to test the sustained write speed, while the 50GB archive will test the same and further ensure that the amount of RAM isn’t skewing the results. Finally, the 10GB folder containing thousands of files will show how far the NAS gets bogged-down by this type of transfer.
Our test system uses an Intel Gigabit LAN connected to a standard 1Gb/s router. To ensure the results are as accurate as possible and not affected by a large amount of RAM, only 2GB was installed prior to testing. The N2560 was loaded up with two 2TB Western Digital WD20EFRX-68A Red drives, and cat 5 cables were used to connect the PC and NAS to the same router. Each test was run twice by transferring files from a solid state drive to the NAS with the results added together and divided by two in order to find the average write speeds.
| Real-world | JBOD | RAID 0 | RAID 1 |
| 10GB Solid File | 105 MB/s | 108 MB/s | 74 MB/s |
| 10GB Files (5,739) | 60 MB/s | 65 MB/s | 50 MB/s |
| 50GB File | 107 MB/s | 108 MB/s | 86 MB/s |
Real-world speeds are looking fantastic at the conclusion of our tests. Anything above 100 MB/s is icing on the cake as far as I’m concerned, and the N2560 has that perfect blend of sweetness and substance if you’re looking for a simple storage device to throw a couple of drives in, or for the speed advantages of RAID 0.
Obviously, the speeds with a RAID 1 configuration will take a noticeable hit, but that’s the trade-off – speed for redundancy. So long as users know the specifics of the each setup beforehand, it shouldn’t bother anyone at all. Even with the drop in performance, the results are still respectable.
Just for kicks, we also tested the direct copy function used to transfer files from a USB flashdrive to the NAS. The 10GB solid file was transferred over at the push of a button, but there’s no way to truly measure the speed. In the end, this feature did what it was meant to do, so that’s another check in the plus column for the N2560.
Support our efforts! With ad revenue at an all-time low for written websites, we're relying more than ever on reader support to help us continue putting so much effort into this type of content. You can support us by becoming a Patron, or by using our Amazon shopping affiliate links listed through our articles. Thanks for your support!


