- Qualcomm Launches Snapdragon 4 Gen 2 Mobile Platform
- AMD Launches Ryzen PRO 7000 Series Mobile & Desktop Platform
- Intel Launches Sleek Single-Slot Arc Pro A60 Workstation Graphics Card
- NVIDIA Announces Latest Ada Lovelace Additions: GeForce RTX 4060 Ti & RTX 4060
- Maxon Redshift With AMD Radeon GPU Rendering Support Now Available
Thermaltake Frio OCK & Jing CPU Coolers Review
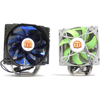
All CPU coolers promise effective CPU cooling, but how each one manages their goal can vary wildly. One may be super-quiet but be the size of a car, while another may be modest-sized but sound like a jet engine. The Frio OCK and Jing from Thermaltake aren’t so extreme, but make a perfect case for noise vs. size vs. cooling performance.
Page 2 – Installation & Testing
Since both coolers use the same mounting method and hardware, the Jing has been chosen to show just how the installation goes. Its outward footprint is smaller and should allow for a better view of the mounting system once assembled. The Jing should have the fans removed prior to installation and the Frio OCK should have the entire fan assembly removed so that the mounting screws can be accessed.
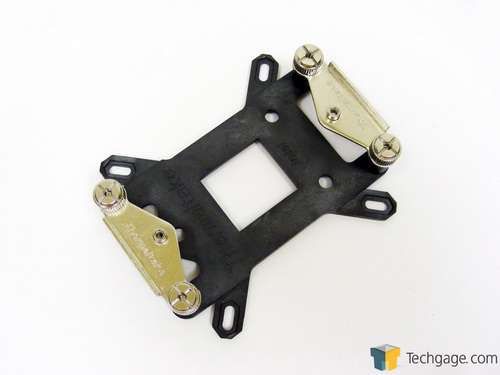
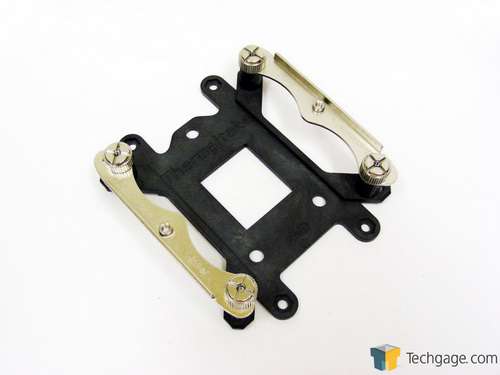
Starting with AMD systems, the stock motherboard mounts will need to be removed. Next, the plastic back plate is placed on the back side of the motherboard with the AMD lettering facing away. Four bolts thread through each hole in the back plate and through the mounting points in the motherboard. A black plastic spacer is threaded over each bolt followed by an AMD mounting bar on each end and then everything is capped off with a metal nut to hold it all in place.
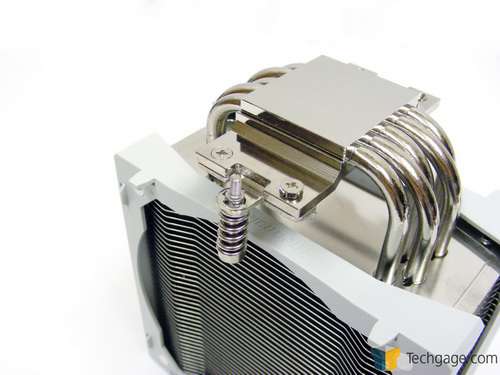
The rest of the hardware goes onto the cooler itself in the form of a T-bar on each side that are secured using two screws for each.
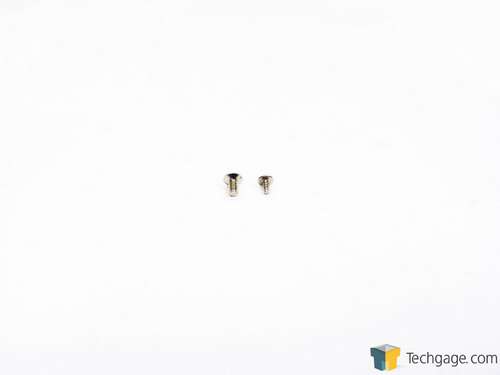
When securing the T-bars to the Jing I ran into my first snag. “One of these things is not like the other. One of these things just doesn’t belong.” Fine, I’ll set aside the Sesame Street references for a moment. Instead of four screws of the same size, one was much too small and clearly not intended for the Jing. It’s a good thing the Frio OCK was around so I could steal a screw from its box of bits and pieces.
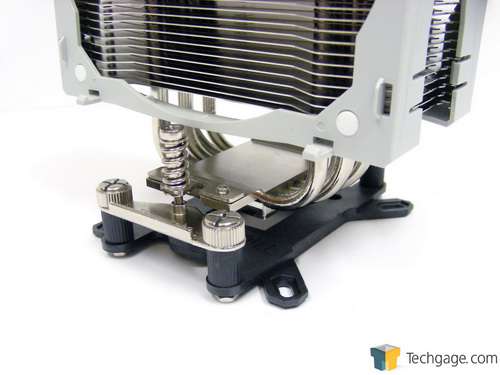
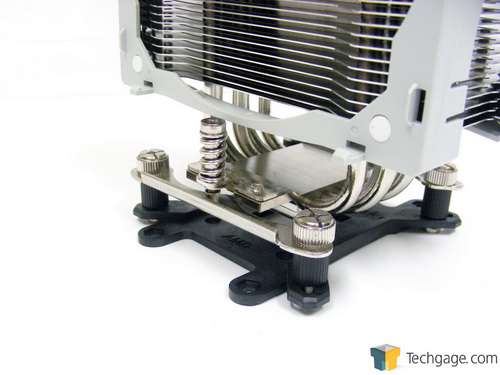
With some TIM applied to the CPU, it’s time to mount the cooler. The spring-loaded screws on each of the T-bars thread into the mounting bars but it’s important to start one side just enough to make the screw catch before moving onto the other. Doing so will prevent excess force from being exerted onto one edge of the CPU and the pins in the socket. After that it’s just a matter of tightening each one evenly and connecting the fans.
Both coolers mount onto Intel systems in much the same way. This time the back plate sits with the Intel lettering facing away, the bolts thread through each corner, the plastic spacers thread over them, the Intel mounting bars go on and then everything is held in place with the metal nuts.
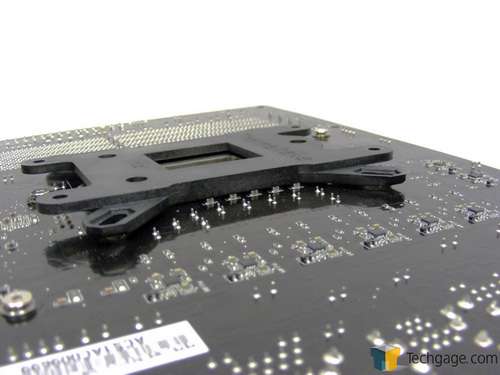
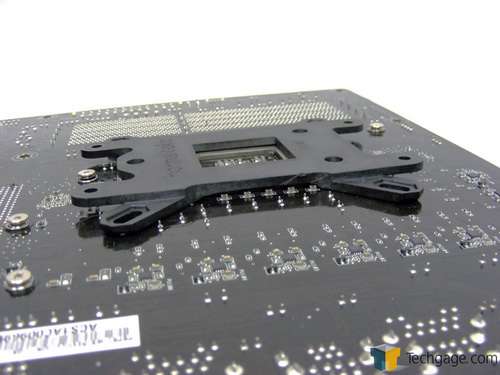
Thinking back to a conversation I had with our SSD guru, Robert Tanner, I decided to be cautious when installing the cooler in our test system because of a row of capacitors that run down the right side of the CPU socket on the back of the motherboard. This is a layout that many, if not all ASUS P67 and Z68 boards have, and Robert found out the hard way that some back plates can crush the capacitors. As you can see he was right on the money as the Jing and Frio back plates are identical and would end up with the same problem – so what’s a guy to do?
Ghetto mod! A simple box cutter was used to shave away the lip of the back plate that would come into contact with the capacitors. It took about 10 minutes to allow for enough clearance but could have been done in less than 2 minutes if done with a rotary tool.
Moving on, the T-bars are also used in Intel systems and are secured to the cooler the same way as mentioned earlier. Once some TIM is applied to the CPU the screws on each T-bar are threaded through the mounting bars and tightened evenly.
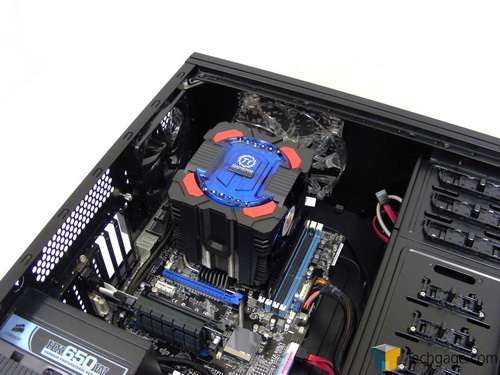
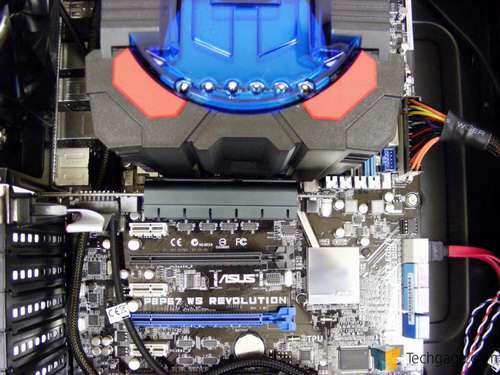
Our test chassis just happens to be another Thermaltake product so I don’t expect there to be any issues there, but always do your homework before buying any components to ensure compatibility. Here’s a quick shot of the Jing installed…
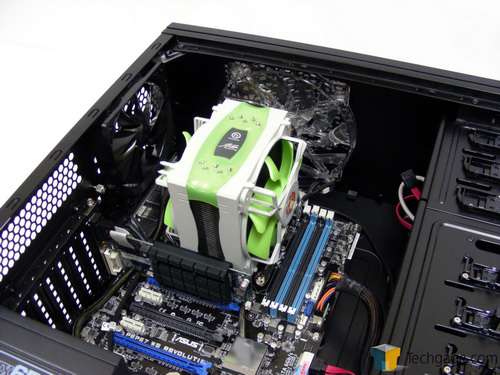
…and finally the Frio OCK, which takes up just about all of the available space provided.
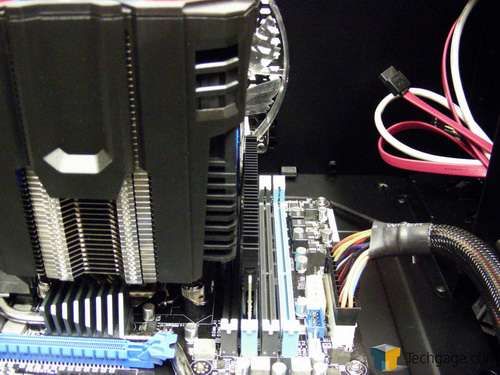
Oh, but wait. The Frio OCK is so large that it blocks off access to the first DIMM slot, meaning memory will need to be installed here before the fan assembly is slid into place. Anything other than standard height memory won’t work.
Another problem came about due to the passive cooler that wraps around to the back of our test GPU. It adds to the thickness and caused clearance issues with the side of the Frio OCK. Those who run GPUs with non-reference back plates or exotic cooling may run into the same problem depending on the location of the top PCIe slot.
Testing
Stock CPU settings were obtained by setting the AI Tweaker option within the BIOS to Auto. and the maximum stable overclock frequency of 3.85GHz was obtained after setting the base clock to 107 and the multiplier to 36. Our locked CPU was able to do this on stock voltage so the vcore was raised to 1.25V to generate additional heat.
All of our testing is performed in a near steady 20°C ambient environment with readings taken before and after with a standard room thermometer. AIDA64 Extreme Engineer is used for monitoring and recording all system temperatures throughout the testing process. All fans are run at 100% during testing and all coolers have any pre-applied thermal interface material replaced with Zalman’s ZM-STG1 Super Thermal Grease due its ease of application that virtually eliminates the possibility of skewed temperatures due to poor surface contact.
Windows is allowed to sit idle for 10 minutes after startup to ensure all services are loaded before recording the idle CPU temperature. CPU load temperatures are generated by performing a 20 minute run of OCCT LINPACK using 90% of the available memory.
The components used for testing are:
|
Component
|
Techgage Test System
|
| Processor |
Intel Core i5-2400 – Quad-Core (3.10GHz)
|
| Motherboard |
Asus P8P67 WS Revolution – P67-based
|
| Memory |
Corsair Dominator 1x2GB DDR3-1600 7-8-7-20-2T
|
| Graphics |
AMD Radeon 5450
|
| Audio |
On-Board Audio
|
| Storage |
Kingston/Intel SSDNow M Series 80GB SATA II SSD
|
| Power Supply |
Corsair HX650 650W
|
| Chassis |
Thermaltake Armor A90 Mid-Tower
|
| CPU Cooling |
Corsair H50
Corsair H60 Corsair H70 NZXT HAVIK 140 Thermaltake Frio OCK Thermaltake Jing Zalman CNPS7X LED |
| Et cetera |
Windows 7 Ultimate 64-bit
|
And the results!
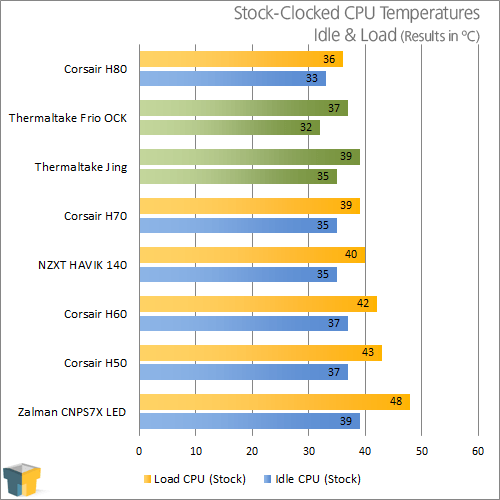
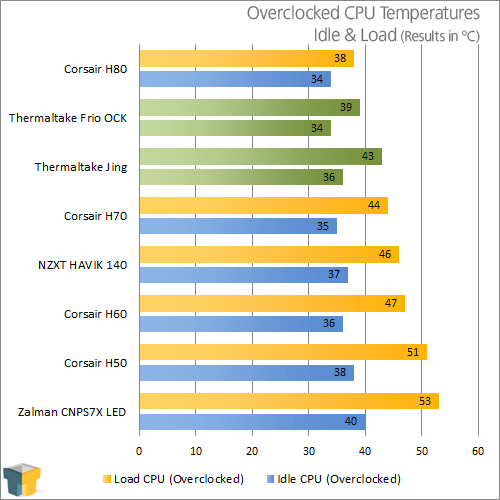
I have to say that I’m surprised most with the results turned in by the Jing. For a cooler designed to be silent, it’s extremely capable, although mileage will vary depending on the level of overclocking being done.
The Jing performed so well that it beat the more expensive and much noisier Corsair H70 liquid cooler and laid waste to the other low noise cooler, the Zalman CNPS7X. To be fair to the Zalman cooler though, it’s in a much different class of silent coolers, so performance is expected to be less.
For fun I decided to run the fans at the minimum speed and perform the overclocked tests again only to find that there was no change as full load temperatures remained at 43 degrees. This could be because even though the fans are rated to run at a minimum 800 RPM, the front fan pulling air into the cooler would not spin below 1,100 RPM while the rear fan spun just shy of the minimum speed.
The Frio OCK turned in some impressive numbers as well, beating the Jing by 4 degrees and nearly matching the Corsair H80 but making considerably more noise in the process. While the H80 remained almost silent during our previous testing, the Frio OCK sounded like a hair dryer and easily drowned out all other noises in the office.
With the fans run at the minimum speed, which turned out to be 1,300 RPM, the CPU temperature rose 2 degees under full load while overclocked. With the fans dialed down, sound levels also drop close to the level of the Jing at full speed, so users should be able to adjust the speed of the fans so the noise level is acceptable without resulting in greatly diminished performance.
If both coolers seem like viable options it’s time to consider what’s most important and then make a choice.
Support our efforts! With ad revenue at an all-time low for written websites, we're relying more than ever on reader support to help us continue putting so much effort into this type of content. You can support us by becoming a Patron, or by using our Amazon shopping affiliate links listed through our articles. Thanks for your support!


