- Qualcomm Launches Snapdragon 4 Gen 2 Mobile Platform
- AMD Launches Ryzen PRO 7000 Series Mobile & Desktop Platform
- Intel Launches Sleek Single-Slot Arc Pro A60 Workstation Graphics Card
- NVIDIA Announces Latest Ada Lovelace Additions: GeForce RTX 4060 Ti & RTX 4060
- Maxon Redshift With AMD Radeon GPU Rendering Support Now Available
Thermaltake Mozart VC4000 HTPC Case
The “Mozart” name implies style and grace, and the Mozart home theater PC case certainly offers elegant styling. But is its beauty only skin deep? Here’s an in-depth look at this popular home theater PC case from Thermaltake.
Page 4 – Building a System
The Thermaltake Mozart could make up a significant amount of points with me if it offers a simple approach to building a system. Thankfully, the process is fairly painless. For this system build, I’ve chosen some parts that would commonly be selected for an HTPC, including an energy-efficient processor and a motherboard with an IGP. To test the case’s ability to comfortably fit a humongous power supply, I used my new Etasis ET750, which is over 7 inches long. Here’s the list of hardware in detail:
- HTPC Test Rig
- AMD Athlon 64 X2 4200+ EE (65w) with Stock HSF
- ASUS M2A-VM Motherboard with AMD 690G IGP chipset<
- 1GB A-Data Vitesta DDR2-800 memory
- 100GB Western Digital Caviar hard drive
- Etasis ET750 750W power supply
/li>
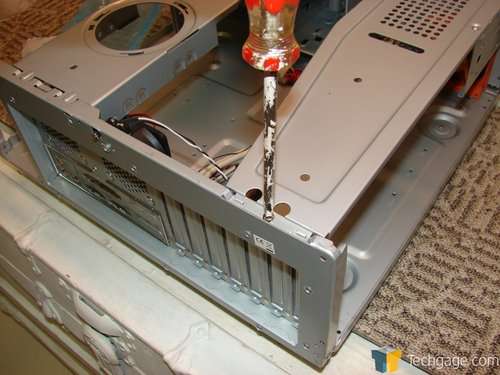
To get started, remove the bracing rails. Simply remove a screw at one end of the rail, and lift it up and out at an angle. You’ll need to pull these braces out whenever you work on the hardware of this case. Removing the rails reveals a very roomy interior, with plenty of room to work around your components. One motherboard standoff is already installed; you’ll have to install the rest.
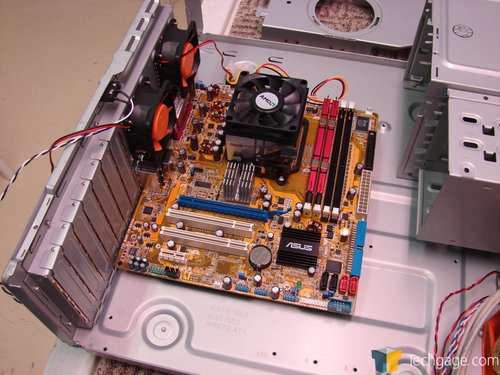
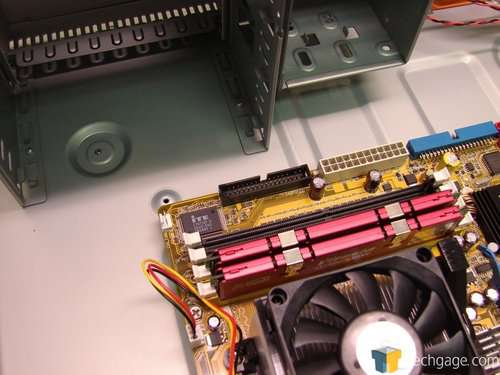
The next step is to install your motherboard. As roomy as the Mozart case is, it’s still always easier to install your other components onto the motherboard while it’s outside the case. The case can accommodate a full-ATX motherboard, but most HTPC builders will prefer the elegance of an IGP motherboard solution, most of which are Micro ATX. The rear I/O panel is secured with a screw, so be sure to remove that before you attempt to pop out the I/O panel.
Now, a bit of bad news for those of you who had your hearts set on having three optical drives in your HTPC: the motherboard blocks the third 5.25″ drive bay. So, instead of having three external 5.25″ bays, consider the lower one occupied. However, if you’ve got a fan controller that you can insert into the lower bay (like the Zalman ZM-MFC2), then it may not need to be wasted space.
Another place where clearances can become a bit tight is between a long power supply and the optical drives. One gripe I discovered, however, is that the power supply must squeeze under a metal lip at the rear of the case. As I worked my Etasis ET750 power supply into the spot, I saw flakes of dark gray paint coming off under that lip, a sign that I was ruining my power supply’s painted finish. This is quite a shame, since that PSU wasn’t cheap, and I liked its painted gray finish.
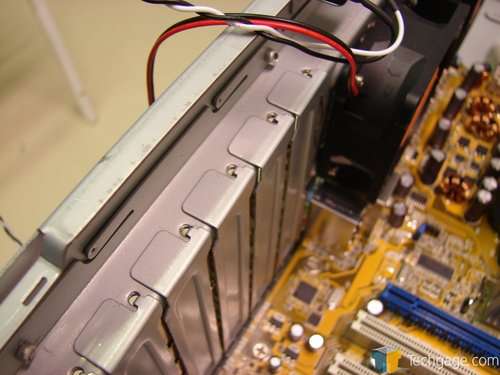
The expansion slot covers, thankfully, aren’t the tear-off kind that the NZXT Duet had, though they aren’t retained with screws. So make sure you hang onto the little baggie of screws that the case comes with, since you’ll need them for mounting any expansion slot covers. I’m also happy to see that these aren’t some half-hearted tool-free solution. I’ve struggled with Thermaltake toolless expansion card retention mechanisms in the past, and found them to be more trouble than they’re worth.
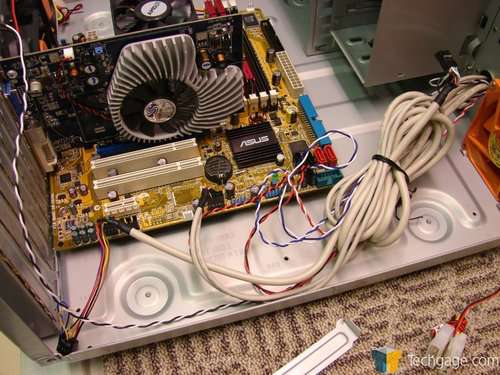
The cables for connecting the front panel wires are extremely long, and I found that most of their length had to be tied back. Make sure you save a cable tie for this purpose. I suppose it’s better to have more length than not enough length, but having tons of extra cable length just contributes to interior clutter. The last thing you should do is mount the drives that will be mounted to the brace that sits above the expansion slots.
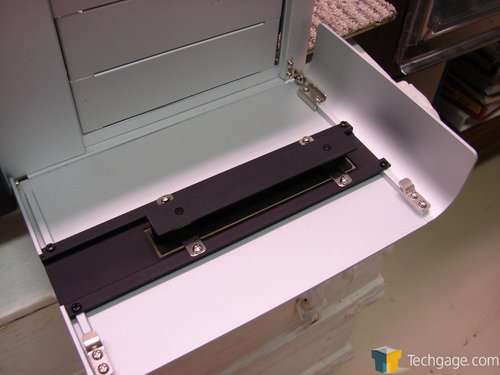
The cover for the DVD drive drawer is attached to the front of the case, to provide a continuous bezel even when no DVD drive is installed. However, when you install your DVD drive, remove the large aluminum extrusion from the door, and use the included double-sized foam tape to affix the cover to the end of the drive drawer. It’s too bad Thermaltake didn’t include provisions for ejecting the drive tray when the door is closed – you’ll have to use Windows’ own command to activate the eject function.
Honestly, overall, if these are the worst problems in this case (by which I’m referring to the drive bay clearance and the long cables), then it’s doing pretty well (though I wasn’t happy about scratching up my PSU). Now that we’ve looked at some of the issues related to building a system in this case, let’s look at some thermal testing and noise analysis for this case.
|
|
Support our efforts! With ad revenue at an all-time low for written websites, we're relying more than ever on reader support to help us continue putting so much effort into this type of content. You can support us by becoming a Patron, or by using our Amazon shopping affiliate links listed through our articles. Thanks for your support!


