- Qualcomm Launches Snapdragon 4 Gen 2 Mobile Platform
- AMD Launches Ryzen PRO 7000 Series Mobile & Desktop Platform
- Intel Launches Sleek Single-Slot Arc Pro A60 Workstation Graphics Card
- NVIDIA Announces Latest Ada Lovelace Additions: GeForce RTX 4060 Ti & RTX 4060
- Maxon Redshift With AMD Radeon GPU Rendering Support Now Available
Thermaltake WATER2.0 Performer & Pro CPU Coolers Review
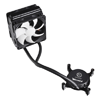
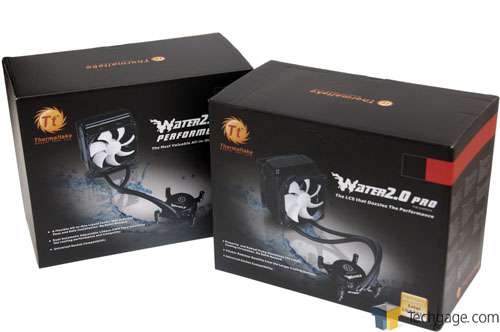
Want to take your CPU cooling to the next level and adopt a self-contained liquid cooler? The market at the moment is packed with such offerings, and Thermaltake just padded it further with its WATER2.0 series. Available in three flavors, we’re taking a look at the Performer and Pro variants here to see if they deserve to be in your rig.
Page 1 – Introduction
Self-contained liquid CPU coolers are no longer a niche product, as the market now proves – and, it’s for good reason. Their price often enables those who would have otherwise purchased a higher-end air cooler to jump on board, and thanks to both their simplicity and popularity, many vendors have joined the party as well. There’s a lot of competition, and such coolers are now more affordable than ever.
While many vendors have begun offering these coolers, there are few that have been catering to cooling products as long as Thermaltake. Despite its huge product portfolio, the company’s motto remains “CoolAll Your Life”. That might sound like horrible translation, but it gets the point across.
The company recently released its “WATER2.0” series, aiming to give enthusiasts three levels of cooling effectiveness to choose from; Performer, Pro and Extreme. The latter doesn’t seem to be pushed too hard, as it’s difficult to find in stock. Performer and Pro are readily available, however, and to kill two birds with one stone, we’re taking a look at both of them here.
Understanding the differences between the Performer and Pro is made simple with the help of the official table below. Both coolers include two fans, but the Pro version comes equipped with a double-width radiator (49mm vs. 25mm). The Extreme, by contrast, retains the 25mm thickness but doubles the length. The effectiveness of the cooler increases with the higher models, and compared to the Pro, Performer looks quite modest.
| Performer | Pro | Extreme | |
| Socket | Intel: LGA2011, LGA1366, LGA1156, LGA1155 AMD: FM1, AM3+ AM3, AM2+, AM2 |
||
| Radiator | Price Does Not Compromise Performance Even with the great value of the WATER2.0 Performer it uses a top quality engineered performance 25mm radiator. | A Step Above The WATER2.0 Pro take the Performer design even further by applying a thicker high performance radiator which allows for more surface area and better cooling potential | When “Good Enough” is Not The WATER2.0 Extreme is for the user who wants the absolute best performance with room to push the limit. With a expanded 240mm radiator the WATER2.0 extreme can push the limits of an extreme platform. |
| Radiator Size | 120mm | 120mm | 240mm |
| Radiator Thickness | 25mm | 49mm | 25mm |
| Radiator Cooling | 1385 cm2 | 3730 cm2 | 4755 cm2 |
| Maintenance | Trouble free for life The WATER2.0 line is designed to operate through its complete lifespan with no internal maintenance or top off of fluids required. | ||
| Smart Control | Silence is Golden with the dual PWM fans any 4 pin motherboard header can keep the fans in silent operation until the cooling power is needed such as heavy workloads or extreme gaming sessions. | The Ultimate in Control the WATER2.0 extreme offers built in cabling and included software to allow full control of the cooler from within windows so that the fans are not just throttled by the motherboard but instead are exactly how you want them including custom fan curves for absolute precision control. | |
| Fans | 2x 120mm PWM Fans included and controllable via available motherboard 4 pin fan headers for temperature controlled fan throttling. | 2x 120mm PWM fans included. (optional: up to 4x 120mm fans can be installed on both sides of the radiator for maximum cooling efficiency) | |
| Fan Speed | 1200 ~ 2000 RPM fan speed range. This allows for adjustment from the silent and tranquil low 1200 RPM speed up to the powerful and high performance 2000 RPM setting. | ||
| Performance | Good Great for anyone looking to get a first step into liquid cooling at the lowest possible cost of entry. | Better For the user who likes to push performance and wants a high performance cooler to support their lifestyle and demands. | Best For the extreme user who has to tweak and tune every bit of performance from everything, this is the no compromise overclocker and tweaker friendly solution. |
The nice thing about these coolers, especially the Performer, is that all of them include fans. While it debuted at about $75, the Performer can now be had for $50 after mail-in rebates. If you get it at that price, it’s a really good value given it includes two fans, which sold separately would set you back about $20. Using the “Smart Control” feature of the coolers, these fans can keep quiet at 1,200 RPM when idle, and ramp up to 2,000RPM during a heavy workload.
The blocks on the WATER2.0 coolers have been milled from a single block of copper, with the aim to keep efficiency to a maximum. Unlike some competitor units, there is no manual fan control here, nor is there any special display on the pump. Personally, this doesn’t bother me, though I do wish more of these pumps would at least come equipped with an LED that would let me know it’s functioning properly.
Let’s take a look at what comes in the box, shall we?
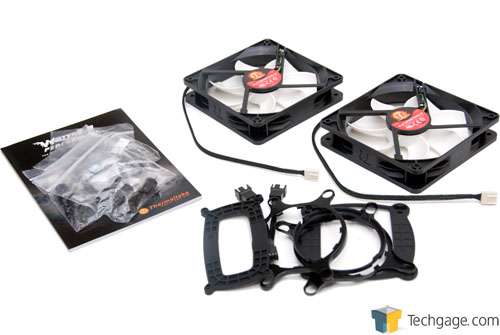
Both the Performer and Pro include identical accessories. These include the mounts for all of the sockets supported, various screws and components to build the mounting assembly and a manual. This manual is sufficient, but as its fonts and diagrams are rather small, I found myself downloading the PDF version from Thermaltake’s website.
One thing I have to give Thermaltake kudos for is giving the included fans a sufficiently long cable. Included among the accessories is a Y cable for first connecting both fans to it, and then this cable to a fan header, but because the cables were long enough on the fans, I didn’t have to use it. If you’re limited on fan headers, you won’t be so lucky, but the fans that came with the H70 (original) didn’t have that luxury, so this stands out.
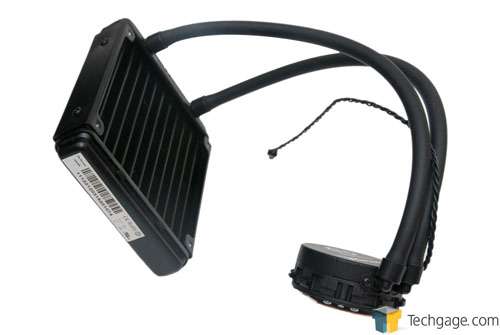
Here’s the Pro model, with its delicious double-width radiator:
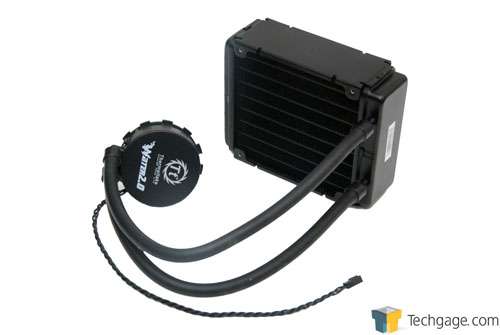
Here’s the Performer model, with its wimpier-looking radiator (as we’ll soon find out, it’s not so wimpy in performance).
If you’ve installed a cooler like this before, you’ve pretty much installed them all. The major difference will come down to the socket. In our particular case, we’re testing these coolers on an X79 platform, so its built-in cooler mounting mechanism allowed us to skip installing the one in the box.
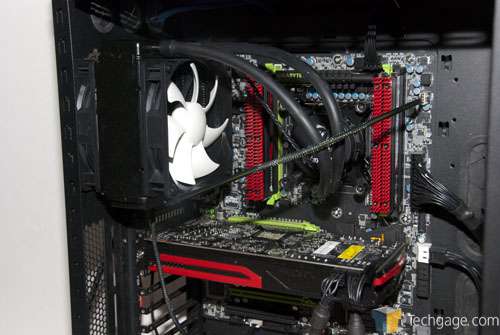
Thermaltake recommends a push / pull configuration with its WATER2.0 coolers, which means both will be blowing air towards the back. The first step of the installation is to position the back fan where it needs to be, feed a screw through to catch the radiator, and then screw it in. Once all four screws are in, you connect the second fan the same way. It’s important to note where your available fan headers are during installation, or you may find yourself having to reposition the fans in order to allow the cable to reach where you need it. As you can see in the photo below, the inner-most fan had no problem reaching a fan header to the right of the DIMM slots (the photo makes it look like it barely made it, but it’s just an illusion – it had a fair bit of slack).
Installation-wise, I have no complaints with the WATER2.0 coolers. While there are instances where you have to exercise your patience getting things into place, it’s pretty unavoidable. The only way it could be made easier is if Thermaltake included industrial adhesive to affix the cooler, but the company probably imagines that people might want to remove the coolers at some point.
With the coolers all installed, let’s get right into temperature-testing.
Support our efforts! With ad revenue at an all-time low for written websites, we're relying more than ever on reader support to help us continue putting so much effort into this type of content. You can support us by becoming a Patron, or by using our Amazon shopping affiliate links listed through our articles. Thanks for your support!


