- Qualcomm Launches Snapdragon 4 Gen 2 Mobile Platform
- AMD Launches Ryzen PRO 7000 Series Mobile & Desktop Platform
- Intel Launches Sleek Single-Slot Arc Pro A60 Workstation Graphics Card
- NVIDIA Announces Latest Ada Lovelace Additions: GeForce RTX 4060 Ti & RTX 4060
- Maxon Redshift With AMD Radeon GPU Rendering Support Now Available
Social & RSS Feeds
Latest Videos


Latest News
Titan Eagle VGA Cooler
by Drew Smith on February 8, 2006 in Cooling
Looking for a better way to keep your GPU cool via air cooling? Titan may have the answer with their new Eagle cooler. We have seen this design before, but do they do it better?
Page 1 – Introduction
Today’s video cards run at very high clock speeds and even higher temperatures, which makes cooling an extremely important concern for gamers. Today at Techgage we are looking at two universal VGA card coolers from Titan, makers of several fine cooling products. The Coolers looks sweet but looks aren’t everything, let’s see if this cooler can keep us cool gamers or will it crash and burn?
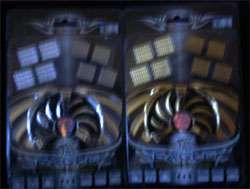
The Copper and Aluminum Titan Coolers
- Features
- Stylish looks with a brilliant silver or copper finish.
- Support for all modem and ATI and NVIDIA VGA cards
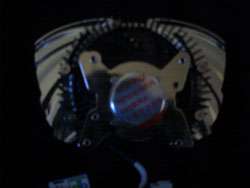
- Excellent heatsink design for maximum heat dissipation
- Easy installation with a brand new clip design
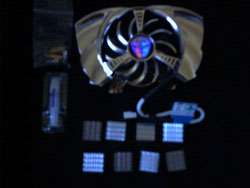
- RAM heatsinks are included for a complete VGA cooling solution
- Specifications
- Outline Dimension – 35.5 x 135 x 90 mm
- Fan Dimension – 80x80x10 mm
- Rated Voltage – 5V DC
- Rated Speed – 2000 ± 10%RPM
- Airflow – 23.58 CFM
- Static Pressure – 0.93 mm Aq
- Noise Level – < 22 dBA
- Rated Current – 0.14A
- Power Consumption – 1.68W
- No. of Pole – 4 Pole
- Rotation Direction – Counter-Clockwise
- Fits NVIDIA
- Geforce 3 Ti 200/500
- Geforce 4 MX 420/440/460
- Geforce 4 MX 440 SE/440 8X
- Geforce FX 5200/5500/5600/5700L
- Geforce 4Ti 4200/4200 8X
- Geforce 4Ti 4400/4600/4800
- Geforce FX 5600 ULTRA/5700/5700 ULTRA
- Geforce FX 5900/5900 XT
- Geforce FX 5950 ULTRA
- Geforce 6600
- Geforce 6800/6800GT
- Geforce 6800/6800GT
- Geforce 7800/7800GT
- Fits ATI
- RADEON 9000/9000 PRO
- RADEON 9200/9200 PRO
- RADEON 9500/9550
- RADEON 9600/9700/9800 Series
- RX 300/600/800/850
My first impressions of these coolers were their much larger size than the stock cooler and their impressive looks and styling. These coolers are very sturdy and weigh a considerable amount more than the stock cooler. The Copper offered more cooling power but it’s up to your taste which style you would like to choose, my preference was still the Aluminum. The RAM heatsinks that come with the cooler are a very excellent touch in order to provide a total cooling product to keep that video card safe under extreme loads.
Installation
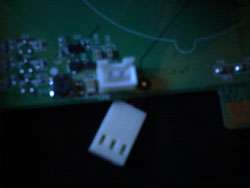
Installation is relatively simple; remove the stock cooler, size up the holes on the cooler with the holes on the card. The application chart that comes with the coolers packaging makes this very simple. Clean the GPU with alcohol and clean the RAM heatsinks as well. Install the RAM heatsinks first just by peeling the tape from the back of the heatsink and sticking it to the RAM chips on the VGA Card.
Once the heatsinks are in place you can begin the installation of the cooler itself. First you must secure the mounting screws to the cooler making sure not to forget the rubber washers. Apply a thin layer of thermal paste (supplied with the cooler) to the GPU, then place the cooler on the GPU and align the screws to the holes on the Card. Flip the card over, place additional rubber washers over the mounting screws and secure the cooler with the nuts. Once the cooler is securely fastened to the card you can install the card back in the computer and connect the cooler’s power supply, and you’re done.
There were only 2 problems I had with this installation;
1. When tightening the securing screws, I wasn’t sure how tight they were supposed to be, this was made difficult by the springs on the bottom of the screws which provide extra resistance. You are not sure whether it is the spring pushing back or that the screw is tight and they cannot go any further. Due to this, I stripped one of the nuts; luckily I had a similar nut on hand to use as a replacement.
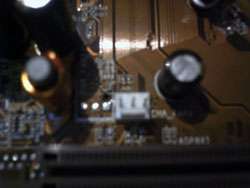
2. When connecting the cooler to power, the instructions are not clear where to connect the coolers plug. Since the stock VGA cooler had a power connector I assumed that the Titan cooler should be connected there, after inspection I realized this was not going to be possible. The connector on the card has 2 prongs and the plug on the cooler has 3 prongs. After further inspections and a phone call for some advice it turned out the cooler uses the Chassis Fan connector on your Motherboard for its power supply. I used an adapter I had on hand to connect the cooler directly to my power supply, as I still wanted to use my chassis fan. After investigation, this is due to the cooler requiring more power than the card can provide, hence why it requires external power.
|
|

Support our efforts! With ad revenue at an all-time low for written websites, we're relying more than ever on reader support to help us continue putting so much effort into this type of content. You can support us by becoming a Patron, or by using our Amazon shopping affiliate links listed through our articles. Thanks for your support!