- Qualcomm Launches Snapdragon 4 Gen 2 Mobile Platform
- AMD Launches Ryzen PRO 7000 Series Mobile & Desktop Platform
- Intel Launches Sleek Single-Slot Arc Pro A60 Workstation Graphics Card
- NVIDIA Announces Latest Ada Lovelace Additions: GeForce RTX 4060 Ti & RTX 4060
- Maxon Redshift With AMD Radeon GPU Rendering Support Now Available
Social & RSS Feeds
Latest Videos


Latest News
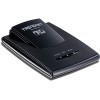
TRENDnet 300Mbps Wireless N Travel Router
by Rob Williams on November 25, 2009 in Networking
Travel often? Need a full-featured router, but not its full-featured size? If so, the TEW-654TR deserves your attention. Despite its small size (smaller than an iPod classic), it delivers a lot of functionality, including the ability to act as an AP and also a wireless card. It also happens to offer great performance, and a price tag of under $60.
Page 2 – Setup & Router Mode
As a travel router, there’s one aspect that’s of utmost importance, and that’s an easy installation. Who wants to fiddle around with their router for an hour after getting checked into a hotel room? I sure don’t, so I was quite pleased to see that setting up the TEW-654TR wasn’t a complicated process, and before I knew it, I was online. Before taking the router of out of the box and setting it up, you have to make a choice of whether to use it as a Router, AP or Client.
When setting the device up as a router, it acts just as a desktop router. It allows the creation of a network (sharing files and other protocols between computers/devices), and delivers Internet access to whatever connects to it. An Access Point is more of a home feature, where someone may want to extend the range of their primary wireless router. For example, if your router is in the living-room, but you want wireless access outside, you could run a cable from your primary router to the access point (located somewhere much closer to the back door), which would allow for much better reception when you are outside.
The third choice is to have the router act as a client, and it’s probably my favorite feature, for reasons I’ll touch on later. As a client, you can add wireless access to any PC out there in mere minutes. You connect the LAN cable to both the PC and the router, hit up the proper IP address, let it seek out a network, put in credentials, and after a reboot, you’re online… no drivers or software needed. This solution is sure a lot clunkier than just having a network card, but the setup couldn’t be easier.

Before powering the router up, it will be important to make sure that the switch on the back of the device is set to the appropriate option. The switch is deliberately tough to move, so as to avoid hassle and confusion down the road. The reason the switch is important is because after accessing the admin, the menu will be customized, and some options are not going to be available from mode to mode for obvious reasons.
Router Mode
The device’s default IP address is 192.168.10.1 with the infamous admin/password of “admin/admin”. The first screen you’ll see in the router mode will be a summarization of the device’s information, including uptime, DHCP status, various network information, SSID and other tidbits of important information. There are five tabs found on the left side of the page to access various parts of the router, with the quick-setup wizard found at the top.
That menu will be where most new-comers will want to head first, because it allows for a quick and easy setup process, taking about a minute for most configurations (might take longer if you have a complicated network). You’ll be asked for a password (which should be changed) and timezone, network configuration information, such as IP address and whether or not DHCP should be enabled, hostname and MAC address, simple wireless configuration and that’s it. Assuming you have an Internet-connected cable plugged into the router at this point, you should have access after it reboots and you connect to it via your wireless device.


The setup wizard is simple, so for more robust configuration, you can head to the “Setup” tab, where you’ll surely have as much control as you could possibly need. You’ll be able to configure five main things here including the wireless, LAN, WAN, WPS and also the dynamic DNS. The wireless section will be the most important to hit up, as it allows you to configure the network’s security, and also the passphrase, along with other options, such as channel, channel width, broadcast mode and also whether or not you want your SSID to be hidden.

Rather than bloat this review with images of every section of the admin system, I highly recommend checking out TRENDnet’s “emulator” on the official product page (found on the right side of the page). There, you can go through the admin system just as you would on the real router, so you can see if all of the support you need is there.
For even greater control over the settings, the “Advanced” tab will be worth visiting. Here, you can configure a wide-array of specific settings, from access control, IP filters, firewall, DMZ and even parental control. Even more advanced LAN/Wireless settings can be accessed here as well, with may be necessary to access if you need to turn on or off UPnP, ping, remote management or specifics like wireless beacon period, RTS threshold, fragmentation threshold and so forth.

Under the system tab, you can find such common options as passwords for the admin or other users, time setup, firmware update, ping test and also the ability to save the router’s configuration to a file on your computer, which could very well come in handy if you are testing out different configurations.
Under the final tab, status, you’ll be greeted with the same screen you saw after initial login, for the device information. Also here are system logs, statistics and and also your wireless status. Next up, we’ll take a look at access point and client mode.

Support our efforts! With ad revenue at an all-time low for written websites, we're relying more than ever on reader support to help us continue putting so much effort into this type of content. You can support us by becoming a Patron, or by using our Amazon shopping affiliate links listed through our articles. Thanks for your support!

Rob Williams
Rob founded Techgage in 2005 to be an 'Advocate of the consumer', focusing on fair reviews and keeping people apprised of news in the tech world. Catering to both enthusiasts and businesses alike; from desktop gaming to professional workstations, and all the supporting software.


