- Qualcomm Launches Snapdragon 4 Gen 2 Mobile Platform
- AMD Launches Ryzen PRO 7000 Series Mobile & Desktop Platform
- Intel Launches Sleek Single-Slot Arc Pro A60 Workstation Graphics Card
- NVIDIA Announces Latest Ada Lovelace Additions: GeForce RTX 4060 Ti & RTX 4060
- Maxon Redshift With AMD Radeon GPU Rendering Support Now Available
Using a Thumb Drive to Install Windows 7

Microsoft may be selling Windows 7 exclusively on DVD’s, but did you realize that it takes very little effort to create a bootable thumb drive and install from that? We’re taking a look at two popular methods of accomplishing this, and as you’ll see, it couldn’t be easier to install Microsoft’s latest OS onto a PC with no DVD-ROM. It’s faster, too!
Page 2 – Using the Windows 7 USB/DVD Download Tool
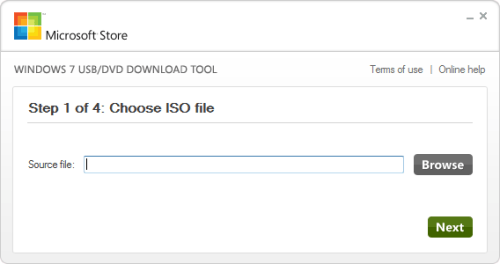
Now as that’s over with, let’s get started. If you don’t have the Windows 7 USB/DVD tool then it can be downloaded from here. Simply install the small tool and launch it. You will be greeted with the below screen, so simply point the program to the ISO file.
If you already have the Windows 7 DVD but wish to make an ISO of it for this task, we recommend the free trial of MagicISO. While our favorite tool ImgBurn would be our first choice, it does not appear able to correctly image the Windows 7 installation disc.
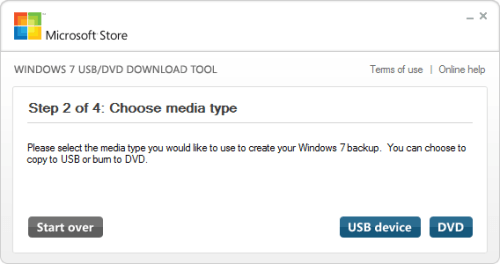
Next, choose if you wish to use the tool to burn your ISO to a DVD or image it to a USB device.
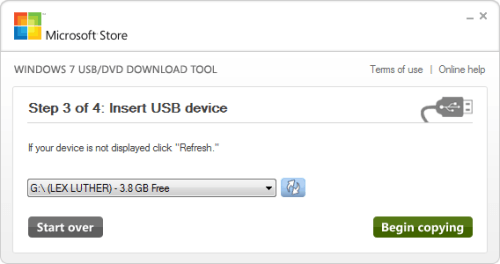
Now carefully select the correct drive, as you wouldn’t want to erase the wrong USB flash drive or hard drive! This process re-formats the USB device, so make sure it is completely empty and all files have been copied elsewhere before you proceed.
Please note that if the Windows 7 USB program says the Windows 7 ISO is not valid, then the program used to create the ISO file from the DVD either isn’t able to correctly image the disc or the file that was selected is partially corrupt. Most Windows 7 x64 ISOs should be around 3GB in size, while the x86 version will hover closer to 2.3GB.
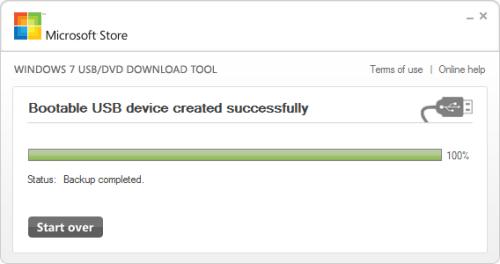
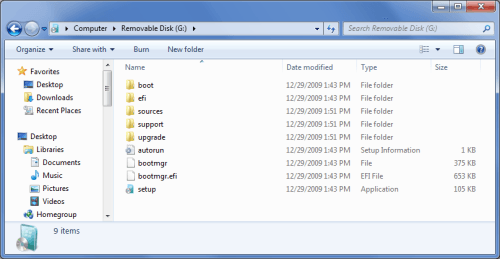
Now you have it, that’s all it takes to convert any USB flash drive into a Windows 7 installation disk! It’s so easy, even a cave man could do it. Your device should now look like this:
Of course there is one last important thing left to do, and that is to configure the BIOS to boot to your USB device! Leave the device plugged in when you reboot. Some BIOS’s differ but generally the setting needed can be found under the Advanced BIOS Features menu. Look for the “First boot device” and change it to USB-HDD. Alternatively if the computer offers a quick-boot menu, pressing F8 on ASUS, F10 on Intel, and F12 on Gigabyte motherboards during the POST’ing process will bring it up.
Most users will need to perform a second step. At the main BIOS screen go to the “Integrated Peripherals” menu and look for a setting labeled “USB Storage Device”. This setting should be enabled if present as it tells the BIOS to look for USB devices during the POST process.
Any computer that is recent enough to run Windows 7 or was made within the last several years should be capable of booting to a USB device, so if you have followed this guide and are still having don’t hesitate to ask for help in our forums!
Support our efforts! With ad revenue at an all-time low for written websites, we're relying more than ever on reader support to help us continue putting so much effort into this type of content. You can support us by becoming a Patron, or by using our Amazon shopping affiliate links listed through our articles. Thanks for your support!


