- Qualcomm Launches Snapdragon 4 Gen 2 Mobile Platform
- AMD Launches Ryzen PRO 7000 Series Mobile & Desktop Platform
- Intel Launches Sleek Single-Slot Arc Pro A60 Workstation Graphics Card
- NVIDIA Announces Latest Ada Lovelace Additions: GeForce RTX 4060 Ti & RTX 4060
- Maxon Redshift With AMD Radeon GPU Rendering Support Now Available
Zalman Z-Machine GT1000
Zalman is not normally known for their cases, but they are looking to please gamers everywhere with their Z-Machine GT1000. With it’s black aluminum frame, the case is built like a tank. But is it worth your $400?
Page 1 – Introduction
|
|
There are a few companies that we have all come to expect superb products from. This isn’t to say that these companies always hit home runs, but more often than not, a solid offering is usually a safe bet. One such company that has had a solid history in releasing well built, good performing products has been Zalman.
Over the years, we have taken looks at quite a few products from Zalman and almost all of them have scored extremely well. Just last month, we looked at their latest fan controller, the ZM-MFC2. As expected, it was a quality product that had a build quality second to none.
One area that Zalman hasn’t exactly been known for is the PC chassis market. Sure, they had the much publicized, prohibitively expensive, passively cooled and silently designed chassis and the case was a head turner, but nothing much more than that. They also have had a considerable amount of success with their Fatal1ty chassis but it too was not without its fair share of criticism.
Not intended for the case itself, the complaints were more directed towards the shameless branding of the case, making it more like a Team Fatal1ty/Zalman NASCAR PC than actually something that any self respecting gamer would dare take to a LAN party. Taking the criticism in stride, Zalman decided to simply take that same case, remove most of the logos from the front, back and side panels, add a few Zalman themed logos and dub it the Z-Machine GT1000. This new case, the GT1000, is the topic of today’s review and on our bench, ready to go.
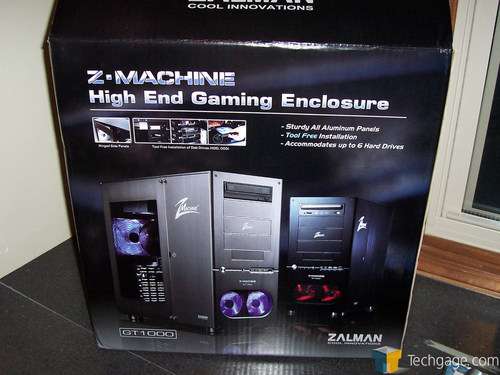
Shipping in a package not unlike what we have come to expect to from Zalman, the GT1000 is securely sandwiched between a pair of molded Styrofoam ends. With glossy pictures of the two different varieties of GT1000s, as well as information about the case on the sides, we quickly remove the case and get down to business.
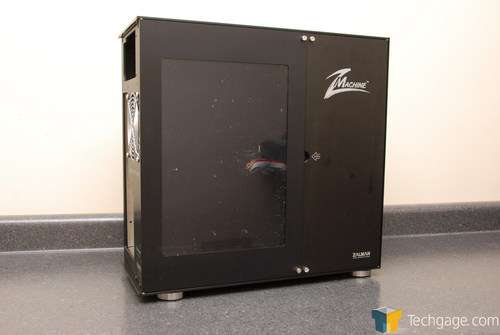
With the packaging out of the way, lets get a closer look at GT1000 itself. The right and left sides are divided into two different sections, each that are hinged and fold outward like a set of pantry doors. On the left side, like in most other cases designed for gamers, there is a window. With the two door design of the sides, the window in housed solely on the back panel and thus, will only show the area of the inside directly above the motherboard. This should help to hide the unsightly mess of cables that haunt almost everyone that cares about what the inside of their case looks like.
Disregard the look of the window in the follow picture. The protective plastic sheet is still affixed and will have to be removed. To do so, we first had to remove the window itself. This is achieved by removing the allen bolts that hold the window in place… and there are quite a few of them. Like everything else on this chassis, if two or three bolts would have done the trick, Zalman used eight. This gives the chassis an incredibly strong feel.
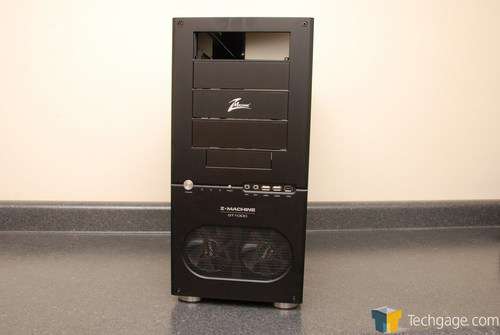
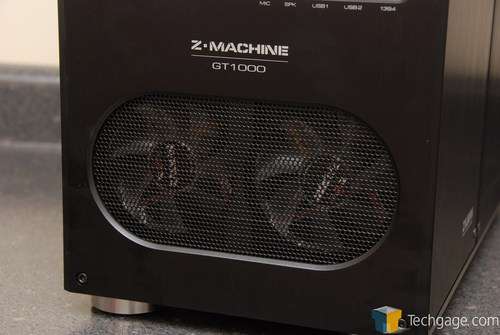
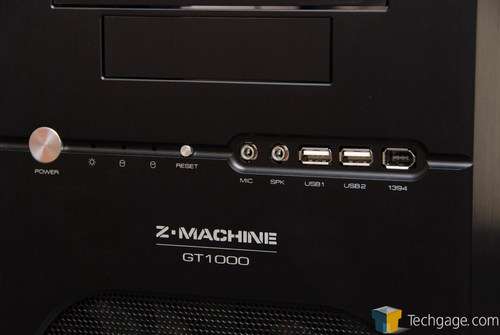
The front of the GT1000 shows us the four 5.25″ drive bays, a single 3.5″ bay, the I/O ports and power button as well as a pair of 92mm cooling fans positioned at the bottom of the case.
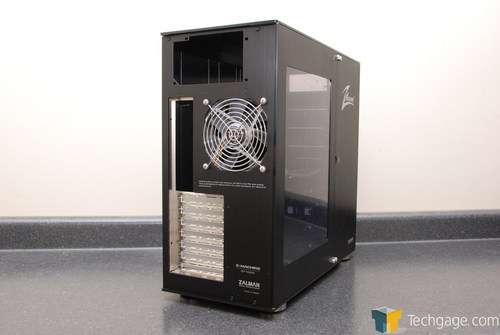
The back of the case is situated much like any other standard ATX compatible case on the market today. At the top there is a spot for your power supply and below it we find a 120mm cooling fan, the I/O shield and seven PCI slots.
Moving back to the front of the case, let’s take a minute and focus on the pair of 92mm fans that sit behind a mesh grill. These fans will glow red when the system is powered on and give the case an aggressive look. They should also provide adequate air intake as well.
Just above the front fans rest the I/O ports and power and reset buttons. From left to right, we see the power button, power LED indicator, primary and secondary hard drive LEDs, audio jacks, a pair of USB ports and a single FireWire port. With the popularity of eSATA, and the abundance of hardware that can now take advantage of this new connection, it’s a bit of a bummer to not see it included on the GT1000.
However, with most motherboards including this feature on the back I/O panel, this really isn’t that big of a deal but something that would have been welcome none the less. Notice the buttons and how they are made out of brushed aluminum. As with everything else on the case, Zalman clearly spared no expense in the making of the GT1000 and the quality of something as simple as the power and reset buttons completely prove this.
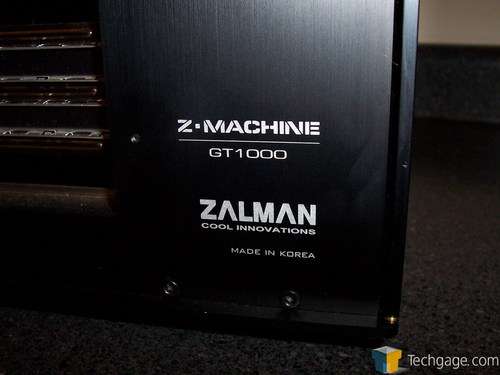
Like we stated earlier, the GT1000 is simply the Zalman Fatal1ty case, sans the logos every 3 inches. While there are far fewer than the original case, the GT1000 still isn’t without its own. While simple, there are a few logos containing both the name of the case as well as a reminder that Zalman is behind this work of art. On the sides there is a large Z-Machine logo and a smaller Zalman logo in the lower right hand corners.
Apparently not ones to leave well enough alone, we find one more section of logos on the back of the case in the lower right hand corner. This time around, Zalman has done a decent job of branding the case and on the GT1000, the logos are well done and have a bit of a classy look to them where as the Fatal1ty case was a shameless attempt to cash in on the Fatal1ty name and brand the name in as many places on the case as possible. This is just my opinions however.
One of the most notable features of the GT1000 is the side panels. The word panel really doesn’t fit in this case as the sides are more like a pair of doors that open out and away from each other. By taking the stellar Fatal1ty case and redoing the side panel, making the one large panel two separate panels, the evolution of this case has only gotten better. To hold these doors in place, there is a small magnet in each door and when shut, each can be secured with a pair of provided thumb screws at the top and bottom of the door.
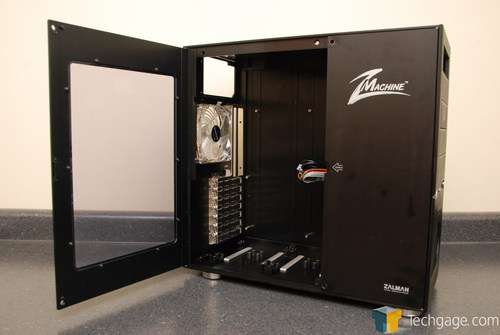
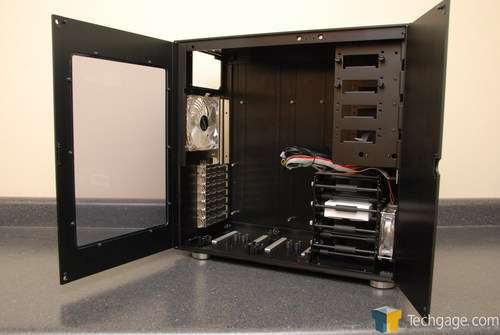
With the side doors open, we see the interior of the GT1000 in all its brushed aluminum glory. Everything from the hard drive cage to the drive bays is constructed out of black aluminum, giving the interior of the case a very classy look.
|
|
Support our efforts! With ad revenue at an all-time low for written websites, we're relying more than ever on reader support to help us continue putting so much effort into this type of content. You can support us by becoming a Patron, or by using our Amazon shopping affiliate links listed through our articles. Thanks for your support!


