- Qualcomm Launches Snapdragon 4 Gen 2 Mobile Platform
- AMD Launches Ryzen PRO 7000 Series Mobile & Desktop Platform
- Intel Launches Sleek Single-Slot Arc Pro A60 Workstation Graphics Card
- NVIDIA Announces Latest Ada Lovelace Additions: GeForce RTX 4060 Ti & RTX 4060
- Maxon Redshift With AMD Radeon GPU Rendering Support Now Available
Social & RSS Feeds
Latest Videos


Latest News
SSDs at the Office – Trials, Tribulations and Still Worth It

by Brett Thomas on February 15, 2013 in Editorials & Interviews, Storage
In advance of the busiest season at the office I work at, I wondered if adding an SSD to the slightly-aging Dell I use would offer a considerable gain in performance, and thus make the onslaught of work easier to deal with. Little did I realize, upgrading a Dell business PC requires a lot of patience, planning and snacks.
Page 1 – Introduction, Roadblocks & Acronis
SSDs have become synonymous with storage performance in recent years, and it’s hard to deny that almost any system can benefit from one. In particular, they hit the performance issues of business applications right on the head – a multitude of small files, constant temp files and rarely defragmented drives. However, due to increased cost and reduced storage space, SSDs have been and still are a hard sell for many businesses both small and large, particularly ones that depend on major PC manufacturers like Dell or HP to provide their desktop units.
These “big-box” manufacturers make buying a standard suite of mid-class systems a simple and fairly cost-effective practice, which is why businesses love them. However, anything outside of the base specification gets a painfully inflated price, including optical media, additional storage, RAM, or faster processors. Those making the buying decisions are often unable to justify the price of many upgrades even if they see a benefit, and then have to sell it to management that very likely knows very little about the technical side of things. By the time you get to an SSD, it’s a lost cause… the average business user knows exactly one thing about storage – you need more today than you did yesterday, and you will need more tomorrow than you do today. That makes it difficult to request $200 premiums for half the storage.
Looking around my own office, I am all too familiar with this situation. We function on a suite of Dell Optiplex 780/790 units, all of which are far from old enough to replace but are already showing the slow-down of a couple years of service. After all, they were never the top of the technology food-chain when they were made! These systems ship standard with a 5400RPM Seagate Momentus drive (160GB at the time of purchase), with the next storage option adding $100 to the price. The SSD option was right out the window at nearly $200 more per system (remember, businesses tend to buy in bulk!) for considerably less storage.
Needless to say, 5400RPM for your OS drive is a guaranteed system bottleneck, particularly for businesses (which tend to use lots of small files). Rob and I had even previously discussed that an SSD is often a far more noticeable upgrade than a new processor or more RAM. An SSD of similar size now costs about $100, but could it extend the life of an aging system through another upgrade cycle? And is it easy enough that most companies could find someone on staff knowledgeable enough to do it?
Those question put us in touch with the awesome folks at Kingston, which rules the roost right now for budget- to mid-grade SSDs with its new V300 line (check out our thorough review). Within a few days, I was staring at a new 240GB SSDNow V300 “upgrade kit” designed for just this kind of project.
The road to Dell is paved with good intentions…
Let’s get one thing straight – nobody buys Dells because they are wonderful to work on. In fact, one of the greatest reasons to buy one is because you never want to look at the insides of your computer. The company crams a lot into a little package in my office – the Ultra-Small-Form-Factor (USFF) case makes everything a tidy little ball of heat that can manage to cut your fingers to ribbons despite having no sharp edges. Importantly, these systems are not designed for DIY upgrades – there is no power connector available for a second hard drive, nor is there space to put one. This means that you’re using eSATA or USB to perform the transfer, and it leads to an important recommendation: Get an external drive with at least as much storage space as your standard C: partition that can use eSATA. They’re handy to have around the office anyways, and I sure wish I had one around when I tried this.
The 400Mbit/s (read that carefully – that’s 50MB/s) limitation of USB 2.0 is a killer here, and at least all Dells since 2009 have an eSATA port on the back. You’ll be transferring a lot of data – over 100GB in my case – twice over. That’s over an hour of transfer time alone if everything ran at perfect efficiency, which it doesn’t. First of all, that 400Mbit is split across all devices on the bus, with each connected device reducing your available bandwidth. Second, you’re transferring a lot of small files – this means your mechanical drive will not be running at peak efficiency to begin with, and you cannot just transfer block-by-block and sector-by-sector because of limitations we’ll talk about in a minute.
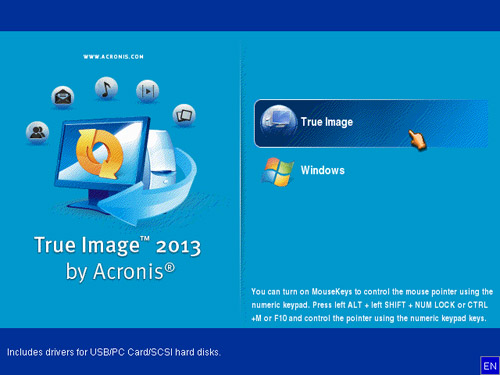
The Kingston SSD upgrade kit kindly supplies a bootable DVD of Acronis True Image HD. Any regular reader of this site will know that we’re long-time fans of Acronis’ work, and the inclusion of such a well-known and supported tool is a wonderful extra. Of course, if your systems are like mine and lack a DVD drive (that was an extra $139 per system, so we bought a single USB DVD to share since DVDs aren’t all that necessary anymore), you’ll need to connect one through the USB bus – which goes back to the above point about the USB bottleneck.
A little Windows surgery
So, you have your SSD, you have an eSATA external drive, and you have your DVD drive. We’re all set, right? Not quite, especially on Windows Vista or 7. Thanks to the recovery partition present on both Dell and HP systems, your C: drive is not actually a bootable partition. Instead, all of the boot files are hidden on the recovery partition (which is also hidden). So, we are going to have to move those files over to your C: drive to make it bootable, unless you want to really get to know the Windows Recovery Environment.
Why not just keep the recovery partition Well, you can, but there really isn’t any point. See, the recovery partitions are designed to bring the machine back to its factory default state, which it won’t ever be truly able to do once you’ve changed out the hard drive (the sector numbers and sizes will be different, even if everything else was exactly the same!) The recovery partitions and Dell’s diagnostic tools (contained in a separate hidden 30MB partition at the end) are both dead weight on your new system. So, smile – you get 15GB of storage back!
Anyhow, back to making your C: partition a bootable one for Windows Vista/7:
- Right click on “Computer” in the start menu and click “Manage.”
- Click on “Disk Management” under “Storage.”
- Highlight the partition BEFORE the C:\ drive, likely labeled “Recovery” or something similar.
- Right click and “assign drive letter” – any will do, but we’ll use R:\ for “recovery.”
- Open up an administrator command prompt.
- Enter: reg unload HKLM\BCD00000000 (yes, that’s 8 zeros after). It may error, that’s okay if so – we’ll know if that’s an actual error if you can’t copy something in step 8.
- Enter: robocopy r:\ c:\ bootmgr
- Enter: robocopy r:\Boot c:\Boot /s (if this errors, repeat step 6 – you probably typed one too few or many 0’s)
- Profit.
That should do it! You can now remove the R: drive letter if you want, but it’s not necessary. The C: drive is now a fully functional Windows installation unto itself, no longer requiring the crappy recovery stuff to be dragged alongside (once the MBR of the hard drive is fixed to point to the right place, of course).
Finally, an extra word of caution – if you have BitLocker encryption enabled on your machine, you must disable it at this time. If you do not, the entire cloning process will fail. You can re-enable BitLocker once everything else is done.
With that said, it’s time to pop in the DVD and boot into Acronis.
A backup is worth a thousand words
The first thing I tried to do when I got into Acronis was use the “clone” tool to simply clone my current drive to the SSD. Let me save you the hassle right now – DON’T. It’s a waste of a lot of time, and will end with the fabled “Sector 63” error that still to this day dots Acronis’ forums. It doesn’t work, because the MBR on a standard hard drive is 512b sectors (even modern 4096b drives emulate this feature) while an SSD is 4096b across the board. This causes a failure on Sector 63 (the last reserved MBR sector) every time, but that error won’t materialize until you’ve already wasted time through the whole copying process. PS – Acronis, if you’re reading, this is why that error happens – nobody on your tech support forums seems to know!
Instead, we’re going to make a backup of your current C: partition and put it on an intermediate drive – this is where the eSATA drive comes in (you do notice I said drive, and not just enclosure, right?!). You will need to go to “Backup”, select your OS partition ONLY (NOT the recovery partition before it), and back it up to a file on the external drive. I recommend no compression here as it saves considerable time and this is a temporary backup, but if you want a permanent backup anyhow then you may wish to add compression to preserve disk usage. Do NOT use “Sector by sector” as it’s basically a waste of space here, and adds even more time to the process. We aren’t transferring a perfect clone to the same-sized partition and a change we’re soon going to make will remap all of the files anyways, so there’s absolutely no upside to this.
This process will take a WHILE. Go make yourself a sandwich or something. To give you an idea, the process took about 3 hours on my system for a 100GB partition with no compression over USB 2.0 (told you it was slow!).

Support our efforts! With ad revenue at an all-time low for written websites, we're relying more than ever on reader support to help us continue putting so much effort into this type of content. You can support us by becoming a Patron, or by using our Amazon shopping affiliate links listed through our articles. Thanks for your support!