- Qualcomm Launches Snapdragon 4 Gen 2 Mobile Platform
- AMD Launches Ryzen PRO 7000 Series Mobile & Desktop Platform
- Intel Launches Sleek Single-Slot Arc Pro A60 Workstation Graphics Card
- NVIDIA Announces Latest Ada Lovelace Additions: GeForce RTX 4060 Ti & RTX 4060
- Maxon Redshift With AMD Radeon GPU Rendering Support Now Available
A Fine Line Between ‘Inexpensive’ and ‘Cheap’: BitFenix Neos Review

BitFenix’s Neos mid-tower chassis sits at the lowest rung of the company’s chassis product line. As such, it comes in at a very affordable $59.99 – a price that allows anyone to get a piece of the action. But a low price doesn’t always deliver on the “value” aspects we’d hope to see, so let’s find out what kind of value the Neos is.
Page 2 – Installation & Testing
I’ll be reviewing the BitFenix Neos on a few key criteria: Ease of system installation; cooling performance; a subjective evaluation of its noise output characteristics; and a few miscellaneous subjective observations and comments about the chassis and its design and features.
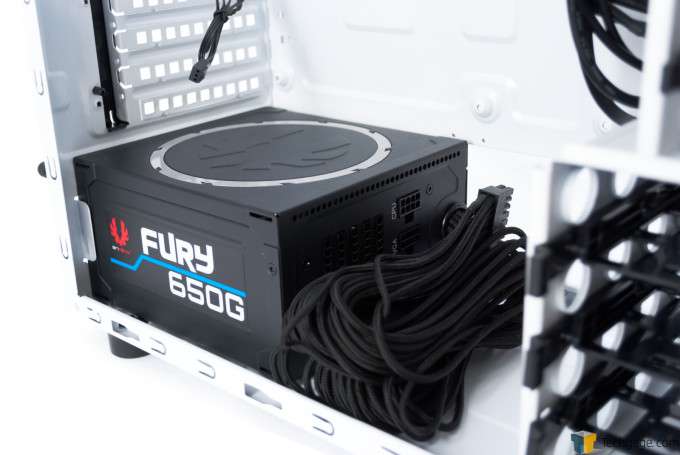
Because BitFenix was so generous in providing the Fury 650G for our testing, I think it’s more than appropriate that it should have the honor of being the first component installed into the Neos. Installation is easy and typical. Users have the choice of mounting their PSUs with its fan facing either up towards the motherboard tray or down towards the floor. I’ve chosen to mount the Fury 650G fan-side down.
Before proceeding further with the installation, here’s the rest of our test system:
| Chassis Test System | |
| Processors | Intel Core i5 2500K @ 3.3GHz/1.2V VCore |
| Motherboard | MSI Z77A-GD65 |
| Memory | GSkill Ripjaws DDR3 1600 2 x 4GB |
| Graphics | EVGA NVIDIA GeForce GTX680 (reference design) |
| Audio | Onboard |
| Storage | Crucial C300 (128GB) SSD |
| Power Supply | BitFenix Fury 650G |
| Chassis | BitFenix Neos |
| Cooling | |
| OS | Windows 8 64-bit |
Motherboard installation is complicated somewhat by the fact that there is precious little room to operate in, particularly towards the top of the Neos. This is exacerbated if you have large hands. Now mine aren’t exactly baseball mitts, but it’s still nearly impossible to work inside the Neos near its roof section. I strongly suggest plugging in the 8-pin CPU power cable before maneuvering the motherboard into position, particularly if the 8-pin connector is in its typical location on the motherboard’s top-left corner. Even if you do this, though, it’s still a major pain maneuvering the cable and the motherboard so that the latter is installed properly onto the motherboard tray. As things stood, though, because of another issue I discovered later, I had to kludge the motherboard installation and forego using the top left and top center screws. I’ll describe why this was necessary in a couple of paragraphs.
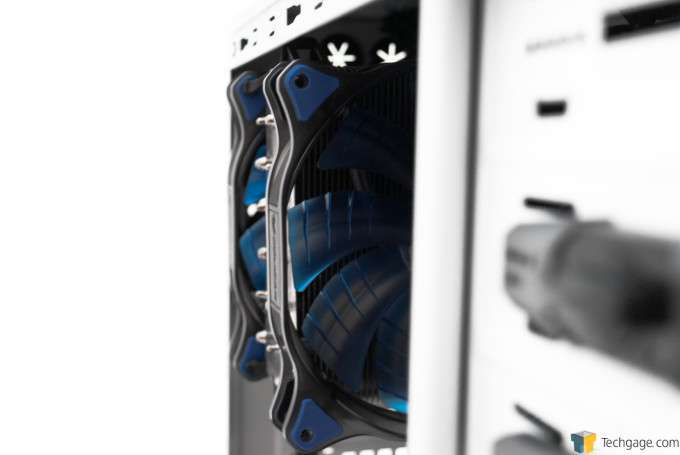
As soon as I put the motherboard in, I ran into another issue, this time with the height of the NZXT Havik 140. There’s no way for it to fit with the side panel installed. I did a bit of research, and I found that the Neos supports CPU coolers with a maximum height of 158mm; the Havik 140 is 8mm too tall.
This simply won’t do; our test system would be useless without a CPU cooler. So I beseeched Techgage top banana Rob and told him about my discovery. Thankfully, he was able to arrange the acquisition of a more suitable CPU cooler.
Unfortunately, the need to uninstall the Havik 140 revealed yet another issue.
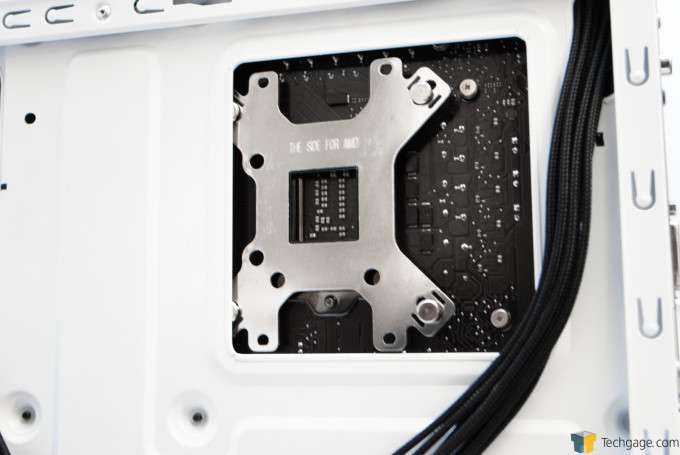
The CPU backplate cut-out was just a bit too small, blocking access to the CPU cooler retention system; this necessitated removal of the motherboard to uninstall the Havik 140 (as well as to install the new CPU cooler). It may be that your motherboard’s CPU backplate may be 100% accessible through the cut-out on the Neos, but it wasn’t for my system. It’s an unfortunate and inconvenient coincidence.
I scarcely couldn’t believe it, though, when the alternative CPU cooler Rob arranged to be sent to me was likewise just a bit too tall. This time, the heat sink was just 2mm too tall (and that was just the heat sink itself; the fans protruded a couple of millimeters more).
By this point I was getting a bit annoyed, if I’m honest. Rob came through for us again, though, and arranged for another CPU cooler to be sent to me. Each delay, by the way, added to the time I was spending to review the Neos. Thankfully, though, the third time, finally, was the charm.
Now that we’ve had our third go at system installation, it’s appropriate to elaborate on why I didn’t use the top left and top center screws for motherboard installation. It was simply impossible to do so due to the absolute lack of space available. Because I had to pre-install the CPU cooler to the motherboard due to the smallness of the CPU backplate cut-out, there was simply no way to fit any of my screwdrivers in the limited space available and install the two remaining screws to secure the motherboard onto the motherboard tray. I cannot remember any other PC chassis causing these types of niggling issues, especially a modern one.
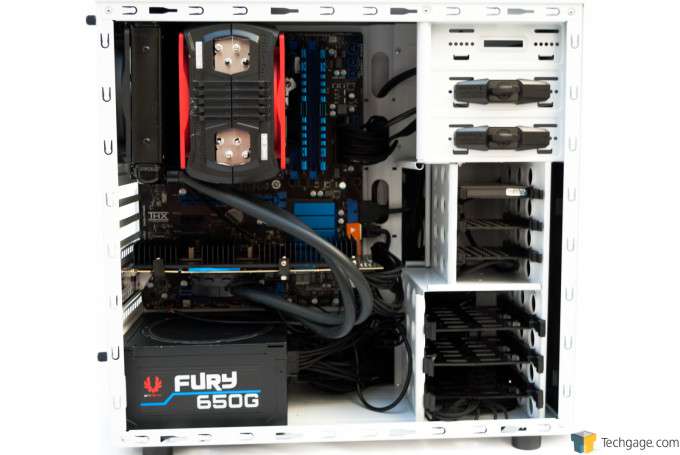
At any rate, after motherboard installation, I proceeded to complete the installation of the GPU and its AIO cooler. This necessitated the removal of the 120mm fan installed in the rear exhaust position. This is the only part of the Neos where users can mount a radiator. Not only that, but users are also limited to just a single 120mm radiator. This means only one component (either the CPU or the GPU) can be water-cooled; there’s simply no way to do both without modifying the Neos.
Because of the location of the radiator mounting, though, I had to install the GPU on the lower 16x PCI-E slot on the motherboard (instead of the upper primary slot) to allow the hoses some more room. Installing the GPU in anything but the primary PCI-E slot may impact its performance; however, since we’re really only interested in the Neos’ thermal performance, mounting the GPU in the secondary PCI-E slot shouldn’t impact the GPU in any negative way for this specific purpose.
Mounting the SSD into its sled was very easy. I don’t mind securing it with four screws, but I can imagine some users may think it’s a slightly inconvenient solution.
Cable management is challenging, particularly because of the shortage of space in the Neos. Thankfully, the Nanosleeve braiding on the Fury PSU seems tailor-made for the Neos’ tight confines. Using a PSU with stiffer, bulkier cables will definitely frustrate builders who like their cabling jobs to be as neat as possible.
And speaking of cables, hooking up the front I/O leads to their headers on the motherboard is more challenging than usual simply because of the lack of space inside the Neos. Using tweezers might help, but I don’t think users ought to go to such extremes just to work inside their PC chassis.
You may have noticed just how much I’ve said about system installation so far. Moreover, most of what I’ve said hasn’t exactly been complimentary, either. Installing your PC’s components into the chassis is normally a straightforward process. It is anything but in the Neos. I hate to say it, but I cannot overstate just how annoying system installation is with this chassis.
Hopefully it can redeem itself when it comes to thermal performance.
Because we are now dealing with a brand-new CPU heat sink, it wouldn’t be fair to compare thermal performance data achieved on the test system versus older data acquired from two previous chassis reviews (here’s the first, then the second). Having said that, testing protocol shall be identical to how we’ve been doing it with this test system: I keep the room ambient temperature at 72°F/22.22°C; I add no fans to the PC chassis, using only what’s installed out of the box or using only what comes with the CPU and GPU coolers I’m using, and I use OCCT and MSI Kombustor to generate peak loads and temperatures for the CPU and GPU, respectively.
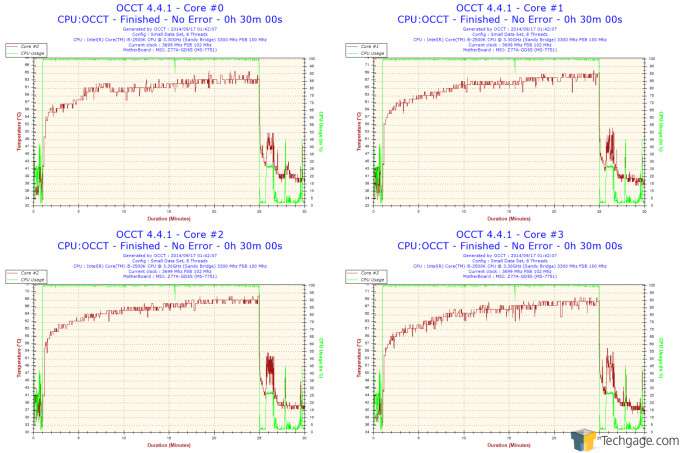
So here is how the BitFenix Neos performs in terms of CPU peak temperatures:
OCCT generates peak CPU temperatures of 64°/69°/68°/69°C for each of the i5-2500K’s four cores. That means there’s a delta of 47°C between the ambient room temperature and the hottest core temperatures.
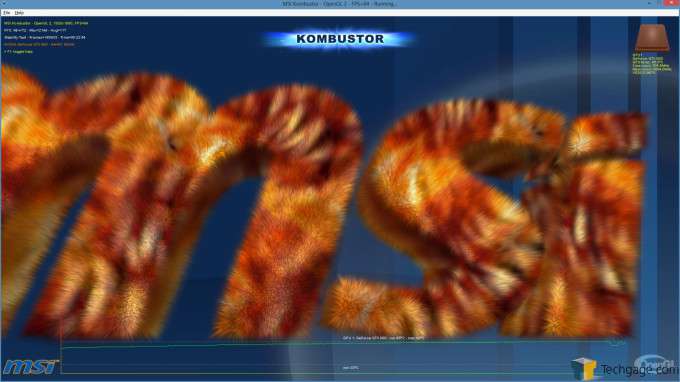
And as for the GPU, MSI Kombustor heats up our AIO-cooled GTX 680 to 68°C (a delta of 46°C from ambient).
While we cannot directly compare CPU temperatures, it’s perfectly valid to compare GPU data. The BitFenix Neos does worse than both the Corsair Obsidian 450D (63°C) and the Puget Systems Test Bench (50°C). Five degrees Celsius may not seem like much, but a difference of 18° is staggering. The data suggest that the GPU radiator’s performance is suffering from air starvation. Because the Neos doesn’t have any intake fans, any air that does make it into the chassis must be sucked in through the front intake, relying on just the fans on the CPU cooler and the radiator. That’s a very inefficient way to feed a PC’s need for cooling air. And that’s with a full-mesh front fascia.
Now, in terms of noise suppression, the Neos is quite good. I couldn’t hear any noise at all from the fans inside. At least that’s something BitFenix did right.
As far as miscellaneous comments go, well, I’m not so impressed with the feel of the materials used on the Neos. There is preponderance of plastic pieces in the Neos’ construction. The feet, in particular, feel a bit flimsy, as does the black plastic panel covering the PCI expansion slot anchor points. Even some of the metal portions of the chassis feel less robust than they should. The PCI expansion slot area seems to lack rigidity, for example.
And I’m not impressed at all with the “disposable” PCI slot covers. If there’s any one feature on the Neos that screams “cheap” to me, it’s this.
Let’s wrap this review up with some final thoughts.
Support our efforts! With ad revenue at an all-time low for written websites, we're relying more than ever on reader support to help us continue putting so much effort into this type of content. You can support us by becoming a Patron, or by using our Amazon shopping affiliate links listed through our articles. Thanks for your support!


