- Qualcomm Launches Snapdragon 4 Gen 2 Mobile Platform
- AMD Launches Ryzen PRO 7000 Series Mobile & Desktop Platform
- Intel Launches Sleek Single-Slot Arc Pro A60 Workstation Graphics Card
- NVIDIA Announces Latest Ada Lovelace Additions: GeForce RTX 4060 Ti & RTX 4060
- Maxon Redshift With AMD Radeon GPU Rendering Support Now Available
A Fully Modular Mini Tower: Cooler Master MasterCase Pro 3 Review

Modularity and customization are at the heart of PC building. With so many different components and needs, it’s hard to find a chassis that can do it all. Cooler Master’s MasterCase series aims to please as many builders as possible. Now with the MasterCase Pro 3, mini-tower builders now have something to work with. Let’s check it out in this review.
Page 1 – MasterCase Pro 3 Design & Build
Our last chassis review, Tom’s look at the EVGA DG-87, was all the way back in September. In that time we’ve published our thoughts on a lot of hardware, but today we’re back with a look at the Cooler Master MasterCase Pro 3.
The MasterCase line of cases has been around for a while and currently there are a few mid-tower offerings. The MasterCase 5 series offers what Cooler Master calls their FreeForm Modular System, allowing users to mix and match exterior parts, such as the top panels and chassis doors.
The interior of the chassis offers additional flexibility to add and remove pieces as space allows and hardware calls for. Cooler Master has taken the benefits of the MasterCase Pro 5 and incorporated them into a smaller offering. For this review, we are taking a look at CM’s Pro 3, a chassis designed for micro-ATX and mini-ITX motherboards.
I’ve had little recent experience with Cooler Master products other than talking with them at CES over the last few years. When the opportunity to check out their latest chassis offering, I was happy to take it on and put it through its paces. In fact, over the last eleven and a half years with Techgage, I’ve only looked at three products from Cooler Master, with the most recent being at the end of April, 2007. Almost ten years ago. The last chassis I’ve dealt with in a review fashion was the In Win D-Frame Mini and with that review in mind, the same motherboard, CPU and cooler were used in this review.
Building a PC is a very personal experience. Almost everyone that goes through the process of picking out their parts and piecing them together, put a lot of thought and pride into the final product. No piece of that process is more visible than the chassis itself. Cooler Master knows this, and also knows that we of the Master Race like to customize the bejeezus out of our PCs. It’s with that in mind that their MasterCase Pro series offers maximum customization options, allowing many different permutations of the same overall case. Let’s get into it.
Exterior
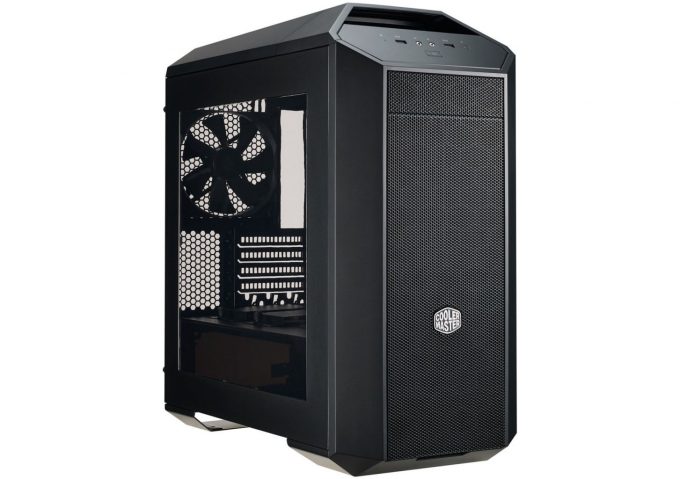
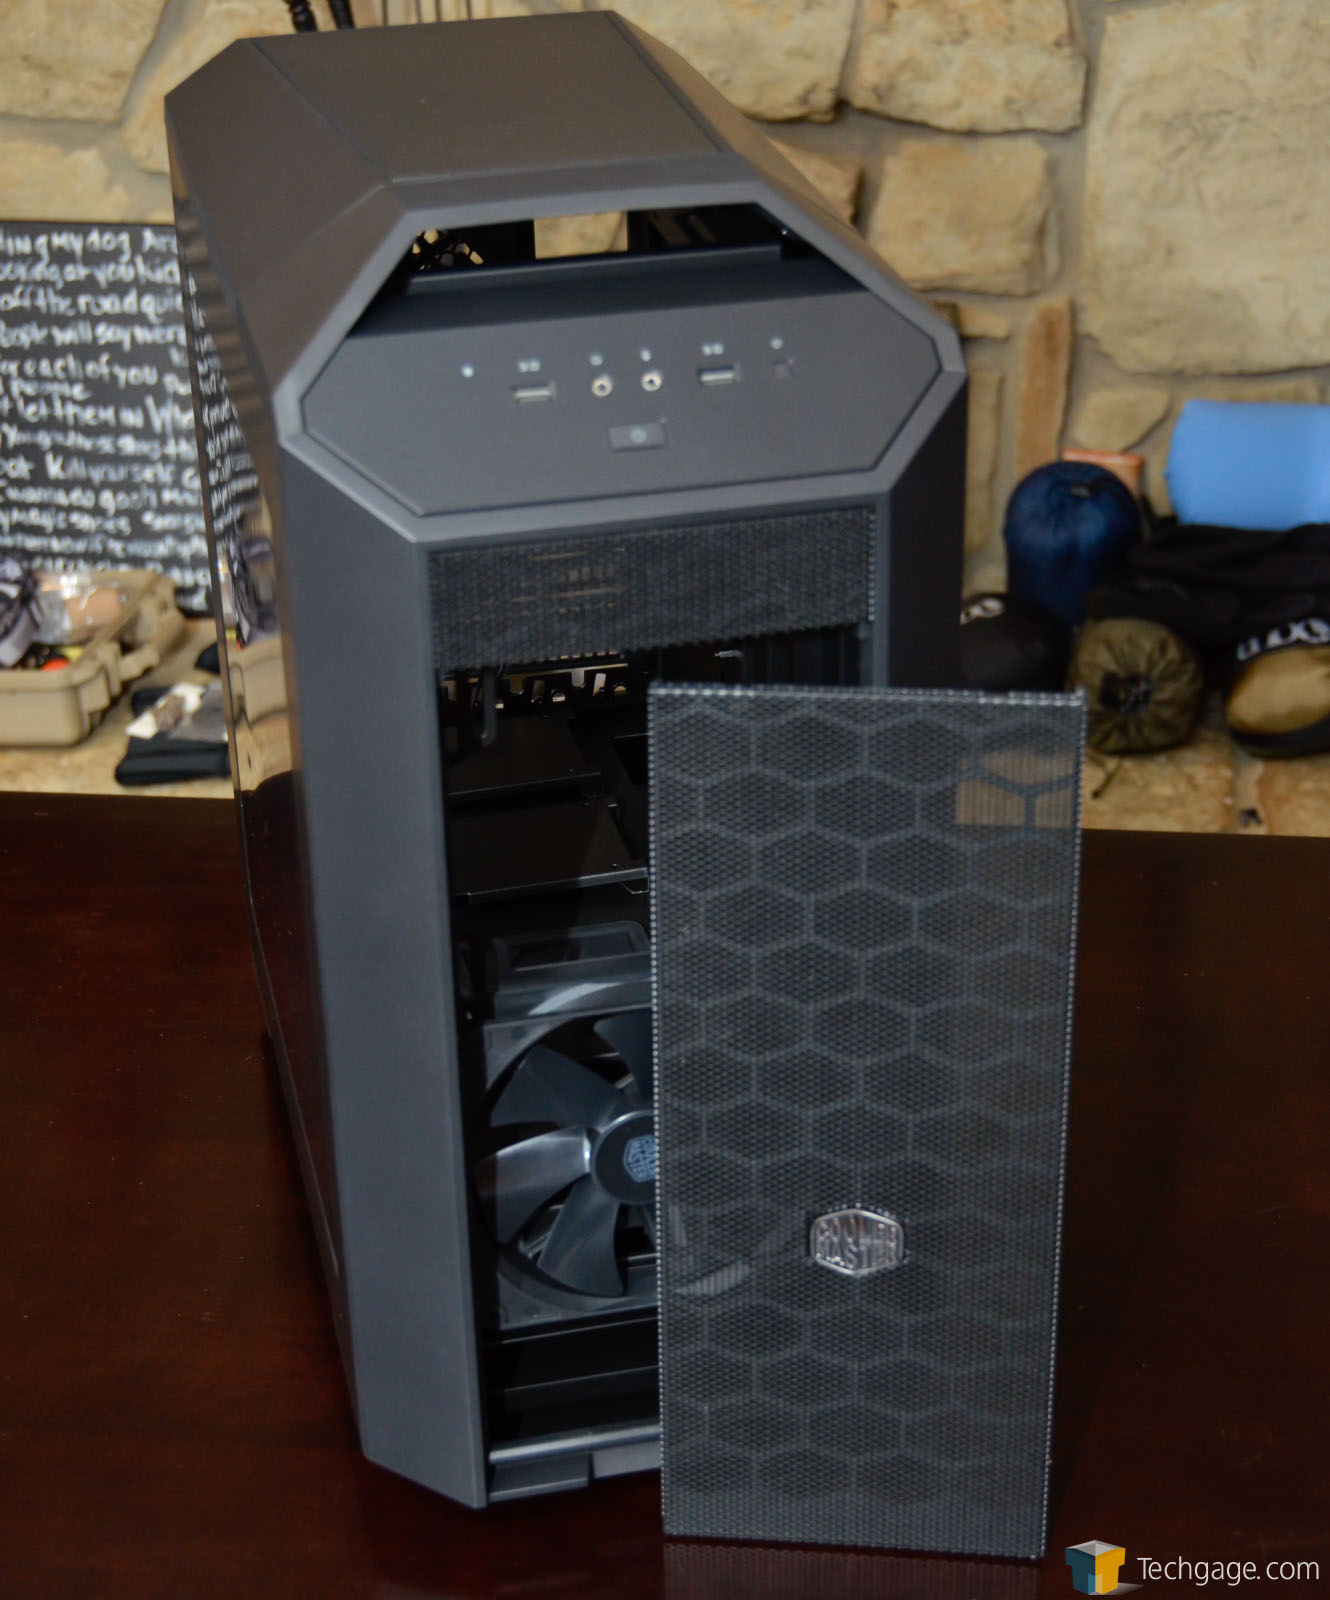
The stylings of the MasterCase Pro 3 are fairly unique, but still manages to remain familiar. Similar to other cases, the face of the chassis is perforated from top to bottom. This perforated face is removable, making the installation of radiators or cleaning a breeze. Like other cases of this size, there is a single 5.25” bay on the front for those of us that still like to have an optical drive in their PCs (it’s been about 6 years since I’ve had one in my daily driver).
Like many other cases today, the side panel is windowed so we can view upon the glorious components that give us max frame rates. That, however, is where the commonalities end. The front IO panel is situated in the middle of an angled section on the top front corner of the chassis.
From left to right, the MasterCase Pro 3 offers an LED for disk activity, a pair of USB 3.0 ports flank the headphone and microphone outputs (both support HD audio), and then finally a reset button. Just below the line of IO and centered is the power button. Above all of this is a large air intake that looks like a hot rod’s hood scoop and it doubles as a carry handle (steel reinforced) for those that like to take their gaming on the road with them.
As part of the Cooler Master FreeForm Modular System, accessories can be purchased to change the look of your MasterCase Pro 3. A tempered glass side panel can be installed to replace the Plexiglass clear window on the base model. Additional accessories that can be added are 2 and 3 bay hard drive bays, cooling brackets, Graphics card supports, and fans. More on that in a bit.
The top of the MasterCase Pro 3, behind the carry handle, is constructed of plastic and is also perforated for additional airflow. If this aesthetic isn’t for you, the screen can be covered with a plastic insert that gives the top of the chassis a more unified look. If you choose to install a radiator at the top of the MasterCase Pro 3, the entire top can be removed, as well as the steel bracket that holds either fans or a radiator.
The back of the MasterCase Pro 3 is pretty standard. The chassis has a bay for a bottom mounted PSU, and a faceplate that is removable to ease the installation. Above that is a set of 5 PCI brackets and to the right of them is a section of perforated steel for airflow. Still moving upward, we have the motherboard IO opening and ventilation for a pre-installed 140mm fan. This is the same model of fan that is pre-installed in the front of the case and both spin at 1200 RPMs.
Interior
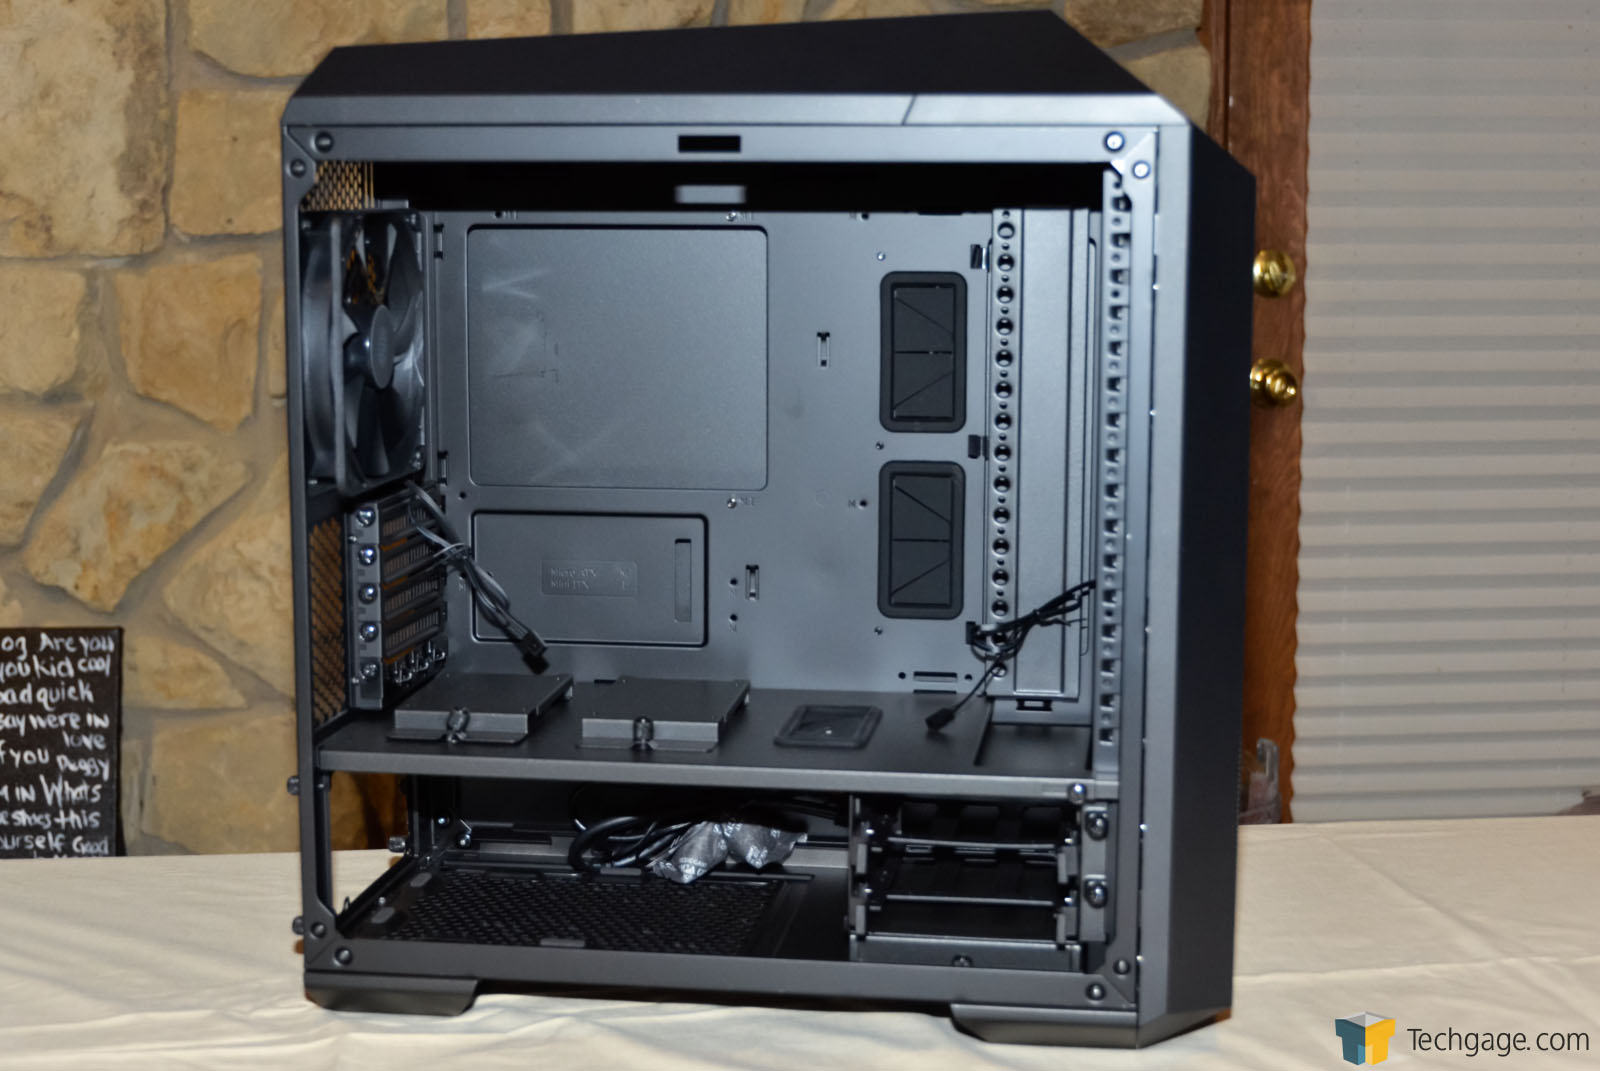
The interior of the MasterCase Pro 3 looks standard but there are a few neat features that Cooler Master designed into the mini-tower. The divider that separates the power supply and hard drive area can be removed if needed. When left in place, it has a grommeted hole to run PSU cabling through as well if so desired. There is also ample space behind the non-windowed side panel for cabling to be routed and Cooler Master included cable stays to help keep them in place.
At the front of the divider there is space cut out to allow the installation of a 280mm radiator (maximum length supported is 297mm). This panel also has a pair of removable mounts for 2.5″ hard drives or SSDs. Sharing the area under the divider with the PSU is a removable hard drive cage accommodating up to two hard drives. These drives are installed by using the included tooless plastic drive sleds, making their installation and removal simple.
Running vertically at the front is something Cooler Master is calling a sliding clip and click panel. This can be moved horizontally to two different locations (only about an inch apart). This is to be used for reservoir installation or to support a 5.25″ drive with the included bracket. This bracket is necessary as the MasterCase Pro 3 lacks a proper internal drive cage.
The MasterCase Pro 3 accommodates mini-ITX and micro-ATX motherboards and the standoff holes being labeled is a welcome sight. To the right of the motherboard are a pair of grommeted holes for cable management.
Support our efforts! With ad revenue at an all-time low for written websites, we're relying more than ever on reader support to help us continue putting so much effort into this type of content. You can support us by becoming a Patron, or by using our Amazon shopping affiliate links listed through our articles. Thanks for your support!


