- Qualcomm Launches Snapdragon 4 Gen 2 Mobile Platform
- AMD Launches Ryzen PRO 7000 Series Mobile & Desktop Platform
- Intel Launches Sleek Single-Slot Arc Pro A60 Workstation Graphics Card
- NVIDIA Announces Latest Ada Lovelace Additions: GeForce RTX 4060 Ti & RTX 4060
- Maxon Redshift With AMD Radeon GPU Rendering Support Now Available
Adobe Photoshop Lightroom 4 Review

Adobe’s Lightroom 4 has been available for a couple of months now, and our very own shoot-a-holic Brett Thomas has been using it regularly since its release. The company has been touting much with the program’s latest iteration, so join us as we explore whether it’s worth upgrading to or if it’s just more of the same.
Page 1 – Introduction, Video, Geo-Tagging & Editor Changes
It seems like it wasn’t even all that long ago that I was writing about Adobe having released Lightroom 3, a product that the company had been aiming squarely at professional photographers and pro-sumers. At the time, I had enjoyed a lot of what LR3 had to offer, but as a user since the LR1 beta, I found myself a little frustrated by the lack of changes. After all, that beta was released in January of 2006 – four years prior to the release of LR3, and many of the problems that existed at the outset existed in that version as well.
I’d like to tell you that this has changed tremendously with the March 2012 release of Lightroom 4. I would love to tell you that the export plugins (particularly to Web) have become more powerful, that annoying niggles of the UI and external editor interfaces (really, do I require EVERY edit to be a 100MB TIFF file?!) have become more robust and configurable for your workflow. And I’d about give my front teeth to say it’s worth the price of admission to get to use its new features.
This article will let me do about half of that, at least. But before you start thinking “Well, it’s not that great…”, let me start off with that “price of admission” point: Lightroom has fallen to HALF of its original price, making it $149 for the full version or a whopping $80 for the upgrade…
…and that changes everything.
Overview of Lightroom 4
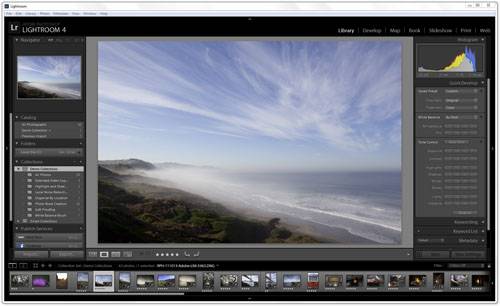
For the truly uninitiated, I am going to recommend that you take a look at my primer on Lightroom 3, because everything that was said there about workflow still holds true. Lightroom is a “home base” of sorts – it holds your catalog of pictures as well as all of their edited versions (quite handy if, like me, you edit the same image three or four different ways). It allows sorting, tagging, metadata, grouping, previewing and exporting – essentially everything that you need for the hub of your workflow.
Though it is not a great editor in the true sense of the word, it has some excellent touch-up tools that can help you quickly clean up your shots with exposure correction, cropping, localised adjustments, blemish repairs, and color correction. Along with these abilities, LR has an exhaustive list of plugins that tie to external programs like Photoshop, Photomatix HDR and others. Everything you do in the program is non-destructive – it tracks every edit and even makes copies of the original image to give to external programs. This makes sure your original shots always remain, and you can always go back to them.
When you’re ready for those shots to leave your computer, you start to see the true power of Lightroom – plugins (both by Adobe and third parties) exist for pretty much anything you want. From Facebook to FTP, Shutterfly to Snapfish, you can click a picture and click a button to send it off. Want to add pictures to a website? No problem. Want to create an entirely new website? Also not a problem. A few clicks on a template and some basic information will have you rolling in no time.
So what’s new?
Aside from the price, Lightroom 4 boasts a large number of new features – at least according to the Adobe website. But here’s the catch – not a single one of them is all that useful to a prosumer or professional photographer. This update has included a litany of new features aimed squarely at Joe Consumer and the movement toward making higher-end editing simpler and more intuitive for those who don’t want to sit and learn Photoshop just to brighten a picture properly.
Now, this may sound like I’m taking a shot at LR4. In truth, it’s a mixed blessing. Anything that will help people take better pictures and take care of their pictures better, I’m happy with. LR4 is the first version of this (or any other true workflow software) that I’d feel comfortable recommending to a person who is either new to photography in general or just wants to keep his or her snapshots in better order. The first reason is the new price – at $149, it becomes an acceptable splurge for a budding shutterbug. The second reason, though, is that almost every new feature is perfect for the amateur who wants to do a bit more with his pictures and home videos without getting so lost in the details that he forgets what he’s doing.
Viva La Video
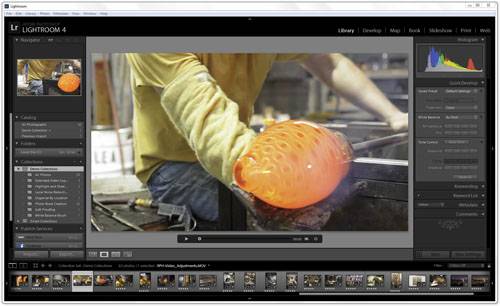
Lightroom 4 properly supports video, which has been one of the major talking points in regard to its release. Now, not only can it accept the video that you shot of your cousin’s (or client’s) wedding, it can even edit it. This makes Lightroom probably the most useful “hub” for your average home user that is available. Despite its seemingly basic editor, LR4 lets you do pretty much everything you need – cut frames, merge videos, and even apply filter presets the same way as you would to a picture. Many of Lightroom’s other basic corrections can also be applied, including white balance, exposure, and even split toning.
The engine for LR4’s video comes out of Adobe Premiere, giving it the professional pedigree to help it with its late arrival into the field. The addition of video to many higher-end SLR cameras over the past couple years makes this feature a welcome addition if you are the type of person to use it, as a photographer now doesn’t need to cough up the extra expense for a video editing program to offer limited service in this field. Of course, one could question whether a photographer should be trying to do a videographer’s job – but the extra feature is nice, and it doesn’t detract from Lightroom’s efficiency if you don’t make use of it.
Tag! You’re it… or here.
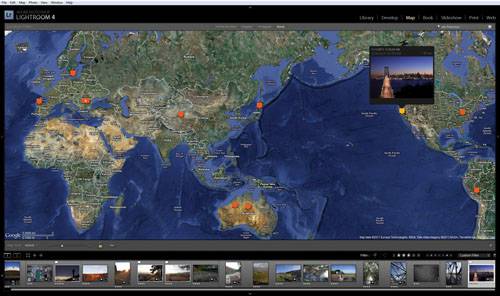
One of the other well-trumpeted additions to Lightroom 4 is the new geotagging feature, which allows you to add location metadata to your pictures and visualize them on Google Maps. The tie-in for this feature is actually quite seamless and functions brilliantly, letting you tag and upload images in groups automatically while creating “private zones” for locations that you would not want geo-data to upload. A new “Map” area has been included on the main navigation bar to keep it in sight but out of the way.
Geotagging is another nice ‘extra’ for the home user, though again I question its professional functionality. In my entire time using LR4, I have touched the feature all of once – just to make sure it worked. That being said, it functions much like the video benefit in that if you don’t want to use it, it’s not in the way – but its existence is appropriately robust to make sure you can do what you want without spilling your entire life onto the Internet.
Newly Edited Editor
The normal workflow in LR4 hasn’t changed, with the tabs for the Library, Edit, and then all of the export options, and this is a good thing. The interface is one of the greatest things about LR, and Adobe has taken care to keep what works and clean up what doesn’t.
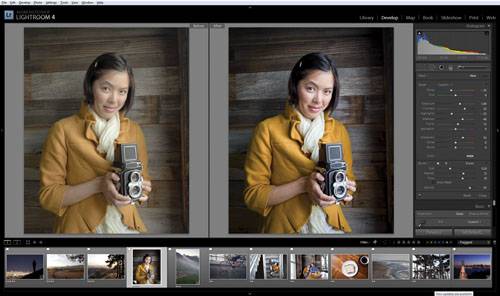
The formerly confusing (and somewhat incorrectly named) “Fill Light” and “Recovery” are gone along with the “Brightness” slider, and have been replaced by two simple controls: “Highlights” and “Shadows”. These two sliders work together to squeeze as much tonal range out of an image as possible. Adobe has gone so far as to say that, in time, the whole process of HDR will be unnecessary with tools like this – I’ve yet to be convinced. However, the new sliders function MUCH better than the old system did, allowing you to quickly and easily set your white and black points for an image (using tools now simply named “Whites” and “Blacks”), and then adjust your dynamic range within those points by using the Highlight and Shadow sliders. It works, it works well, and it’s simple enough that even my grandma could figure it out.
The other major edit to the editor is that of localized contrast enhancement and localized sharpening. In the past, it was possible to “paint on” a number of color and brightness correcting actions using a paintbrush or gradient. Adobe has now expanded those options to include all of the contrast enhancement tools – clarity, highlights, shadows, and general contrast. It even allows selective noise reduction, blurring and sharpening to be painted on, adding a whole slew of things that you no longer need to open Photoshop for.
Support our efforts! With ad revenue at an all-time low for written websites, we're relying more than ever on reader support to help us continue putting so much effort into this type of content. You can support us by becoming a Patron, or by using our Amazon shopping affiliate links listed through our articles. Thanks for your support!


