- Qualcomm Launches Snapdragon 4 Gen 2 Mobile Platform
- AMD Launches Ryzen PRO 7000 Series Mobile & Desktop Platform
- Intel Launches Sleek Single-Slot Arc Pro A60 Workstation Graphics Card
- NVIDIA Announces Latest Ada Lovelace Additions: GeForce RTX 4060 Ti & RTX 4060
- Maxon Redshift With AMD Radeon GPU Rendering Support Now Available
ASUS P5K3 Deluxe WiFi-AP
Intel’s P35 chipset was only just released, but ASUS already has seven motherboards which utilize it. We are taking a look at one of their top models, the P5K3 Deluxe. This board utilizes DDR3 memory and has WiFi capabilities built-in. It also turns out to be a great overclocker.
Page 1 – Introduction
|
|
Intel last month released their highly anticipated chipsets, P35 and G33. Both bring a few new things to the enthusiast table, which we laid out in our article from last month. In general, the P35 was a modest upgrade from the P965, allowing a little more flexibility. Of the upgraded features, my personal favorite would be the fact that you can disable SATA ports not in use, which gives you the ability to turn a drive invisible and undetectable by your operating system.
Not surprisingly, the key feature to garner a lot of attention is DDR3 support, and it’s no surprise. It’s not often we are greeted to a new memory architecture, especially so soon after DDR2 seemed to just catch on. It’s well known that DDR3 is not going to change the computing landscape, but it is faster and could be worthwhile to bandwidth hungry users.
On the day P35 was announced, so were many motherboards utilizing the chipset. Of these were ASUS’ own P5K Deluxe and P5K3 Deluxe, both of which utilize the ASUS WiFi-AP feature as well. We received our boards late, which is why our performance benchmarks are also late. We will be now covering all of the details between P35 and previous chipsets in this article. In this particular review, we will be evaluating the performance and feature-set of the P5K3, but will be taking a look at the P5K in the near future.
The P5K3 Deluxe is targeted for enthusiasts and regular consumers alike, but moreso to the enthusiast thanks to its $250 price tag. Besides the P35 chipset, it has an impressive feature-set, including a technology they call “Super Memspeed”, which they claim to increase memory performance up to 90.6%. Although it’s difficult to find proper documentation regarding the technology, it appears it has more to do with overclocking than simply installing DDR3 and being done with it.
In preparation for Intel’s upcoming Penryn architecture, the board natively supports 1333FSB, although you can stick to 1066FSB with a current-gen processor. Of course, the Core architecture is well known for being the best overclockers available, so 1333FSB should prove no problem even before Penryn. Thanks to this, if you have a pair of DDR3-1333 memory, you could run it with a 1:1 ratio.
We will touch a lot more on P5K3 specific features as we pass by over them, and also elaborate on the ASUS software that adds a slew of benefits to your PC. Before we go into that, lets take a look the board itself.
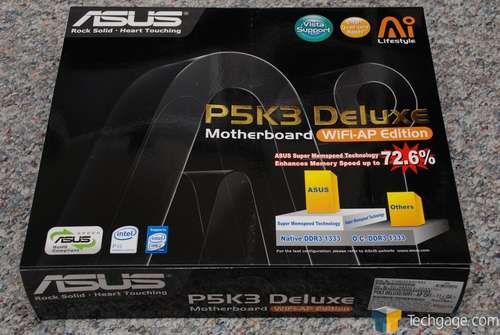
As is the usual from ASUS, the box for the P5K3 is packed with relevant information. They give a prime spot to their Memspeed technology, although here the estimated figure is a little lower than it is on their own website. The board is also Vista supported, but we have not begun testing the board on that OS thanks to lack of demand. In the future when Vista becomes a more common OS, we will shift our focus there.
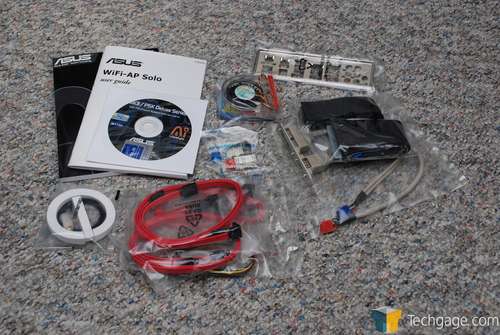
Included in the pile is the board manual, WiFi-AP manual and the driver disc. Also here is the I/O shield, S-ATA cables, IDE cables, Q-Connector, WiFi antennae and also a heatsink fan. Throughout tests, I found little use for this, although it would have made more sense for them to include two, since there is more than one spot on the board to place it.
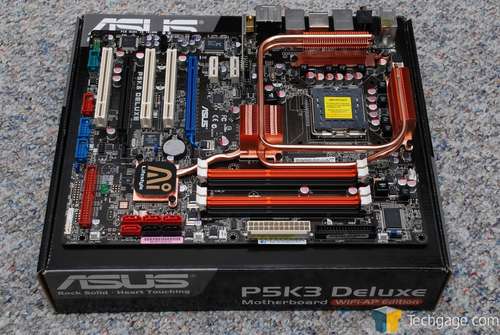
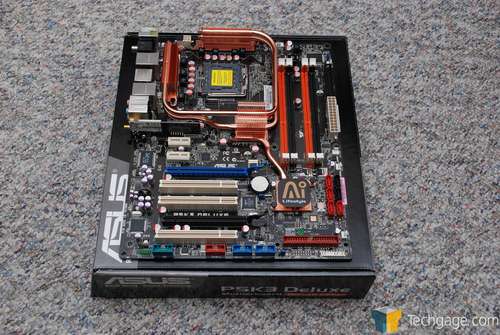
You may look at the board and have your eyes immediately drawn to the large passive cooler. It’s far from small. There are benefits here, alongside burdens. It’s large, but no CPU cooler should have a problem fitting in. There is sufficient room on all sides, and I’m sure ASUS made sure this was the case. The benefits of the cooler are obvious… silence.
You can see more of what I am talking about in this picture.
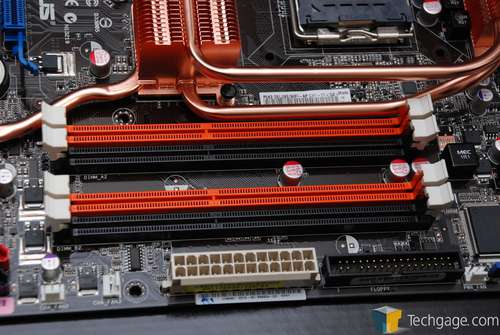
The DDR3 slots have a Halloween theme going on, but they look good. If color is what sells you a board, then this board would sell well. Beside these slots are the IDE and 24-Pin motherboard connector.
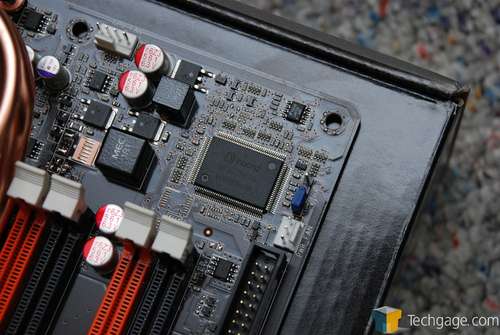
Here is the Winbond W83627DHG chipset which handles much of the I/O for the motherboard, including PS/2 peripherals, printer, joystick, et cetera. It is also responsible for passing along the boards temperatures to you.
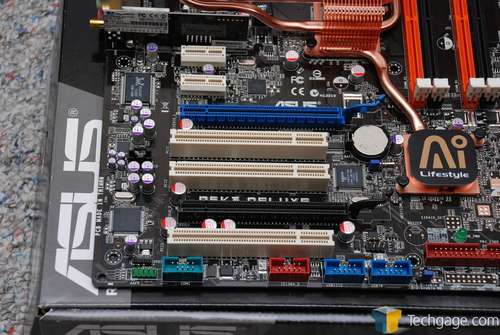
The P5K3 is not light on features, with 3 PCI and 2 PCI-E 16x slots available. There are two PCI-E 4x slots as well, if you can find a use for them. This board is completely compatible with ATI Crossfire, so if you have a dual GPU setup in mind, this board should perform well. I do not have any compatible ATI cards, so I will be unable to test that feature specifically.
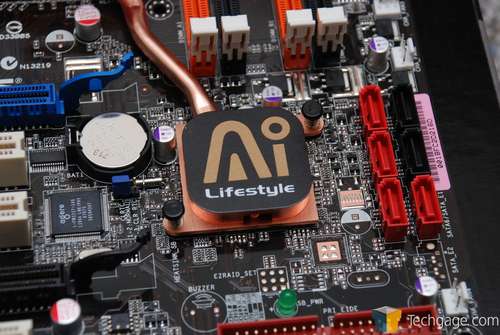
The southbridge receives fanless treatment. The BIOS battery is located right beside this, with all of the boards S-ATA ports on the opposite side.
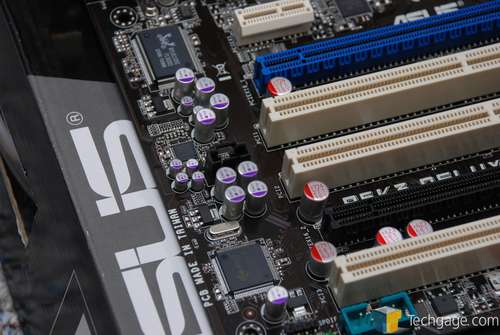
Located here is the JMicron JMB363 and Realtek RTL8110SC chipsets. The former is responsible for two of the boards S-ATA ports (I am assuming the two black ones) while the latter is for the ethernet ports. There is another small chipset found here, the ADI SoundMAX ADI1998B, which delivers 7.1 high-definition sound.
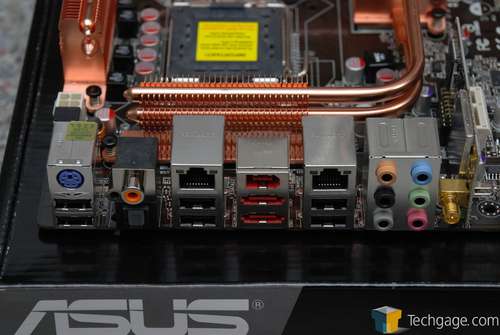
From left to right we have a PS/2 keyboard port, two USB 2.0 ports, S/PDIF port, optical S/PDIF port, NIC, two more USB 2.0, firewire, two eSATA, NIC, two more USB 2.0, sound ports and finally, the wireless connector port. I appreciate the fact that ASUS was not stingy with the USB ports. Combine these six with the two on your case, and you have 8 (or more) USB 2.0 ports to work with.
With regards to the layout, I don’t really have any complaints to speak of. I was wary of the large copper cooler at first, but it didn’t prove a problem. Even though it’s directly beside the DIMM slots, I was still able to hook up my Corsair Dominator Airflow fan. It’s all a tight squeeze, but no components were touching each other.
If you have a long video card, such as the 8800GTX, it will come within millimeters of the southern tip of the DIMM slots. Because of this, I had to install my Airflow fan prior to installing the GPU. Though a tight squeeze, neither component was touching the other.
The only “issue” I encountered are specific to my case (Antec P182) specifically. Because of the way the PSU cables route up through into the case, it was difficult plugging the ATX connectors to the board. If you have the same case, you will be fine if you move those cables out of your way.
|
|
Support our efforts! With ad revenue at an all-time low for written websites, we're relying more than ever on reader support to help us continue putting so much effort into this type of content. You can support us by becoming a Patron, or by using our Amazon shopping affiliate links listed through our articles. Thanks for your support!


