- Qualcomm Launches Snapdragon 4 Gen 2 Mobile Platform
- AMD Launches Ryzen PRO 7000 Series Mobile & Desktop Platform
- Intel Launches Sleek Single-Slot Arc Pro A60 Workstation Graphics Card
- NVIDIA Announces Latest Ada Lovelace Additions: GeForce RTX 4060 Ti & RTX 4060
- Maxon Redshift With AMD Radeon GPU Rendering Support Now Available
CM Storm Inferno Gaming Mouse

When Cooler Master released its first “CM Storm” gaming mouse last fall, we were impressed. For a company not known for mice to come out with such a competitive product was great, and helped pave the way for the future. That future is here, in the form of the Inferno. Can it surpass the quality set by the Sentinel Advance?
Page 3 – Using the Software Continued…
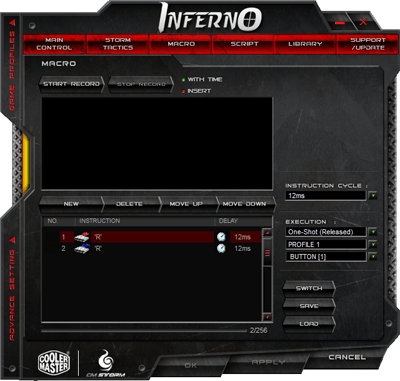
Finally, the Macro and Script sections. As I mentioned, I’m not a heavy macro user, so I’m not going to delve too deep into these sections, but what they allow is for you to set up rather robust macros and assign them in the manner that we just talked about. The process here is rather simple, but again, confusing at first.
The most important thing to check first is that you are editing the correct profile, and in this case, I was editing the first one. Then, you must select a “Button”, which you might as well think of as being a “Slot”, because it has nothing to do with the actual buttons on the mouse. I assume they call it button in case you actually want to keep track of what macro is assigned where, but personally, I just find it all the more confusing.
After you select the right profile and “Button”, you need to change the “Execution” to whichever makes sense. The most common will be “One-Shot (Released)”, which means that when the macro is used, it executes once. By default, the execution is for a loop, which I personally find to be a very strange design choice. I accidentally created many macros and forgot to change them from a loop to one-shot, and let me tell you… that makes for some wild times when you use one in game and aren’t expecting a loop.
To create a macro, you need to click “Start Record”, and for keyboard keys to be recorded, you can just keep your cursor in this window and type as you need to. For the mouse, you need to keep the cursor in the above box, and then hit your buttons as needed. Once done, hit “Stop Record”, and then “Save”.
Once you create a macro, you can adjust the delays as you need, simply by double-clicking them and changing the millisecond value. You can’t go below 12ms, but can seemingly go as high as you’d like. Once your done with a macro and it’s saved, you can edit another by selecting a new profile and/or button and then hit “Switch”. Personally, I wish that last requirement didn’t exist at all. It’d be far more convenient if you could simply choose a profile and button and have the macro load automatically, especially if you are needing to create a lot of them.
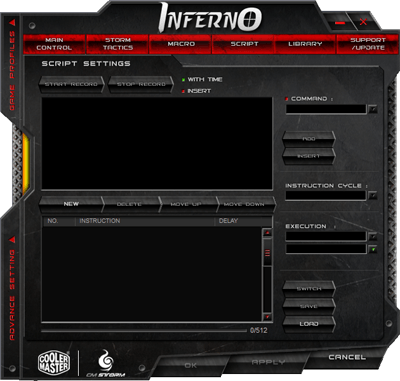
If you are experienced with creating robust scripts for a keyboard or mouse, then you know a lot more than I do. I didn’t touch this feature at all due to an absolute lack of knowledge, so hopefully you can read into its features simply based on the screenshot above. If you’d like me to test something out, please feel free to post in our article thread.
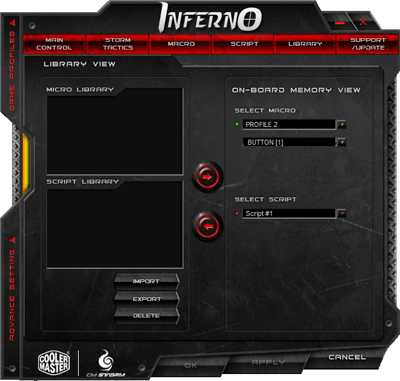
Because the mouse has internal memory to store all of your settings, you can easily export and import the data as you please to your PC. But be warned, as the data will take up a staggering 128KB of memory on your hard drive! (To be safe, for those unaware, 128KB is “nothing”).
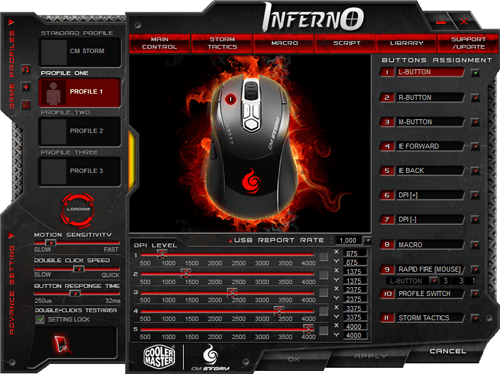
Finally, here’s an expanded view of the software:
On the left side, you can choose your profile and also the motion sensitivity, double-click speed and button response time.
It goes without saying that Cooler Master’s software here is incredibly robust, and it really does allow you to do a lot only with your mouse. If you have patience, the software shouldn’t be a problem, but I really hoped for an easier-to-understand interface, because after I was done configuring my macros and settings, I had a headache… and mouse software shouldn’t go quite that far.
Support our efforts! With ad revenue at an all-time low for written websites, we're relying more than ever on reader support to help us continue putting so much effort into this type of content. You can support us by becoming a Patron, or by using our Amazon shopping affiliate links listed through our articles. Thanks for your support!


