- Qualcomm Launches Snapdragon 4 Gen 2 Mobile Platform
- AMD Launches Ryzen PRO 7000 Series Mobile & Desktop Platform
- Intel Launches Sleek Single-Slot Arc Pro A60 Workstation Graphics Card
- NVIDIA Announces Latest Ada Lovelace Additions: GeForce RTX 4060 Ti & RTX 4060
- Maxon Redshift With AMD Radeon GPU Rendering Support Now Available
Cooler Master iTower 930
Taking a break from making stellar gaming chassis, Cooler Master looks to invade our desks, not to house our multiple GPU systems, but rather our ever increasing storage needs with their iTower 930.
Page 2 – Interior
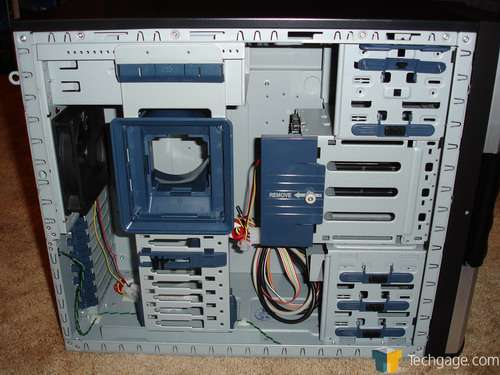
Once the side of the iTower is off, we get a good look at the interior of the case itself. The most noticeable feature of the case is the adjustable air duct. This can be moved towards the front of the case as well as the back. This allows you to place the duct directly above your CPU heatsink to help direct as much cool air from outside onto the CPU directly.
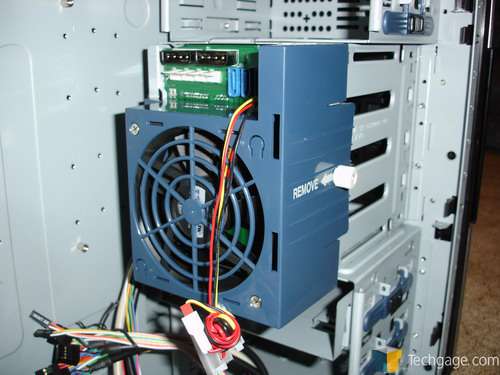
The other dominating feature, not found in your regular PC chassis, is the 4 bay hot swap connections and fan. The iTower lacks a front mounted intake fan but in its place, is a fan on the back end of the hot swap bay to pull cool air in from the front of the case, move it across the hard drives and then into the case to be expelled by the 120mm exhaust fan on the back.
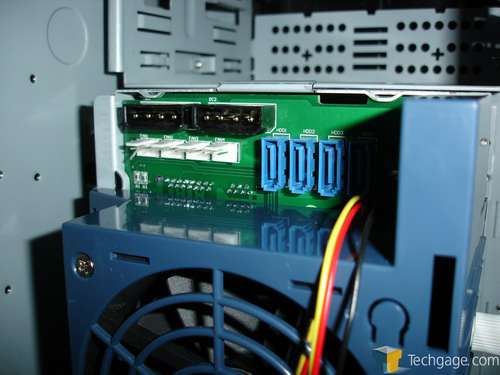
To power front drives, there is a pair of 4-pin Molex connectors. To connect them to the motherboard, there are 4 SATA ports that basically pass the connection from the motherboard, through the circuit board and into the hard drive. There are also 3 3-pin fan connections that power your case fans should you wish to add more.
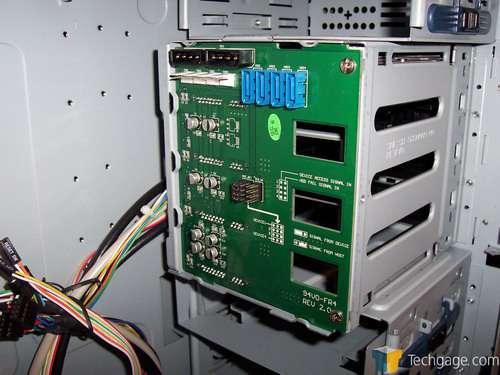
With the fan removed, we can see the board in its entirety. One thing that stands out to us is the small amount of open space to allow air to come though into the case. While adequate, there really should be more open area to allow a more sufficient amount of air to flow across the hard drives.
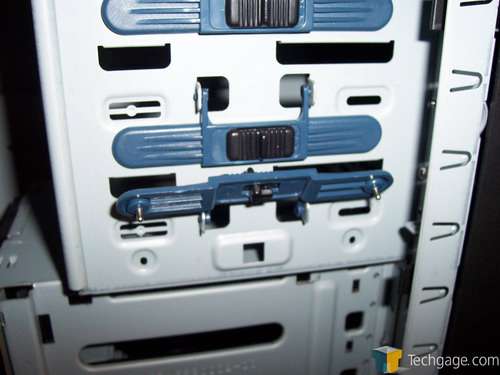
With the front offering 5 optical drive bays, as well as one 3.5" floppy bay, the drives can be mounted and removed with ease thanks to the tool less design of the iTower. All that needs to be done it to simply install the drive and lock down the plastic piece on the side of the case. There are a pair of small metal studs that stick into the holes where a screw would normally secure the drive and the mechanism is locked and unlocked by sliding the black piece side to side.
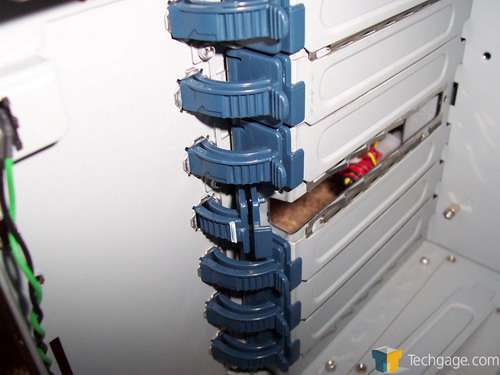
Keeping with the tool less design, Cooler Master provides us with the ability to install our add in cards such as a video, sound or network card and then lock it in place without the need for screws. To use these locks, one only needs to push in at the bottom of the piece and rotate it towards the user. Once the card is in place, rotate it back up and push on the tab to lock it into place.
Notice in the picture that the plastic tab has broken off. This was not because of the design of the lock, but rather my impatience. Please be careful when using these locks. While they are rather durable, they are ultimately made of plastic and can break.
Now to tackle the fun part… installation.
|
|
Support our efforts! With ad revenue at an all-time low for written websites, we're relying more than ever on reader support to help us continue putting so much effort into this type of content. You can support us by becoming a Patron, or by using our Amazon shopping affiliate links listed through our articles. Thanks for your support!


