- Qualcomm Launches Snapdragon 4 Gen 2 Mobile Platform
- AMD Launches Ryzen PRO 7000 Series Mobile & Desktop Platform
- Intel Launches Sleek Single-Slot Arc Pro A60 Workstation Graphics Card
- NVIDIA Announces Latest Ada Lovelace Additions: GeForce RTX 4060 Ti & RTX 4060
- Maxon Redshift With AMD Radeon GPU Rendering Support Now Available
Cooler Master iTower 930
Taking a break from making stellar gaming chassis, Cooler Master looks to invade our desks, not to house our multiple GPU systems, but rather our ever increasing storage needs with their iTower 930.
Page 3 – Installation, Final Thoughts
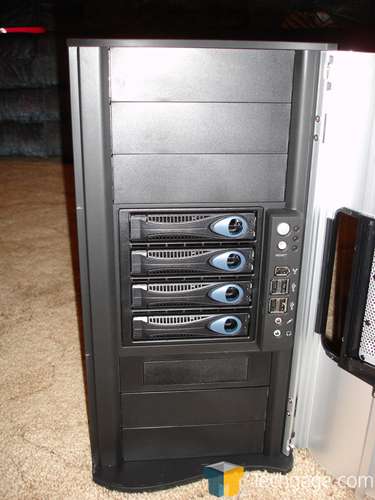
Installation of hardware into the iTower is simple and to the point. The case supports any standard ATX motherboard and as stated earlier, up to 4 front loaded SATA hard drives. For starters, we will look at the front of the case.
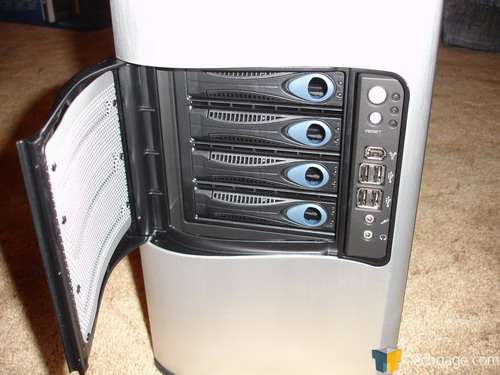
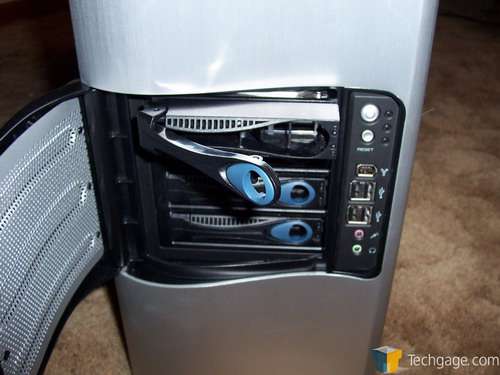
Here there is room for four front mounted SATA hard drives, five optical drives and if needed, one 3.5" drive. The four hot swap bays are easily accessed by opening the small door on the front of the chassis.
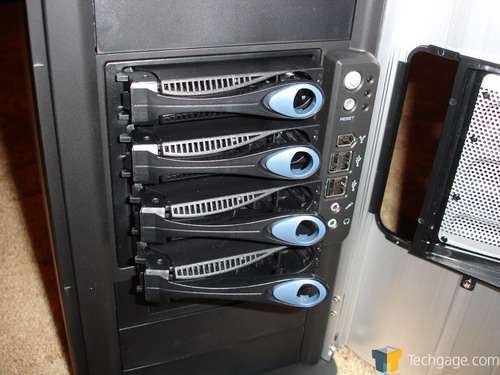
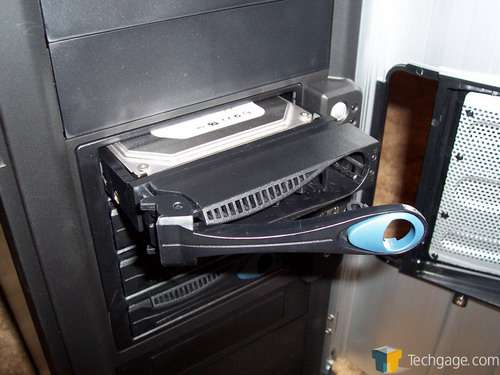
The hot swap drives can be removed by pushing the blue rings to the right and then rotating them outward. This unlocks the rails and allows them to be pulled out to either install a hard drive or replace a faulty one.
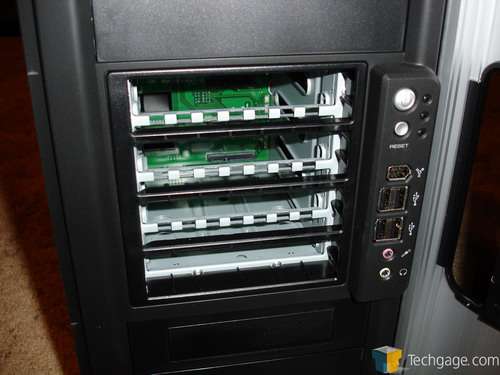
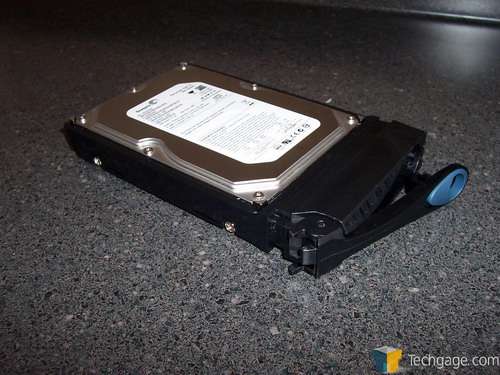
When the rails are removed, to install a drive, one just needs to place the side rails around the hard drive, obviously with the power and data connections facing the back and right side down, and screw in four mounting screws. Then the drive is ready to be placed back into the case.
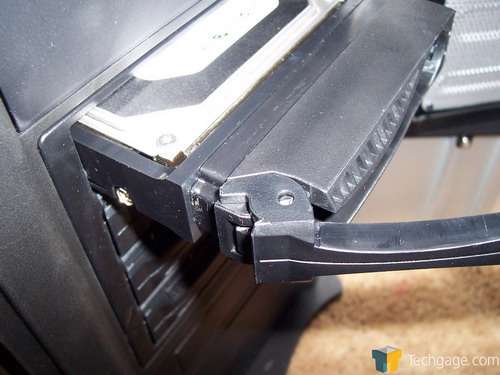
When placing the drive back into the case, make sure first that the drive is right side up and then gently slide the rails back into the case until you get about 90% of the way in. When you get close, make sure you have the handle all of the way out. At the end of the handle, near the drive itself, there is a tooth. This is what holds the drive in the case once the handle is locked down. When you feel the drive slide into the connectors at the back of the bay, lock the handle down and this will completely push the drive into the case.
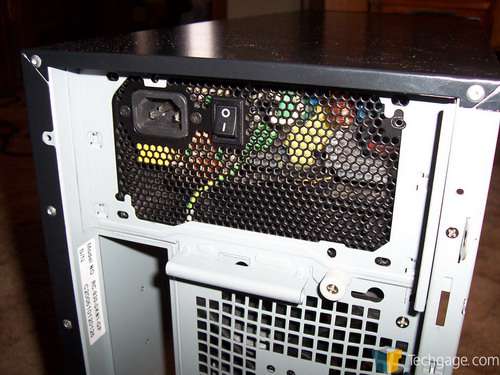
To install the power supply, there is somewhat of an unorthodox way of doing it. Instead of the normal inside mounting, the power supply must be slid in from the back of the case, pulling the cables in as you go. To do this, as covered earlier, the back plate must be removed, allowing the power supply to be slid into the case. Once the power supply is in, replace the back plate and secure it with the thumb screw. While not a very conventional way of installing a power supply, it is relatively hassle free and was a non issue for us.
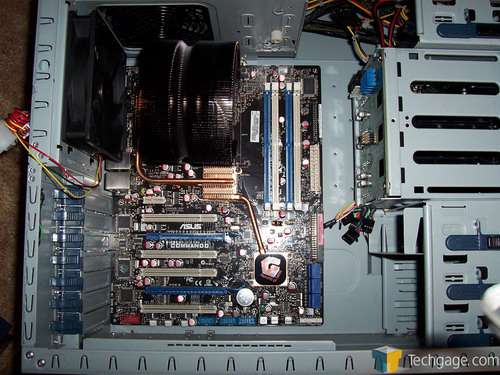
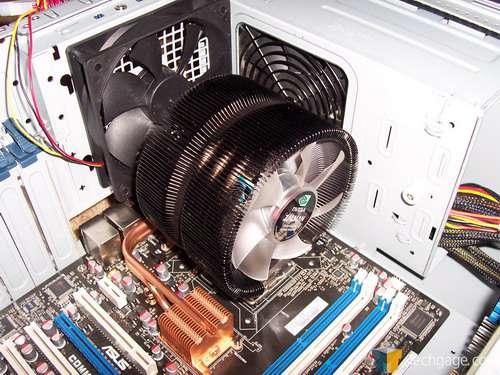
The last step in our installation is the motherboard itself. With the vertical air duct out of the way, the motherboard installation is simple. While the case is not my beloved full ATX, it does offer plenty of room to work and we able to install the hardware with little effort. The cooler we decided to use was the rather large Zalman 9700. Even with a cooler this large, there was plenty of room left over. With such a large after market cooler, there is really no need for the air duct and even if there was, it simply would not fit with such a large cooler installed. The duct would be ideal for anyone using a stock cooler that sits much lower than anything that can be purchased afterwards.
With everything installed, the Cooler Master iTower 930 provided us a great chassis for a home server or simple everyday use PC. For anyone who is considering this case for the foundation for a gaming PC, I would strongly advise them to look elsewhere. While this is an incredibly well built case, the airflow isn’t exactly ideal. It does provide just enough to keep your hard drives in check, if you add in a set of hot running video cards, your internal temps can really start to heat up.
As a server, this case is top notch and because of this, it earns an 8 out of 10. The 930 is robust, well built and provides a safe and secure chassis for all of your most important data. One thing I would like to see on future models though is the ability to lock the front of the case. While you can lock the side panel to keep your internals safe and secure, the front is fair game for anyone that can operate a hot swap drive. Not a huge problem but for those who are paranoid, this will most certainly deter them in their choice.
- Pros
- Well built and sturdy
- 4 bay hot swap
- Front access to drives
- Tool less design
- Makes for a stylish and convenient data center case
- Cons
- Air flow could be better
- Front could use a lock
If you have a comment you wish to make on this review, feel free to head on into our forums! There is no need to register in order to reply to such threads.

|
|
Support our efforts! With ad revenue at an all-time low for written websites, we're relying more than ever on reader support to help us continue putting so much effort into this type of content. You can support us by becoming a Patron, or by using our Amazon shopping affiliate links listed through our articles. Thanks for your support!


