- Qualcomm Launches Snapdragon 4 Gen 2 Mobile Platform
- AMD Launches Ryzen PRO 7000 Series Mobile & Desktop Platform
- Intel Launches Sleek Single-Slot Arc Pro A60 Workstation Graphics Card
- NVIDIA Announces Latest Ada Lovelace Additions: GeForce RTX 4060 Ti & RTX 4060
- Maxon Redshift With AMD Radeon GPU Rendering Support Now Available
MSI Z97I Gaming AC mini-ITX Motherboard Review

Just because a PC is being built for gaming, it doesn’t mean that it has to be enormous. With MSI’s Z97I Gaming AC, the ability to build a super-small gaming rig is granted, thanks to its mini-ITX form-factor. Some perks include Killer Ethernet networking, a full assortment of audio enhancements, and a software suite well-worth checking out.
Page 3 – A Look at the EFI
An archive including all of these screenshots and more can be downloaded here (.ZIP, 3.7MB).
It’s been almost exactly two years since I last took an in-depth look at an MSI motherboard, and so with this one, I looked forward to seeing what EFI improvements there would be. With that Z77 board, I didn’t mind the EFI too much but wasn’t personally a fan of its overall layout, and tying into that, I found it a little complicated to use – counter-intuitive in some regards.
Well, not much has changed with the Z97I Gaming AC. Somehow, though, I don’t mind this latest implementation as much; it’s as if some simple, and very subtle, polish has taken place. I still find it a little clunky with regards to navigating with only the keyboard, but it doesn’t take long to work it all out in your head and use it efficiently.
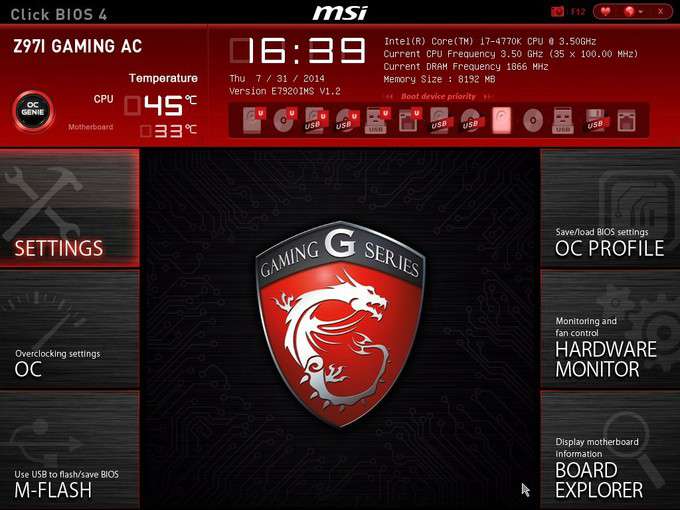
The shot above is the screen you’ll see as soon as you enter the EFI, and as the following screenshots will highlight, most of the UI elements have static locations, regardless of what section you’re in. At times, the right pane will disappear to make way for expanded sections, but for the most part, you’ll be looking at the center of the screen most often.
From this screen, you can enable MSI’s OC Genie overclocking tool, adjust the bootloader sequence, and get simple temperature information, as well as see the CPU and DRAM frequency.
It’s on this screen that I find navigation a little complicated; using the arrows to get from one side to the next, while in a menu, requires a couple of hits of the Esc key to hit the home screen, at which point you can select the other options. Alternatively, you can simply use the mouse to get to those sections faster, which is what I did.
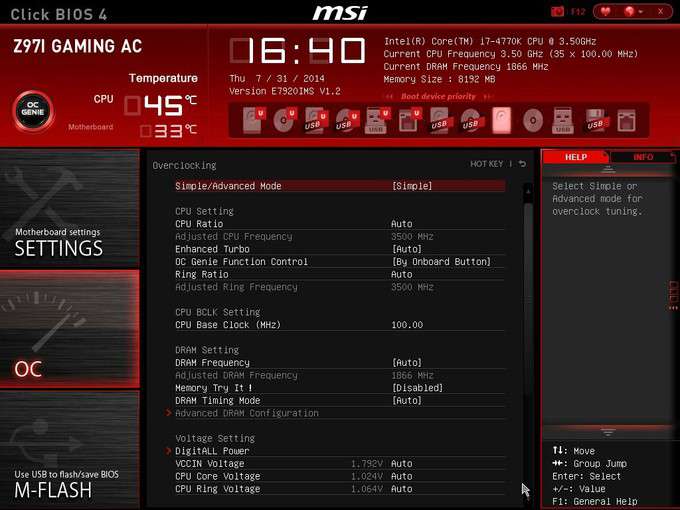
An example of the menu system can be seen below, and it looks quite good overall, with clear text and simple navigation. For some reason, I didn’t have an XMP option available to me, despite the kit of RAM I used having four profiles; normally you would see one. I blame the lack on some quirk about the RAM I was using, but it’s still unusual.
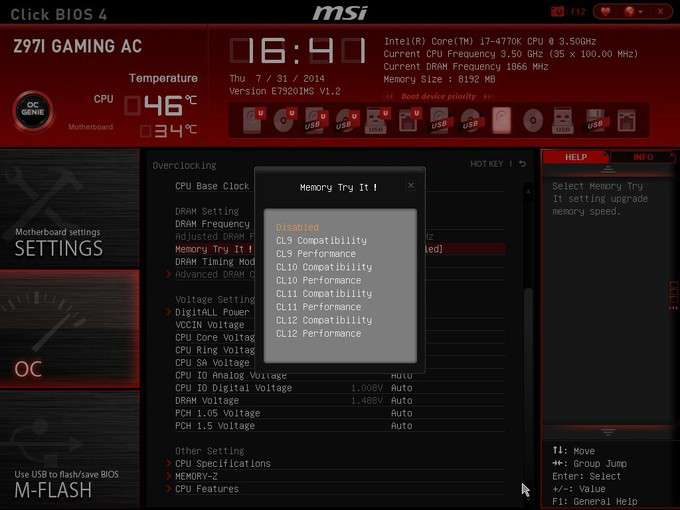
A standout feature in this list is called Memory Try It!; with it, you can select a target CAS latency and let the board adjust micro-timings to optimize the RAM as much as possible. If you’re using a kit of CAS 11 memory, for example, you’d want to choose “CL11 Performance”. You could also try overclocking the memory by choosing CL10 Performance; and if that doesn’t work, maybe CL10 Compatibility will. I am not entirely sure that many people will make use of this feature, but it’s a cool one to see included.
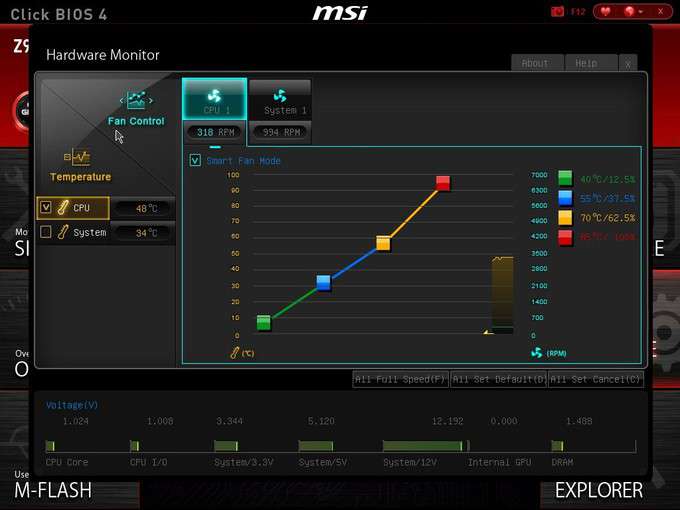
In my look at ASUS’ Z97I-PLUS, I was impressed by an EFI feature that allowed you to adjust or create new fan profiles with a graphical chart. As it happens, MSI has the exact same feature, and in some ways (definitely not aesthetically), it’s a little neater.
With this implementation, whenever you click on a plot marker, it zooms in like this to let you fine-tune things easier. Plus, all the while you’re doing this, you can monitor voltages at the bottom. I admit that ultimately, I prefer to use an external fan controller to manage fan speeds, but this is an excellent feature for those wanting a more hands-off approach.
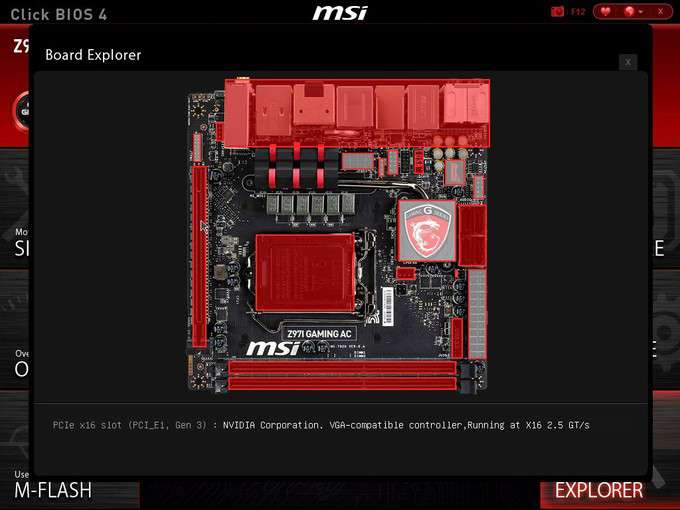
Board Explorer isn’t a brand-new feature, but it’s not one I’ve talked about before, so I’d like to do it here. As simple as it might sound, this is a feature I think all motherboards should have, because it’s informative. Here, you can see an overview of the board, with some areas highlighted red. Hovering over any of these areas will reveal information about it. Hover over the CPU, for example, and it will tell you what model is installed. PCIe slot? It’ll tell you what’s there. You can see an example of this in the shot below; it doesn’t say the specific GPU model, but it does acknowledge it as an NVIDIA card.
Here’s where things go from informative to downright useful. Hovering over the SATA ports, for example, will tell you which ports are occupied, and which drives are installed where. Hovering over the back I/O panel will reveal the same sort of information. Feeling seriously lazy and don’t want to look behind the PC? Simply load up Board Explorer and it will tell you if you have a USB port free!
While I still prefer the more traditional EFI layout that ASUS has been implementing on its boards, MSI has done a fine job here. I don’t find it extremely intuitive at all times, but it’s certainly easy to look at and has a load of functionality.
As we’ll see on the next page, it’s not only the EFI that’s feature-rich: So too is the included Command Center software.
Support our efforts! With ad revenue at an all-time low for written websites, we're relying more than ever on reader support to help us continue putting so much effort into this type of content. You can support us by becoming a Patron, or by using our Amazon shopping affiliate links listed through our articles. Thanks for your support!


