- Qualcomm Launches Snapdragon 4 Gen 2 Mobile Platform
- AMD Launches Ryzen PRO 7000 Series Mobile & Desktop Platform
- Intel Launches Sleek Single-Slot Arc Pro A60 Workstation Graphics Card
- NVIDIA Announces Latest Ada Lovelace Additions: GeForce RTX 4060 Ti & RTX 4060
- Maxon Redshift With AMD Radeon GPU Rendering Support Now Available
Nero Linux 4 – Still the Best Burning Tool for Linux?
One of the best features of Linux is its sheer number of free available applications. But once in a while, certain commercial offerings deliver enough features and an ease-of-use that makes it worthy of consideration. Nero Linux is one of those. Now in its third iteration, Nero Linux remains the definitive optical-burning tool for the OS.
Page 1 – Introduction, Nero Linux 4 Features
As the most popular non-commercial desktop OS, Linux and its users have a lot worth boasting about. One of the biggest points raised when Linux is questioned boils down to security, and I think few would argue that as far as certain operating systems being targeted goes, Linux is rather safe. That’s also helped by the fact that the entire OS is open-sourced, so if there is a hole somewhere, it’s bound to be caught by somebody.
If not for security, then maybe you simply like how Linux as a whole operates… how the system works. Or, you might just prefer the available desktop environments, such as KDE or GNOME, over the commercial alternatives. Or how about the fact that Linux is a 100% free operating system? Even the vast majority of available applications for Linux are created by passionate developers for free.
Admittedly, some free software can’t hold a candle to some of the more robust commercial alternatives, but that’s again not much of a surprise. Most software on Linux costs nothing to use, and it’s built by passionate developers who love what they do, and who usually get very little in return.
I dual-boot my personal PC with both Windows and Linux, and while I admit I have quite a bit of commercial software inside of my Windows installation, out of all the software packages I have installed inside of my Linux, only one happens to be a commercial application. Can you guess what it is? Of course, it’s Nero Linux. When I laid my hands on the first version of the application well over four years ago, I was sold. While there are many free CD burning applications for Linux, none were quite as refined as Nero Linux, at least in my opinion.

Aside from the overall application reliability, one of the reasons I came to like Nero Linux so much is simply because it followed many of the design cues from the Windows version. This isn’t exactly something most would care about, but for me, it was familiar territory, since I used Nero for Windows many times. With the launch of Nero Linux 3, which I also took a look at, Nero improved upon things even further. The UI was refined, and overall, it was even easier to use.
When the first version of Nero Linux (2.0, for some reason) came out in the spring of 2005, it took only two years until Nero Linux 3 saw its release. With Nero Linux 4, released just last month, there was a two-and-a-half year gap in between releases. With so much time in between, can we expect some major changes, and maybe even a UI refresh? Well, not exactly. I have to admit that when I first took a look at the press release, I was a little underwhelmed, and I actually had to dig deep to see what was new. According to the company, these are the newest features:
- Nero Linux Express
- More advanced options for burning all types of media
- ISOLINUX Bootable CD/DVD/BD Support
- BD Defect Management
- Enhanced Audio Format Support – AIFF and MusePack
“That’s it?” See what I mean? It’s been two-and-a-half years since Nero Linux 3, and this is what’s updated? Nero Linux Express is admittedly a nice update, but the rest are going to appeal to a rather slim audience – especially the Blu-ray defect feature (essentially a more robust verification process). Well, the new features might be slim, but let’s take a look at the application as it stands today and see if it’s worth your $20.
Installing Nero Linux 4
Like many other Linux applications, Nero Linux officially supports only a handful of distributions. These include Red Hat Enterprise Linux 5, SUSE Linux 10.3, Fedora 7, Debian 4.0 and Ubuntu 7.04. Use a newer version? Don’t worry… these are the minimum versions, so if you are using the latest version of any of those, you’re fine. One thing you might notice is that any of those distros support either RPM or DEB, and it’s for that reason that Nero offers downloadable versions of either of those.
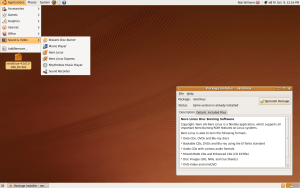
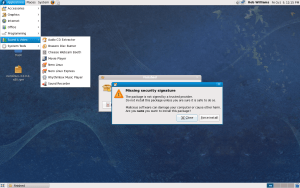
Due to some recent discussion in our forums, I was interested to see just how easy (or difficult) it was to install Nero Linux 4 under a couple of the supported distros, so I loaded up both Ubuntu 9.04 x64 and Fedora 11 x86 and gave it a whirl. As Ubuntu is Debian-based, it’ll be the .deb installer you’ll be using. After double-clicking the file, clicking “Install Package” and inserting my password, Nero Linux was installed within 4 seconds. No, that’s not a typo. On Fedora, the install took a little bit longer while using the .RPM file, and I had to click through a few additional screens, but the entire process still didn’t take too long, at 14 seconds.
For users of distros that don’t support RPM or DEB, you have two primary options. Your first is to see if your distro’s repository lists it, and install it that way. My preferred distro, Gentoo, actually did have the latest version ready for download, so it was made rather easy, but neither Ubuntu or Fedora had it listed in theirs. If your repository doesn’t, you’re not out of luck, but getting it installed is a bit more technical.
What I personally recommend is using the command-line program “rpm2tar”, which is likely in your distro’s repository. If it’s not, I have it hosted here for quick downloading. There is an official website for the tool, but the download link hasn’t worked for months, at least for me. With the RPM installer in the same folder as your rpm2tar file, you can type in “./rpm2tar nerolinux*.rpm” and it will convert it to a .tar file. Then from there, you’ll have to enter sudo or su, and type in, “tar -xfv nerolinux*.tar -C /”, which will extract the files to the root folder on the hard drive, putting files exactly where they need to be.
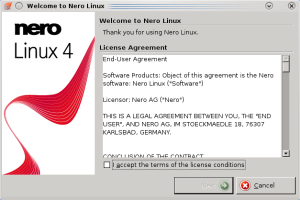
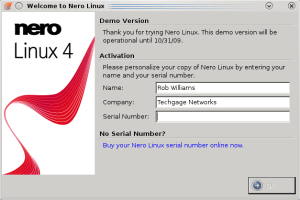
Alright, that’s enough of the installation. Let’s get right into our look at the actual application, starting off with the first screens you’ll see after starting it up:
If you didn’t purchase a code to activate the application as a full version, a trial code will be automatically inserted. I have no idea how long the trial period lasts, and I can’t find information on Nero’s website about it, but given the information in the above screenshot, I’d guess about three weeks. After you put in your credentials and code, you’ll be greeted with the main application screen:
This screen will come as absolutely no surprise if you’ve used Nero Linux 3, and it’s for good reason… I can’t spot a single change. Even the options on the left-hand and right-hand side are identical. As mentioned earlier though, some options deeper in are in fact different, but most will appeal to power users… those who understand the technical aspects of burning (I am not one of these people).
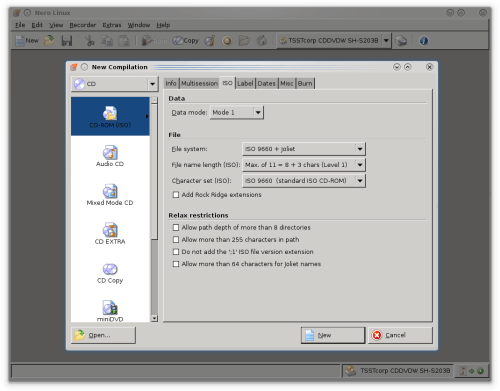
For those interested, here are the exact options available on both the CD and DVD sub-menus:
|
|
As you can probably tell, Nero Linux isn’t exactly a lightweight burning application… there are many possibilities here. This is one of the advantages Nero has over such solutions as K3b… the sheer number of options available. The thing to bear in mind, though, is that the majority of users will likely rarely ever take advantage of all these additional options, but for those who burn often, and take it seriously, there’s no competition where the sheer flexibility of Nero is concerned.
Support our efforts! With ad revenue at an all-time low for written websites, we're relying more than ever on reader support to help us continue putting so much effort into this type of content. You can support us by becoming a Patron, or by using our Amazon shopping affiliate links listed through our articles. Thanks for your support!


