- Qualcomm Launches Snapdragon 4 Gen 2 Mobile Platform
- AMD Launches Ryzen PRO 7000 Series Mobile & Desktop Platform
- Intel Launches Sleek Single-Slot Arc Pro A60 Workstation Graphics Card
- NVIDIA Announces Latest Ada Lovelace Additions: GeForce RTX 4060 Ti & RTX 4060
- Maxon Redshift With AMD Radeon GPU Rendering Support Now Available
NZXT H2 Silent Mid-Tower Chassis Review
Being that silence is golden, it’s no wonder that so many people go out of their way to make sure their PC runs as quiet as possible. Pulling that off can be made a lot easier with the right chassis, however, and of them all, NZXT’s H2 is one of the best. It features classy aesthetics, a ton of features, and more foam than a busy Starbucks.
Page 2 – Interior
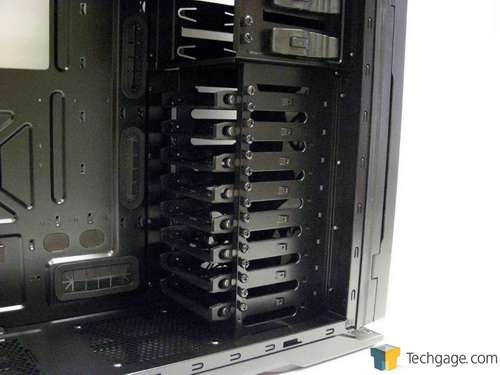
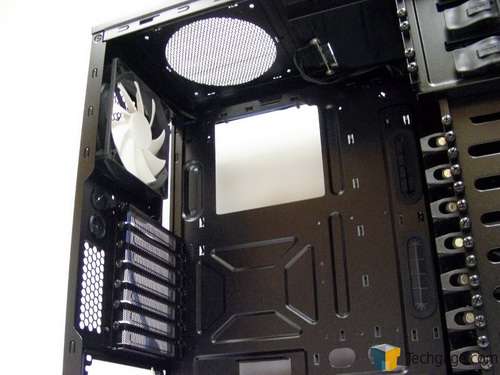
The all black interior shows off the eight hard drive bays at the front with the typical front to back orientation to help with air flow. Each 3.5″ or 2.5″ drive mounts into a plastic tray from the bottom although there are metal pegs surrounded by rubber washers that will need to be removed in both instances to allow for clearance. The trays are held in place without the use of tools but running down the side of the drive cage are thumbscrews for those who like an extra measure of stability.
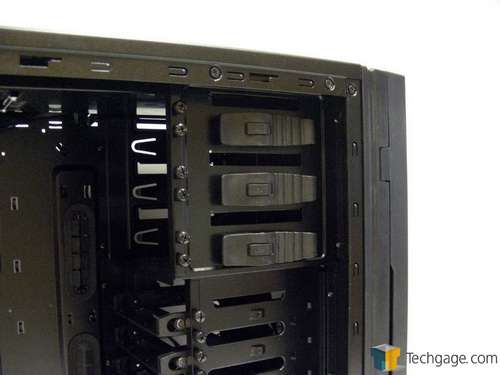
Above the hard drive cage are the three tool-less locking mechanisms for the 5.25″ drive bays. To mount a drive, simply move the small slide latch forward to unlock the bay and pull out on the back end of the mechanism. Once a drive is in place, let the lock go, slide the latch back and the pegs on the back end will keep it secure. Like the hard drive cage, additional thumb screws are included if needed.
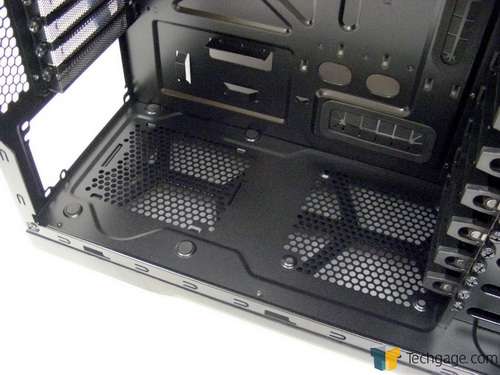
Behind the drive bays, along the bottom of the case are the openings for the 120mm fan and power supply that the filter covers from the outside. The power supply area has four round rubber pads to absorb any vibration caused by the fan.
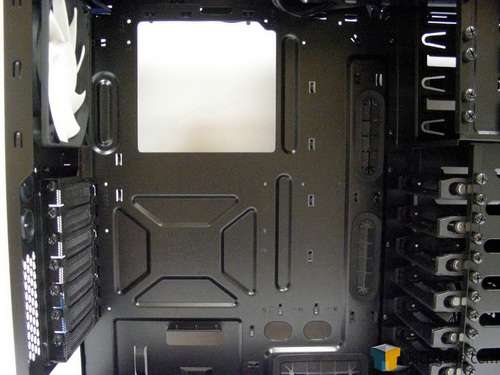
Moving on to the motherboard tray that can support ATX, micro-ATX and oddly enough, baby-AT, we have what luckily is now considered standard fair in most higher-end cases today. Down the right side and along the bottom are cable management areas with pre-installed rubber grommets to help protect cables and keep things looking tidy. The smaller, oval openings that feature rolled edges instead of grommets can be used to route front panel connection to headers along the bottom edge of most motherboards.
There is also a large cut-out towards the top of the tray to help install CPU coolers that feature a back plate. The final cable management areas are at the top center and left corner where small cut outs help with routing the 12V power lead based on its location on the motherboard. The motherboard tray does not feature any pre-installed standoffs so users can configure them to fit the form factor of their motherboard.
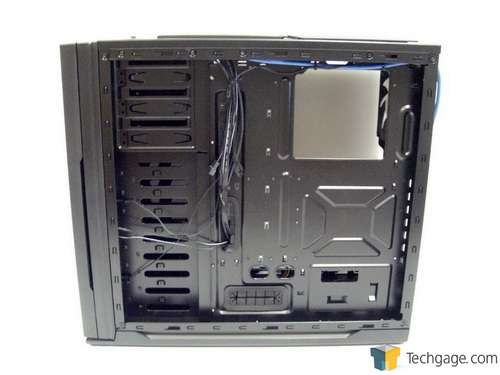
The inside shot of the back and top panel show that the PCI slots feature the same thumb screws found throughout along with the rear exhaust fan and the top fan opening.
Behind the motherboard tray there is what seems like acres of room to tuck cables out of sight; 25mm or nearly 1″ of space. There are also the usual small loops in the motherboard tray where zip ties can be used to keep cables tucked up tight and enough room to hide any extra cables on this side of the hard drive cage.
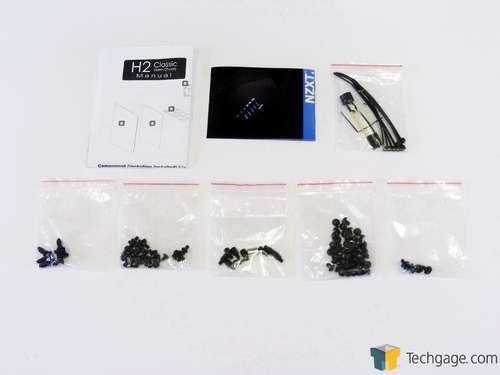
Included with the H2 are a black and white fold-out manual, a product brochure showcasing some of NZXT’s other products and a bag that holds a speaker, some zip ties to keep cables in check and four rubber washers to help absorb vibrations from any extra fans added in by the user.
For screws, NZXT covered all the bases with extra screws to secure additional fans, screws for mounting 2.5″ drives, motherboard standoffs with a handy little socket, more screws for securing the motherboard and optical drives and finally four screws to keep the power supply in place.
With that said, it’s time to get our build on to see if the H2 can take the heat without holding it all in as many “silent” cases do.
Support our efforts! With ad revenue at an all-time low for written websites, we're relying more than ever on reader support to help us continue putting so much effort into this type of content. You can support us by becoming a Patron, or by using our Amazon shopping affiliate links listed through our articles. Thanks for your support!


