- Qualcomm Launches Snapdragon 4 Gen 2 Mobile Platform
- AMD Launches Ryzen PRO 7000 Series Mobile & Desktop Platform
- Intel Launches Sleek Single-Slot Arc Pro A60 Workstation Graphics Card
- NVIDIA Announces Latest Ada Lovelace Additions: GeForce RTX 4060 Ti & RTX 4060
- Maxon Redshift With AMD Radeon GPU Rendering Support Now Available
NZXT Lexa
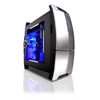
If you have never heard of NZXT, you don’t know what great cases you are missing! We are taking a look at their Lexa case, which combines “Perfect Symmetry” with class and functionality. Let’s check it out and see if we have a winner on our hands.
Page 2 – Exterior
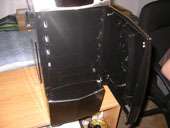
After I took various pictures of the case, the time came to open up the side door and take out the accessories. Here’s where I realize that I only have half a brain. The handle on the door is different.. it looks as though you are to lift up on it to open the door, but that did not work. After toying with it longer, I looked all around and wondered if I was supposed to remove some screws before I took it off, but that didn’t make much sense to me. From the inside view of the door, I could tell that there was a locking mechanism, so I figured now that I would need a key. The key of course, is inside the case in a white box. I knew I was screwed.
Then my friend Pete comes to the rescue and pushes the handle in the direction of the front of the case, and he popped the door right off. So after feeling like an idiot, I took everything out. If you end up picking up this case, don’t make the same dumb mistake I did ;)
Inside the case is a lot of accessories and odds and ends. The white box includes the keys for the case, many screws and drive mounting clips. These clips are used to install your HDD’s, CD-Roms or multi-function panels, if they have screw holes aligned properly. These clips can be considered a benefit or a trouble, because if you have any rheobuses, multi-functional panels or hard drive coolers that do not have the holes in the proper places, then you will have to suffer with the unit sitting on top of something else, instead of being secured in place. The frame does offer some holes, but they did not align properly for the Vantec Vortex2 HDD Cooler.
Another thing that stood out is the fact that the power button is at the very top if the front panel, instead of behind the door. This is fine, although it sticks out far enough that if you brush it as you pass by, you have the potential to turn the PC on or off, respectively. This is not really a big problem by any means, unless you are in a small room, which I am.
In addition to the power button, the arc of the front and back panel stick about 2 inches above the rest of the case. Being in a small room again, after it was all set up, I passed by and my cargo pants caught on to the tip and I actually pulled it hard enough that the front panel partially came off the frame. Again, not a problem that seems likely for most, but I tend to run into any problems if they are possible.
At the very front of the case you will see an HDD activity light, that lights up a very bright blue. This is great to add to the theme, because the two fans inside also light up blue. This will flicker often, so if you sleep in the same room as the PC, you may not want to hook that up as it will get irritating. The door on the case is keeps closed with a pretty strong magnet instead of a clip, so it will always stay tightly closed.
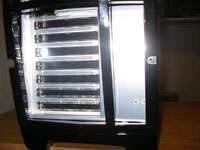
Inside the door we reveal four 5 1/4″ drive bays and two 3 1/2″ drive bays. The reset button is to the right of the floppy drive bays. As you can see from earlier pictures, you can reach your fingers around each bay to pop it out. Once you place the clips on your peripheral, it will slide in place and click to secure it.
|
|
Support our efforts! With ad revenue at an all-time low for written websites, we're relying more than ever on reader support to help us continue putting so much effort into this type of content. You can support us by becoming a Patron, or by using our Amazon shopping affiliate links listed through our articles. Thanks for your support!


