- Qualcomm Launches Snapdragon 4 Gen 2 Mobile Platform
- AMD Launches Ryzen PRO 7000 Series Mobile & Desktop Platform
- Intel Launches Sleek Single-Slot Arc Pro A60 Workstation Graphics Card
- NVIDIA Announces Latest Ada Lovelace Additions: GeForce RTX 4060 Ti & RTX 4060
- Maxon Redshift With AMD Radeon GPU Rendering Support Now Available
Sun VirtualBox – Free, Powerful Virtualization
Where virtualization is concerned, “free” certainly doesn’t equate with “cheap”. Sun’s VirtualBox is a perfect example of that. For non-commercial use, it’s a cost-free hypervisor that’s feature-robust, offers great performance and stability, and supports a wide-variety of guest operating systems. Read on as we take an in-depth look at all that it offers.
Page 2 – Installing a Virtual Machine
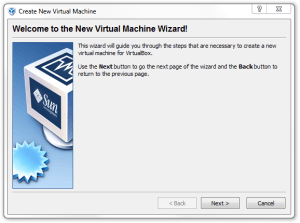
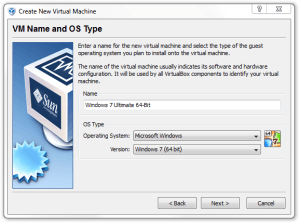
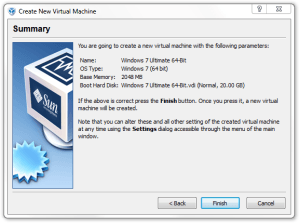
After clicking the “New” button on the main screen, a dialog box will pop up, and you’re ready to go. After pushing “Next” for the first time, you’ll be able to type in the name of your VM. I usually name mine by exactly what it is, but you don’t have to. “Julie’s Windows XP” and “Development Windows” are two examples that would work. This screen is also where you will need to choose which OS you’ll be installing from that drop-down. If you plan to install an OS not listed, you could just choose other and hope the best. For Linux distributions not listed, there are appropriate “Other” options found here.
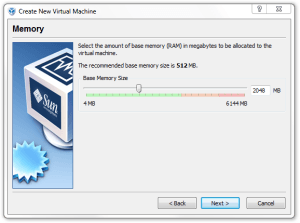
The next slew of screens have to do with the amount of RAM you wish to allocate to that given VM, and also virtual hard drive space. For RAM, 512MB – 1024MB is usually fine for testing out most OSes, but if you actually plan to use the guest OS like a regular OS, you’d want to allocate more RAM if possible. Just be sure to leave enough RAM for your native OS, as dedicating too much can cause slow-down for both.
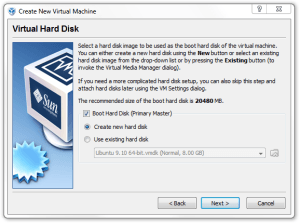
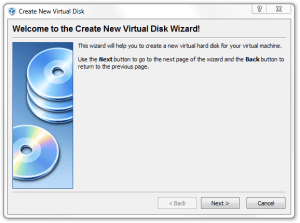
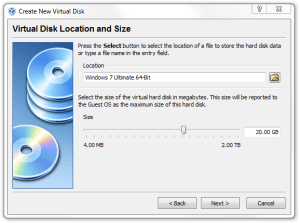
For most virtual machines, a real hard disk is not used, so a virtual one must be created. Like the RAM choice, you’ll want to choose just as much as you think you will need. If you are simply testing out an OS for fun, then dedicating too much isn’t going to make much sense (don’t worry, it doesn’t have to take as much space as you selected on your HDD until you actually fill it up). It is important to note, though, that if you do plan on using the guest OS a fair amount, to not choose too little of a figure, as it’s not so simple to increase the virtual disk size later on.
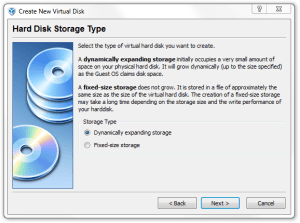
After proceeding through the virtual disk creation, you’ll quickly reach a screen that asks you to choose between a dynamic and fixed-size disk. If you choose dynamic, the real size on your disk will not increase until the VM itself requires it, as I mentioned above. Fixed-sized means that a file will be created immediately on your hard drive of the density you specified. If you plan on making a lot of VM’s, the fixed-size option might be the better choice as you won’t accidentally exceed your hard drive’s total free space while using a VM.
Like the name of your VM, the name of the disk doesn’t much matter, but for the sake of ease, it’s better to leave it at default. Don’t skip past this screen too fast, though, because it’s here where you will need to decide where the virtual disk goes, or rather, on which hard drive. Why does this matter? Because if you have more than one real hard drive installed, with the OS on one, and regular data on the other, you’re likely to see better performance if the VM is located on the non-OS drive. If you only have one hard drive, the default option is fine.
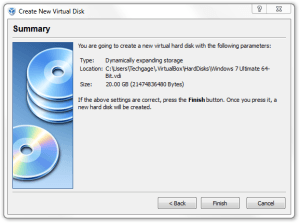
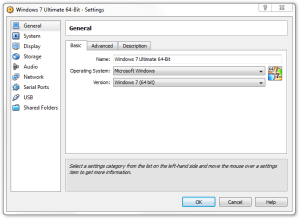
At this point, the virtual machine “setup” process is done, and you have two options. You can either accept all of the pre-configured options that VirtualBox assigned the machine, or do what I recommend and click once on the VM in the list, and then “Settings” up top. Because a hypervisor is essentially a PC within your PC, the virtual machine will see it, not your real PC. So in here, you can set up some specific options, from networking to audio to display settings.
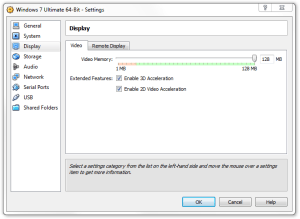
If you plan on using 3D in your VM, then the first stop I recommend is “Display”. Here, you can choose the amount of video memory you want to dedicate to the VM, and I highly recommend sliding the bar to its highest point (128MB) if your card is 256MB or higher. Certain features might not be usable without increased video RAM, and VirtualBox will tell you if that’s the case with an orange error in the box field below. New to version 3.1 is 2D video acceleration, which works only with Windows guests. Be sure that “Enable 3D Acceleration” is checked before leaving this screen.
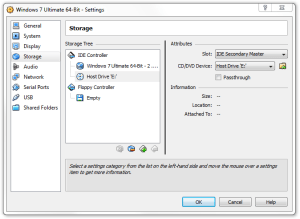
The next menu item is “Storage”, and this is where you can either create a new virtual hard disk for use inside of the VM, and also mount an ISO to the CD-ROM if you want. If you want to install the OS with the original disc, then just pop it in and do nothing here. But for ISO usage, you can select the appropriate file through the CD/DVD Device drop-down. If you don’t need Floppy support, you can remove it here.
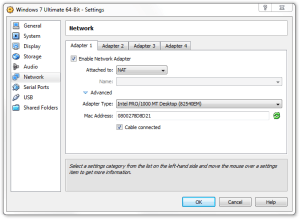
If you have an elaborate networking situation, you might also want to go to the “Network” section and configure the needed options. For most people, nothing will have to be altered, but if there is one, it might be the “Attached to:”. If you are unsure of the options here, leave the default as is, and alter it after the OS is installed if need be. Should you choose to, you could refresh the MAC address or change the adapter type.
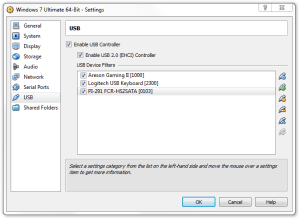
One of the last menus you might want to check out is “USB”. Here, you can enable the controller, and add “Filters”, which essentially enable full support for the device in the VM. Do not add a filter for the primary mouse on the machine, as that will cause issues later. If you have a secondary mouse connected to the machine, you could add a filter for that. You could also add a filter for things like USB storage, your keyboard, camera and so forth.
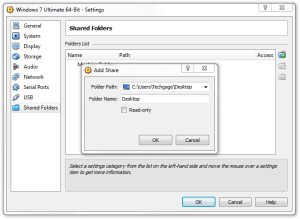
So that your virtual machine can access files outside of itself, you can also set up “Shared Folders”. Once configured, these folders will be accessible in the VM (different method depending on the guest OS). I highly recommend not adding a share to the root of the hard drive, unless you add the share as read-only. The reason has to do with malware. If you are using Windows XP in a guest OS, for example, and somehow contract a virus, and a writeable shared folder leads to important files elsewhere on the drive, they could be affected. The best option is to create a special folder to be used just for sharing files between the host and guest, and between the guest OSes.
Before you leave the settings, if you’ve had any change of heart regarding the amount of RAM you wanted to dedicate to the machine, or the name, or anything minor like this, you can adjust those before booting up for the first time. Don’t worry if you do change your mind post-install, though, as these options will always be available to you. If you have an AMD Phenom II or Intel Core i5/i7 processor, I’d recommend enabling nested memory under the System > Acceleration section.
Once you are content with your setup, click “OK”.
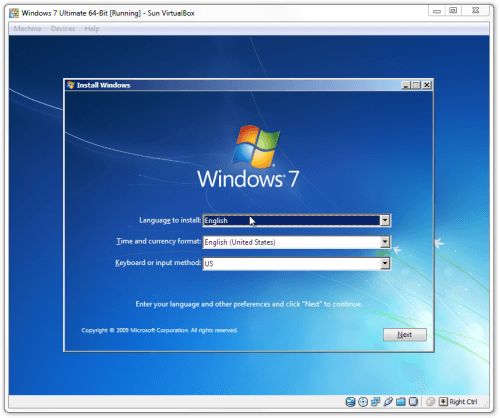
All that’s left to do now is to install our guest OS. In this particular case, I was installing Windows 7 inside of Windows 7, and the screenshot below reflects that. There’s essentially nothing at all different between installing an OS in a hypervisor and installing it natively on your machine, so the difficulty of installing the OS depends on the OS itself (in the case of Windows 7, it’s straight-forward). The install process will take a varying amount of time to complete depending on your setup. On a recent PC, the install could take between 20 – 30 minutes, but not usually more than that.
After the OS is installed, and you’re booted in, you might notice something missing, whether it be the lack of ability to adjust your resolution, or the fact that you have no video acceleration at all. That’s where “Guest Additions” come into play, and this and more will be discussed on the next page.
Support our efforts! With ad revenue at an all-time low for written websites, we're relying more than ever on reader support to help us continue putting so much effort into this type of content. You can support us by becoming a Patron, or by using our Amazon shopping affiliate links listed through our articles. Thanks for your support!


