- Qualcomm Launches Snapdragon 4 Gen 2 Mobile Platform
- AMD Launches Ryzen PRO 7000 Series Mobile & Desktop Platform
- Intel Launches Sleek Single-Slot Arc Pro A60 Workstation Graphics Card
- NVIDIA Announces Latest Ada Lovelace Additions: GeForce RTX 4060 Ti & RTX 4060
- Maxon Redshift With AMD Radeon GPU Rendering Support Now Available
Sun VirtualBox – Free, Powerful Virtualization

Where virtualization is concerned, “free” certainly doesn’t equate with “cheap”. Sun’s VirtualBox is a perfect example of that. For non-commercial use, it’s a cost-free hypervisor that’s feature-robust, offers great performance and stability, and supports a wide-variety of guest operating systems. Read on as we take an in-depth look at all that it offers.
Page 3 – Installing a Virtual Machine Cont. & Tested OSes
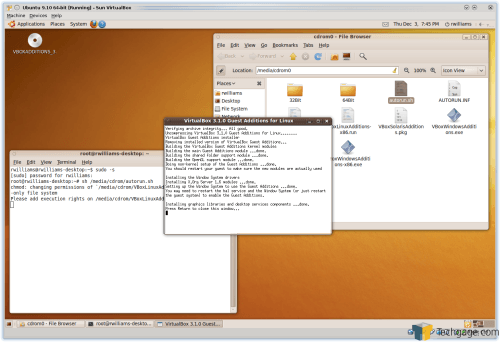
Guest Additions have to be installed in order to unleash the full power of your guest OS. The installation process will vary from OS to OS, but all installations can be kicked off by using the “Install Guest Additions” option in the “Devices” menu up top.
A common mistake that a lot of virtualization noobies make is getting locked into the virtual machine and not knowing how to get out. By default, VirtualBox assigns the right Ctrl button as the one to break out of the VM. This is more important when Guest Additions are not installed, because with them installed, you are freely able to move your mouse from inside the VM to your regular OS or another guest OS without issue.
In Windows OSes, the installation of these Additions couldn’t be easier. After selecting to install them, a pop-up should come up asking you to autorun, and you’re safe to. Then you just install it like normal software, and reboot, and enjoy the benefits. Linux and Solaris guests are a little more complicated, but not by much. After choosing the option, the Additions ISO will be mounted in the OS, at which point you can open a terminal and enter sudo -s or su mode. Then travel to the mounted CD-ROM (usually ‘cd /media/cdrom’) and then execute the autorun with ‘sh autorun.sh’.
On some distros, you can simply double-click the drive on the desktop, or access it from elsewhere in the OS, then right-click the autorun.sh and choose “Open With…”. There, you could click the option to run a command, and also to “Run in Terminal”. If your distro setup allows this, type ‘sudo -s sh’ in the command box, and click “Open”, making sure that “Run in Terminal” is indeed checked. You might not need this option, but if it’s there, use it.
With the Guest Additions installed, the OS should be good to go, and you can use it as you please. All necessary hardware should automatically be operable, such as audio, network, USB and so forth, and if it isn’t, the best option is to head to a search engine and see if others have had the same issue. In all of the OSes I’ve tested (past and present), I never had a show-stopper issue, but one that did require me to search around was with Windows 7.
For some reason, no matter how I installed Windows 7, I’d never have operational audio once in the OS. The effect was the same on both Windows and Linux hosts, so I knew the issue was with VirtualBox itself (the audio works fine in Windows 7 in VMware). After searching around, I found out that the Realtek driver found in the 6285_Vista_APO_PG536.zip file solves the problem, and for me, it did. That driver can be found all over the Web, so if you run into the same issue, and I’m willing to bet you will, you can search for it and download it from a trusted source.
Because VirtualBox has such robust support for a wide variety of guest operating systems, I didn’t want to stick to just one, to help get a better understanding of all of the ups and downs. I’m happy to report that no OS I tested VirtualBox with brought about major issues during either the installation or during the usage. There were a couple instances when I wish VirtualBox offered a bit more robust support for certain things (I’ll talk more on this later), but no issue I ran into was a show-stopper.
Let’s now take a moment to talk about our four tested OSes in rapid succession.
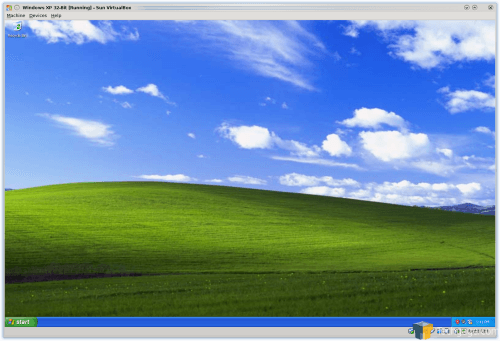
In all of the experience I’ve had with virtual machines, I’d have to vote for Windows XP as the one that’s the easiest to deal with. There’s a reason people use XP on their desktops today… it’s fast, and for the most part, stable. So it’s perfect for VM use, especially on slower machines. Although I run Linux as my primary OS, I run Windows XP almost every day for various tasks, and the reason I use it over Vista or 7 comes straight down to the performance. It’s slick and responsive, and that matters a lot if you plan to put some serious use into your VM.
Installing Windows XP wasn’t too much of an event, although it’s been a little while since I’ve seen that glorious initial blue screen of the setup process (I had hoped I’d never have to see it again!). Once in the OS, the additions installed fine, and I was online in a jiff, with things like audio and 3D graphics working without a hitch.

Windows XP Professional 32-Bit
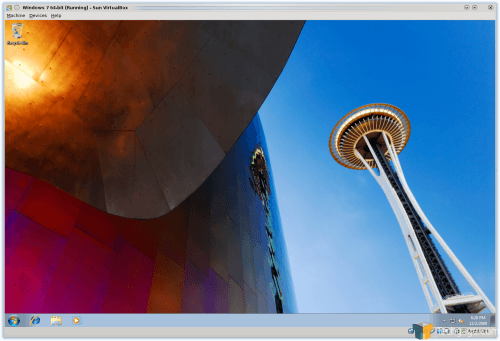
Like Windows XP, I had no issues whatsoever in installing Windows 7, including the Guest Additions. Because VirtualBox doesn’t support Vista and 7’s WDDM driver, things like the Aero window transparency doesn’t work, but other simple 3D does, as long as it’s OpenGL based (Direct3D doesn’t work in Vista or 7 in VirtualBox). As mentioned earlier, I had an issue with the audio driver not functioning (as seen in the image), but after installing the appropriate driver, it worked fine.
Performance as a whole is tolerable, but for working at things for long periods of time, I’d quicker recommend Windows XP. Windows 7 could be considered a glutton compared to XP, and the performance seen in the VM reflects that. That’s not to say that Vista or 7 can’t be used as a regular secondary OS, but you’ll have to be prepared to put up with occasional slowdowns and bouts of no response from applications or the OS itself. For testing, especially with development, the performance is fine, but I’m not quite sold on using either Vista or 7 as a regular OS in a VM. Your opinion may differ, so don’t let my opinion sway you from trying it.
With our two Windows OSes out of the way, let’s move into a look at both Unix-based OSes tested, and also take a look at 3D support.
Support our efforts! With ad revenue at an all-time low for written websites, we're relying more than ever on reader support to help us continue putting so much effort into this type of content. You can support us by becoming a Patron, or by using our Amazon shopping affiliate links listed through our articles. Thanks for your support!


