- Qualcomm Launches Snapdragon 4 Gen 2 Mobile Platform
- AMD Launches Ryzen PRO 7000 Series Mobile & Desktop Platform
- Intel Launches Sleek Single-Slot Arc Pro A60 Workstation Graphics Card
- NVIDIA Announces Latest Ada Lovelace Additions: GeForce RTX 4060 Ti & RTX 4060
- Maxon Redshift With AMD Radeon GPU Rendering Support Now Available
Social & RSS Feeds
Latest Videos


Latest News
A Look At Enermax’s Equilence Mid-tower Chassis & Liqtech TR4 280 AIO Cooler
by Rob Williams on February 27, 2018 in Cases & PSUs, Cooling
AMD’s Ryzen Threadripper CPUs offer a ton of performance, but that performance can sometimes come at the expense of higher temperatures. Enermax’s Liqtech TR4 280 aims to prevent heat from ever becoming a problem, though, thanks to its full TR4 coverage. Complementing that in our look is the Equilence chassis. Between them, Threadripper screams… but at a muted level.
After taking both the Equilence mid-tower chassis and Liqtech TR4 280 AIO cooler for a good test, I’m left wondering why it is we haven’t had Enermax on our radar a lot more over the years. I hate to admit it, but our last look at an Enermax product was a ridiculous six-and-a-half years ago, and before that, four years. Two reviews in ten years is a bit lacking, so we’ll correct this wrong.
In December, Enermax reached out to talk about its full-coverage Threadripper cooler, and offered us a look. One thing led to another, and an Equilence mid-tower chassis joined in, along with a 600W power supply. This kit ultimately became a base to a Threadripper build, one that will complement the Intel X299 rig we have for workstation testing.
Speaking of – I pit both rigs against each other last month across a variety of tests, so check that out if you’re looking to go the high-end route with your next processor.

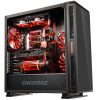
Above, the Equilence chassis acts as a wall to lean on for Aorus’ X399 Gaming 7 motherboard (one that I’ve enjoyed using quite a bit; it’s really been pain-free), while the Liqtech 280 sits near, waiting for action. Secured into the TR4 socket is the Ryzen Threadripper 1950X, a chip that I absolutely love, as the aforementioned article will allude.
Below is a better look at the Equilence than my measly camera skills could capture. The front is completely glossy, which means it is a bit of a finger print magnet. The side panel is a thick tempered glass piece that suits the rest of the aesthetic very well. On the opposite side of the back, top, and front panels are sturdy dampening pads that help keep the PC running as quietly as possible.

And here are the Liqtech TR4 280 and 360 coolers. I’m taking a look at the bottom one here, a middle-of-the-pack model that doesn’t hold anything back. After testing the 280 model, I don’t really see a need to go with the triple-rad solution unless you’re going to be overclocking quite intensely. And even then, there’s no guarantee.

We’ll start by taking a tour around the Equilence chassis (I’ll supply some build photos later). You can check through the chassis specifications in the table below, and then head on over to the image gallery to see what’s available.
| Enermax EQUILENCE Chassis | |||||
| Model Name | ECA3511A-BB | ||||
| Dimensions (mm) | D500 x W235 x H510 mm | ||||
| Material | 0.8mm SPCC | ||||
| M/B Type | ATX, Micro ATX, Mini ITX | ||||
| I/O | USB3.0 x 2, USB2.0 x 2, HD Audio, Fan controller | ||||
| Drive Bays | 3.5″ | 2 | |||
| 2.5″ | 6 (Hidden, converted from 3.5″ HDD trays) | ||||
| Expansion Slots | 7 | ||||
| Fan Slots | Front | 3 x 120mm (2 x 120mm fan pre-installed) | |||
| Rear | 1 x 140 / 120mm (1 x 140mm fan pre-installed) | ||||
| Top | 2 x 140 or 3 x 120mm | ||||
| Side | 2 x 120mm | ||||
| Liquid Cooling |
Top | 360 / 280 / 240mm radiator | |||
| Front | 360 / 240mm radiator | ||||
| Rear | 140 / 120mm radiator | ||||
| Side | 240mm radiator | ||||
| PSU | Standard ATX Type | ||||
| Maximum Compatibility | VGA Card Length: 420mm (280mm with side radiator) | ||||
| CPU Cooler Height: 175mm | |||||
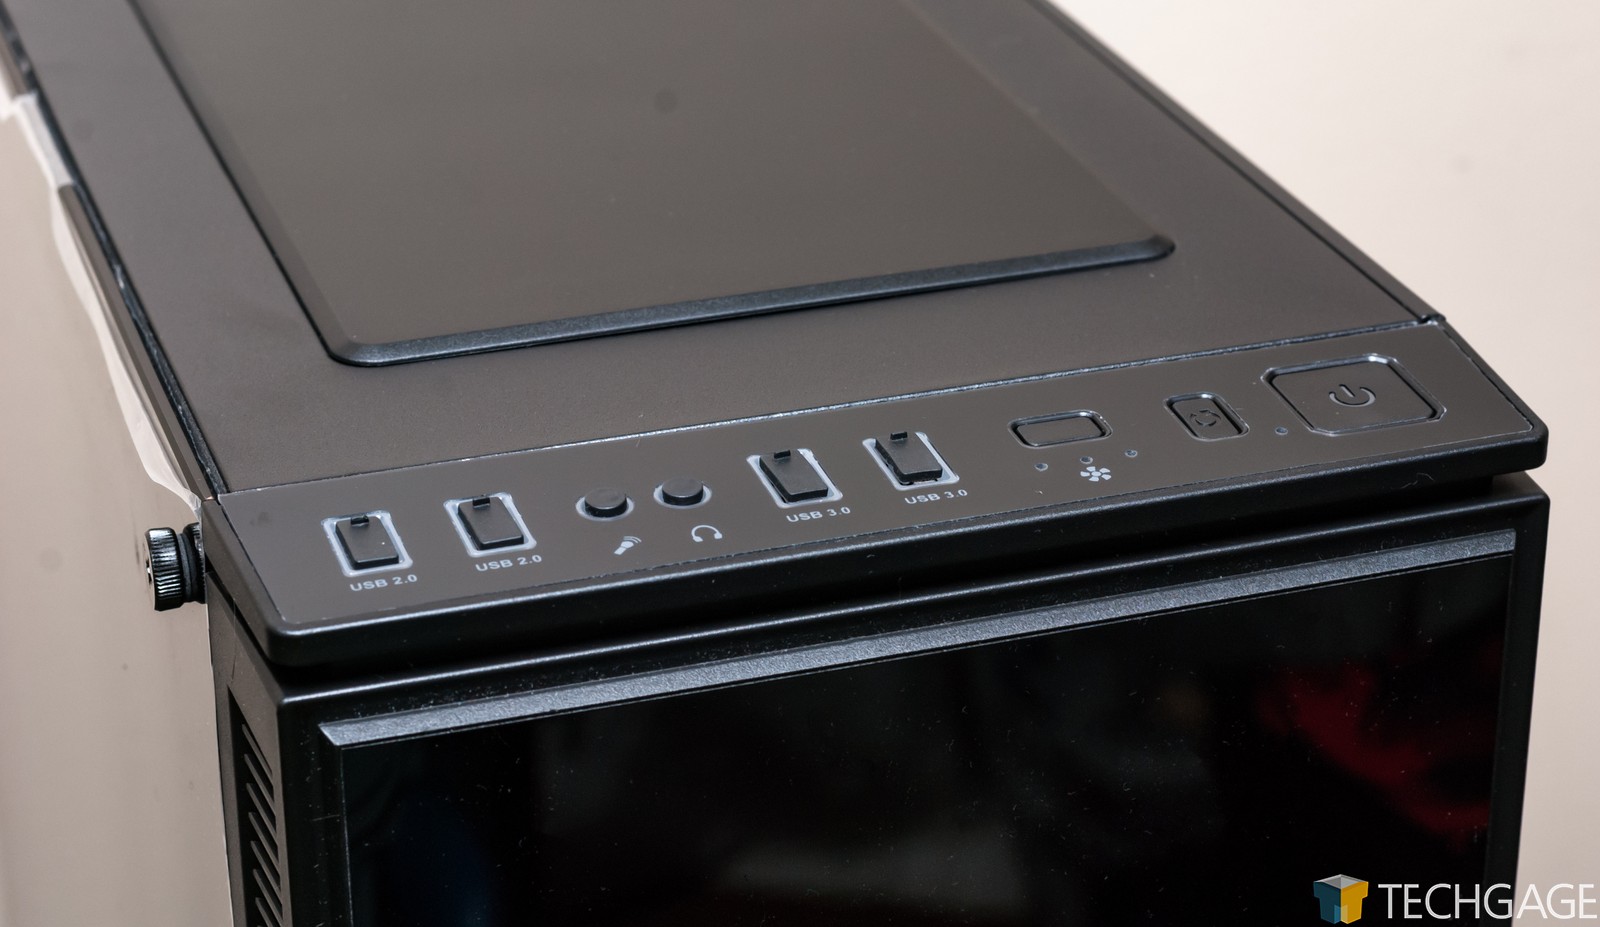
To start, the first thing that caught my eye about this chassis is that the top panel ports have rubber blockers preinstalled. These are easily lost if you don’t keep track of them once you take them off, but this is a really nice touch, because USB ports can get really dirty over time. These blockers help maintain the chassis’ super-clean aesthetic.

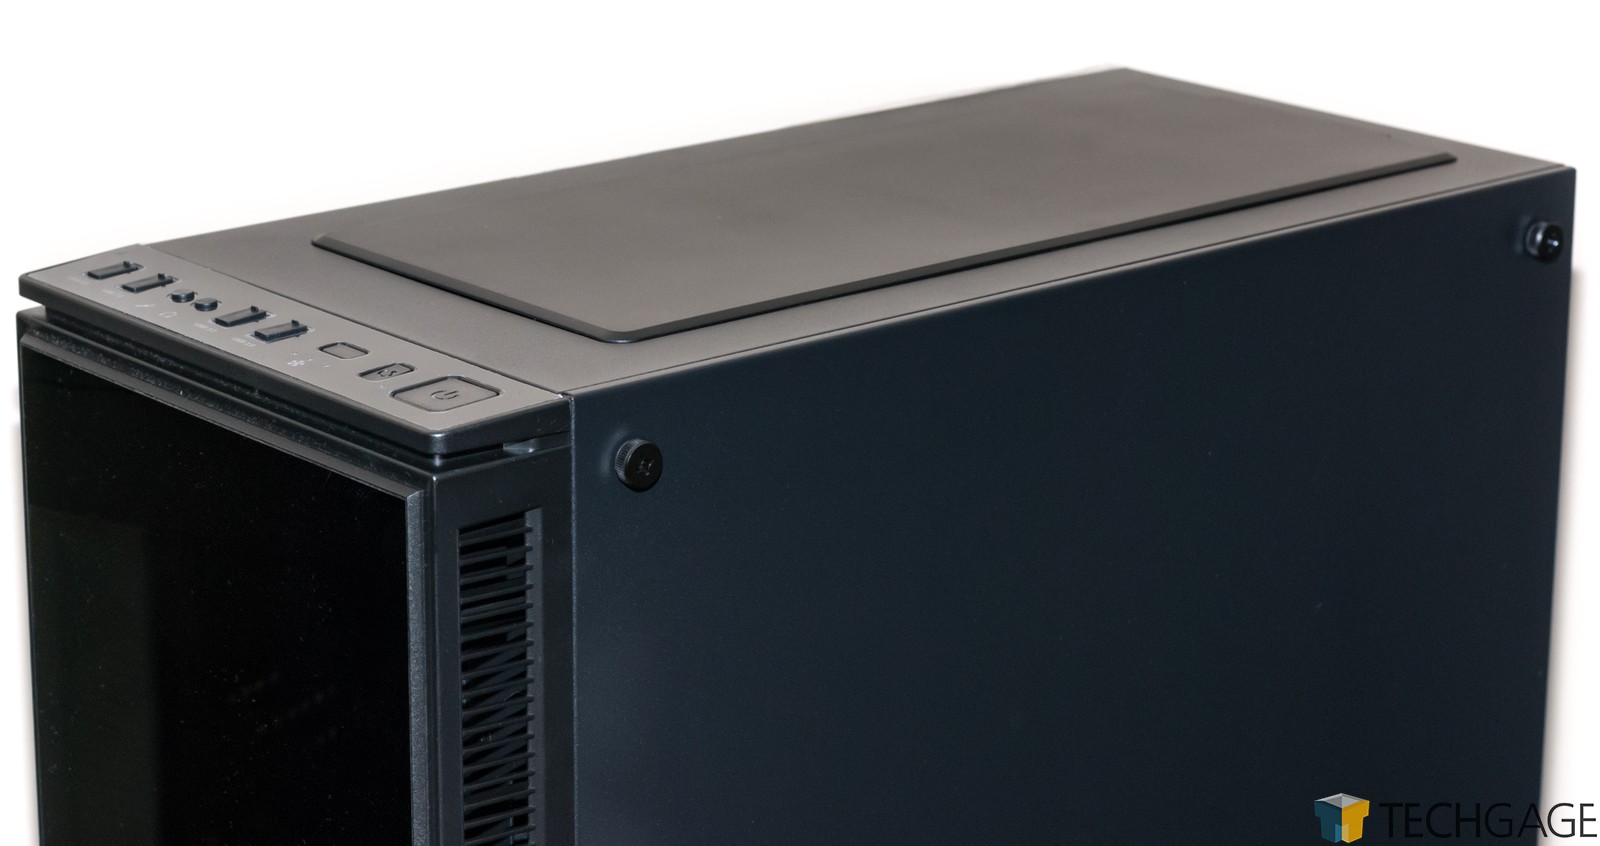

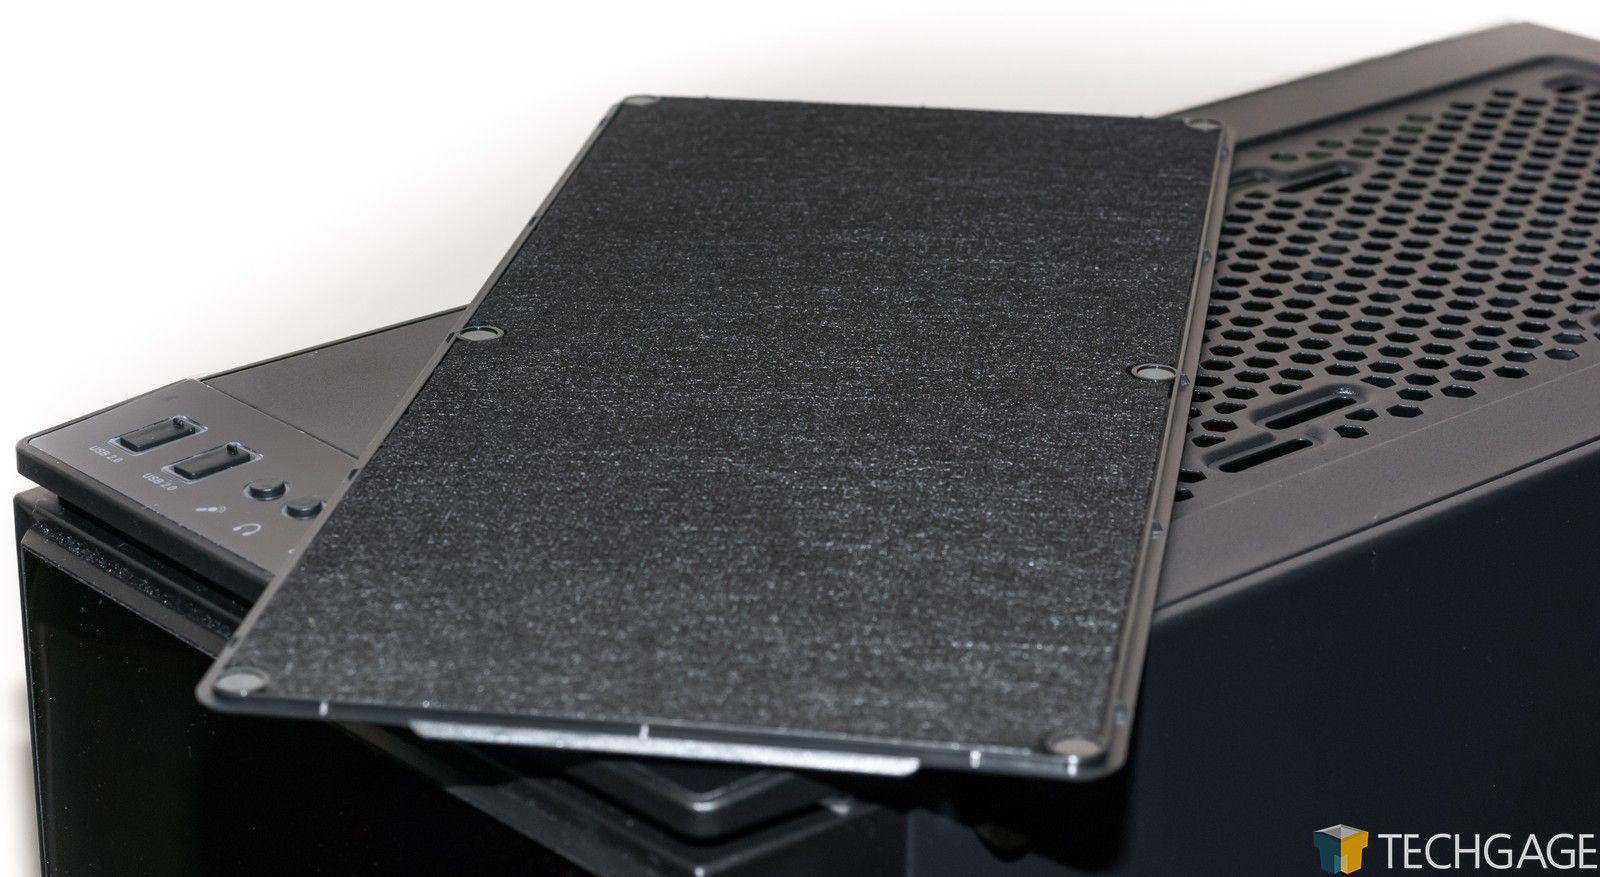
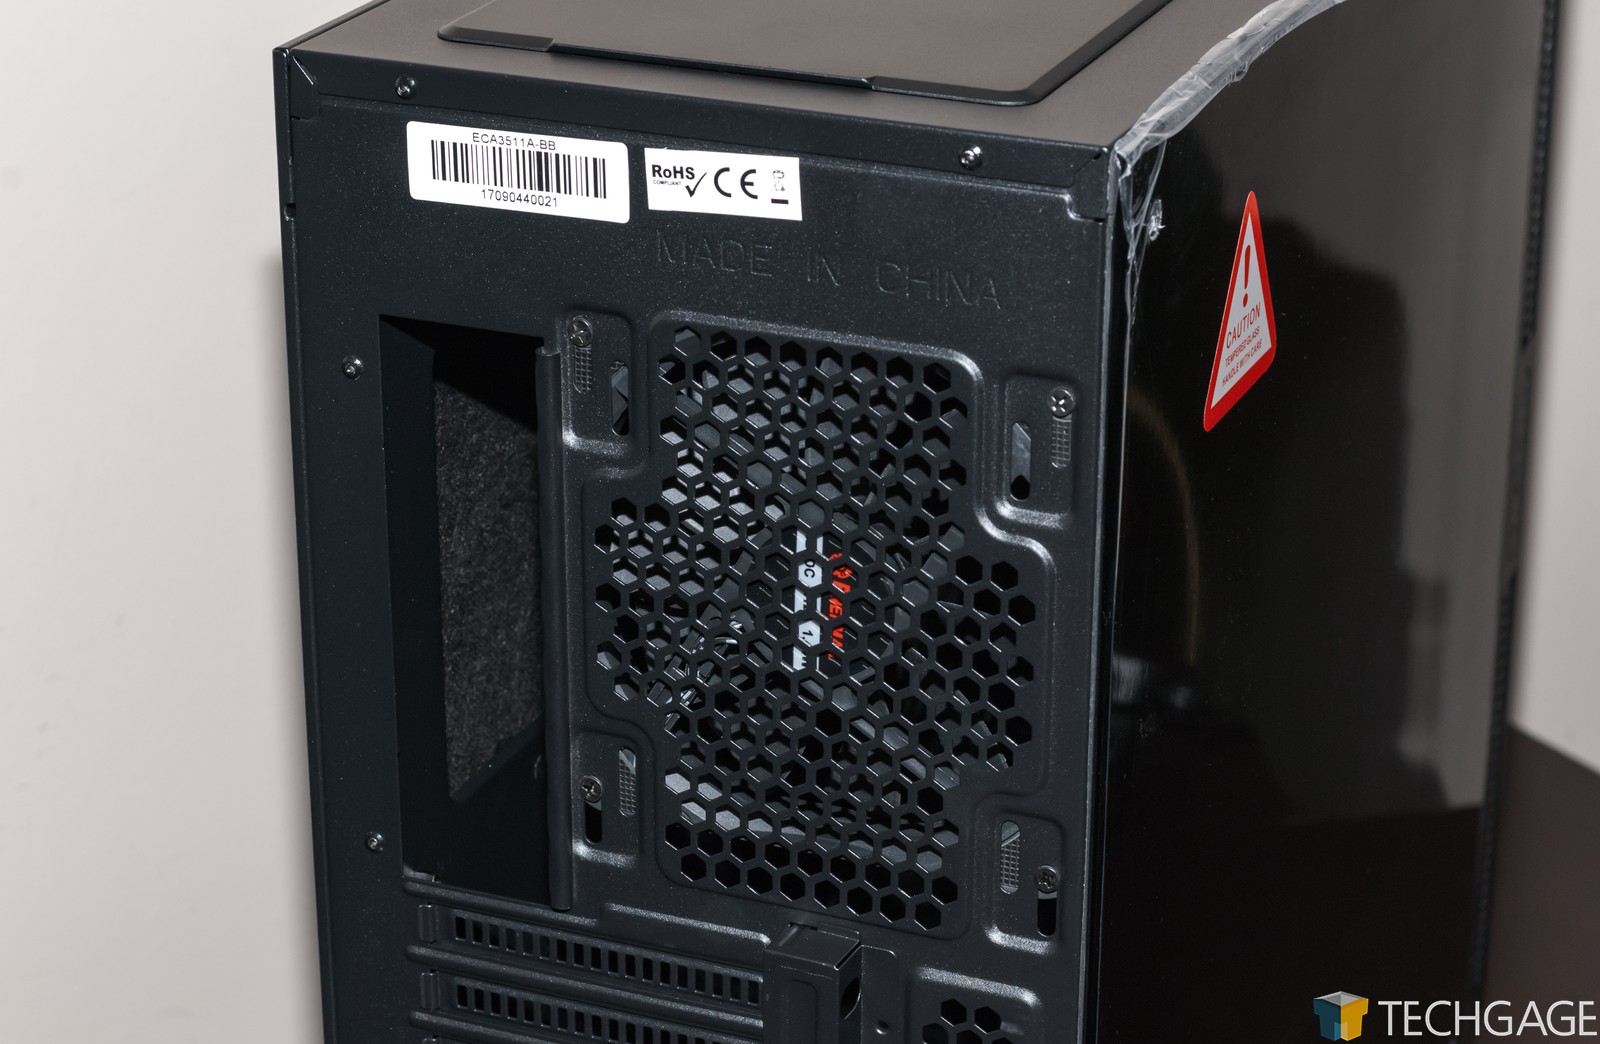
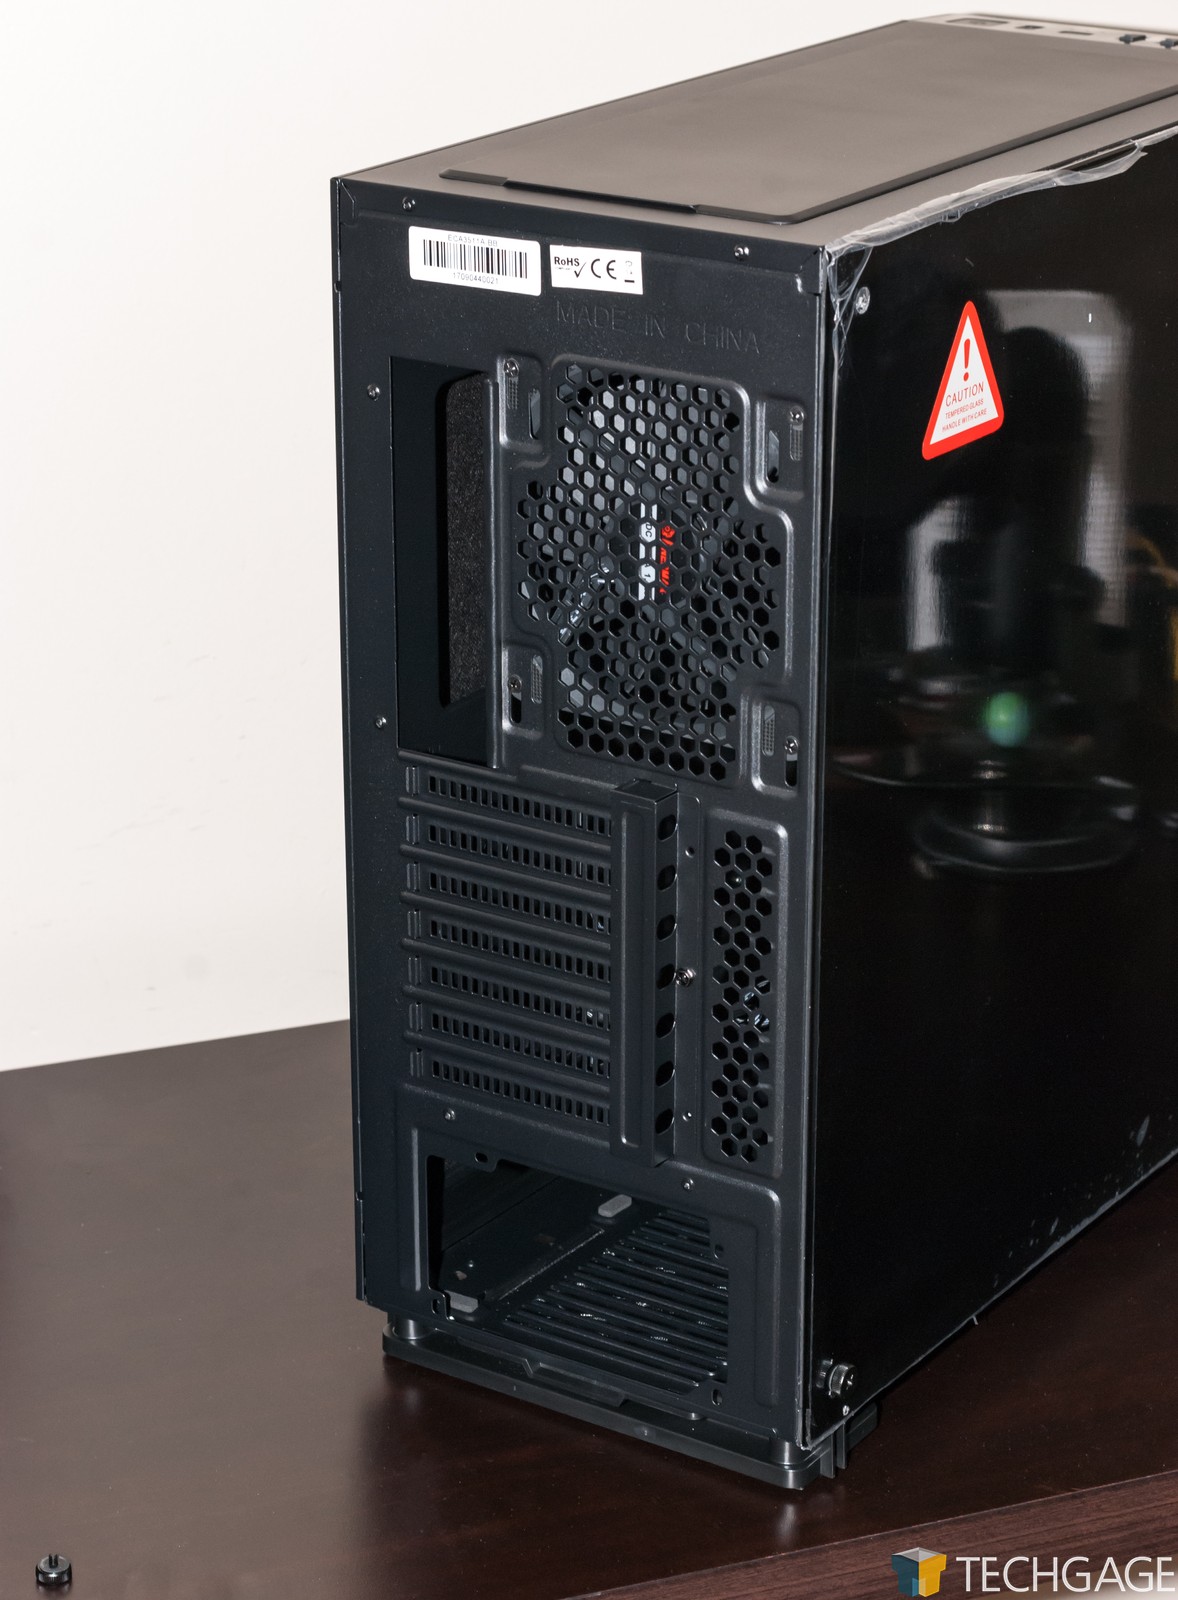
On the back side, two thumbscrews hold the entire (very rigid) panel in place. At the top, a dampening cover can be removed to improve airflow, although whether you’d want to remove it would depend on your level of noise acceptance. I personally installed the AIO radiator at the top, which would mean there’d be very little room for air above the rad to move.
I did however use the PC for some time with this top panel in place just to test (OK, it’s because I had totally forgot about it), and the temperature difference was about 8-10°C higher. Alternatively, if you want to spend some time routing things differently, you could install the rad vertically inside, after moving the preinstalled front fans.
With a closer look at the front IO panel, we see dual USB 2.0 and 3.0 ports, a mic input and headphone output, as well as a simple fan controller that lets you adjust up to six fans using included fan headers.


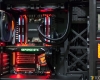
In its default configuration, SSDs could have been installed to the right of the motherboard, or as mentioned before, the AIO’s radiator could be, as well. I preferred to keep the AIO up top, blowing air outward, and then keep the stock fans in front sucking cooler air in. The final shot in the slider above shows that on the side, there’s plenty of room for air to come in, and likewise, that’s a good shot to show off the lit-up Enermax logo (one on either side).
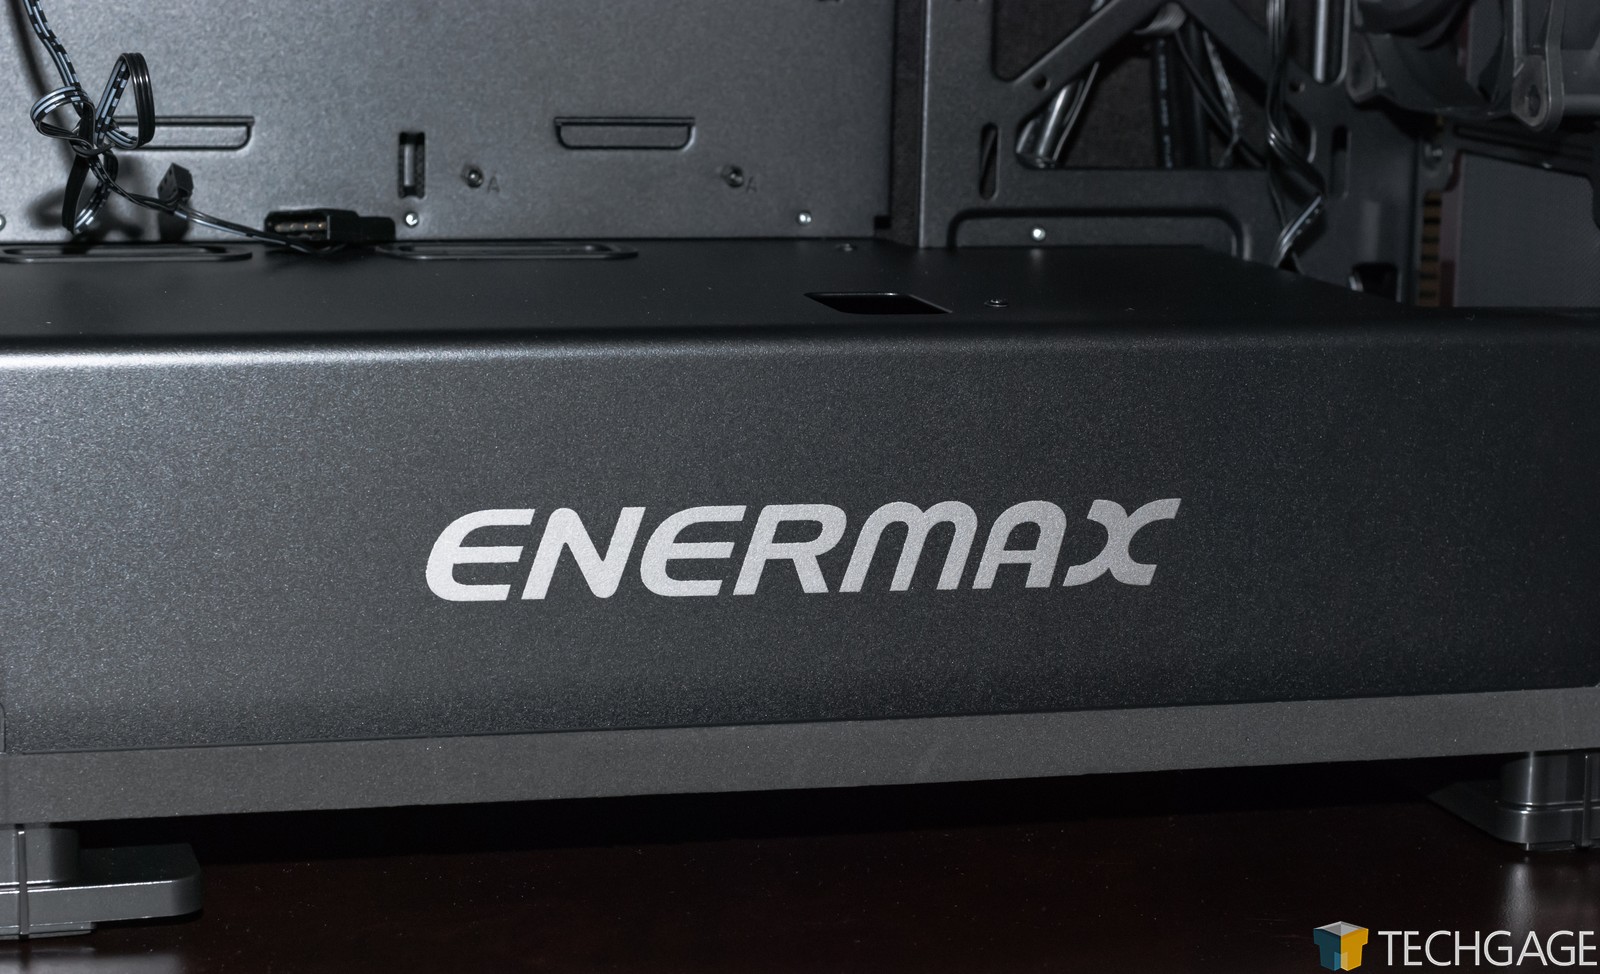
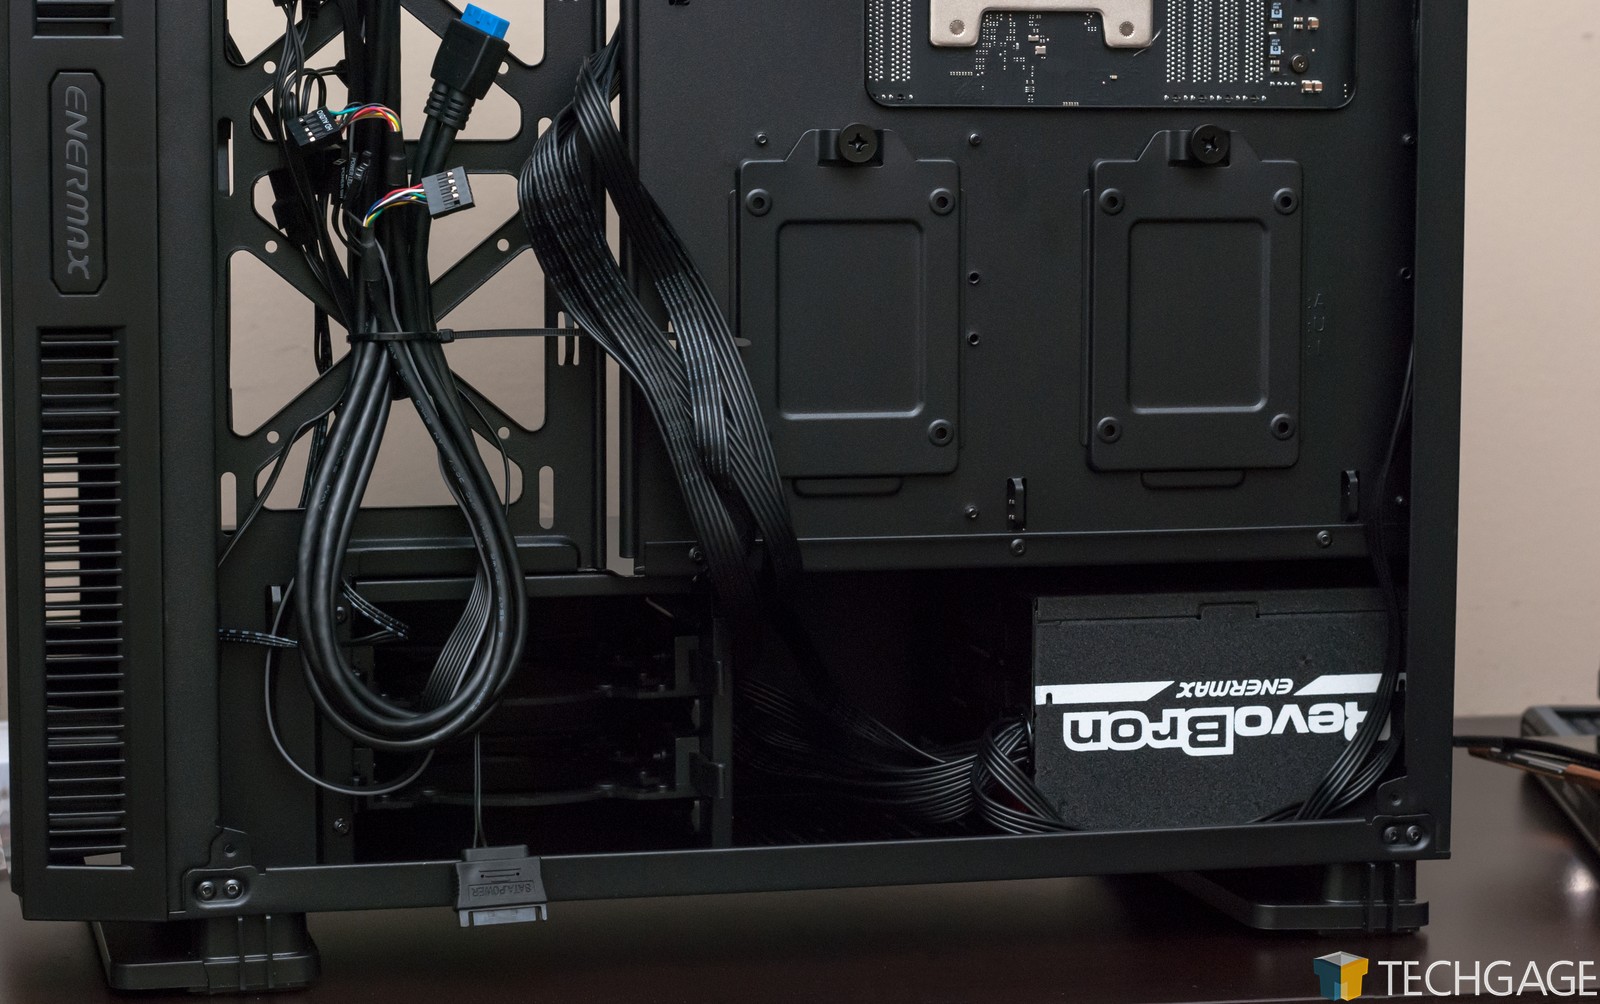
At the bottom of the chassis is a shroud with another Enermax logo gracing the front. This completely hides all of your cabling, keeping the internals looking good, as well as the thermals. There’s plenty of room in this chassis to route your cables efficiently. While I would have personally liked to have seem some gap separating the bottom of the motherboard from the chassis, grommets at the bottom will allow you to route the USB headers, chassis connectors, and other miscellaneous cables from the back and up through. Here’s a better look at the internals, with different lighting.
Since I didn’t grab great images of the Liqtech TR4 cooler, like a meathead, please allow me to pull an image from Enermax’s website, that again, is better than I could do.

The Liqtech TR4 is laser-focused on Threadripper, so it’s not going to be able to support other platforms (except maybe Threadripper 2 in the future, and that’s only if AMD’s able to keep the socket the same). Because of that TR focus, the heatspreader on this cooler offers 100% coverage of the chip’s massive surface. This of course allows for much more efficient heat transfer. Full specifications are available in the table below:
| Enermax LIQTECH TR4 280 | ||
| Model | ELC-LTTR280-TBP | |
| Cold Plate | Material | Copper |
| Pump | Bearing | Ceramic nano PI bearing |
| MTBF | 100,000 hours | |
| Motor Speed | 3000 RPM | |
| Rated Voltage | 12 V | |
| Rated Current | 0.4 A | |
| Radiator | Dimension | 313 x 140 x 28 mm |
| Material | Aluminum | |
| Tube | Material | Polyamide (PA) rubber tube |
| Length | 400 mm | |
| Weight (w/o fan) | 1260 g | |
| Bracket | Compatibility | AMD® TR4 / SP3 |
| Fan | Dimension | 140 x 140 x 25 mm |
| Bearing | Twister Bearing | |
| MTBF | >=160,000 hours | |
| Speed | 500 – 1500 RPM ± 10% | |
| Rated Voltage | 12 V | |
| Rated Current | 0.2 A | |
| Air Flow | 31.86 ~ 80.71 CFM 54.13 ~ 137.13 m3/h |
|
| Static Pressure | 0.960 ~ 4.812 mm-H2O | |
| Noise Level | 14 ~ 25 dBA | |
| Connector | 4 pin PWM | |
| Warranty | 2 years | |
The cooler also uses Enermax’s SCT (shunt-channel technology) that eliminates (or at least mostly) the “boundary layer” effect that can slow the flow of liquid by adding a channel to the block. That, combined with a pump capable of pushing 450 liters-per-hour, helps make this a really efficient cooler.
Other perks of this TR4 cooler are sturdy fans that feature anti-vibration pads on the corners, and weaved tubing that improves durability. And that durability really is the name of the game here. As I mentioned in the intro, it’s been ages since I’ve had the pleasure to take an Enermax product for the spin, but from the moment I took the Liqtech TR4 (and Equielence chassis, for that matter) out of the box, I was instantly impressed with the craftsmanship and overall quality of the gear.
Quick Tests & Final Thoughts
As much as I’d like to be able to compare this chassis and setup directly to another, I don’t have proper data to do that with (and won’t, quite frankly, since this is more of a one-off article), and I’ll be frank: getting accurate temperature data on Threadripper is tough, for some reason.
During testing, I made good use of AMD’s Ryzen Master software, tuned for Threadripper, and the reported temperature was all over the place, simply untrustworthy. AIDA64 and HWInfo seemed to give me generally the same kind of temperatures, which seemed more accurate overall, so I stuck with AIDA64, since I’m much more familiar with it.
I conducted a total of three tests, each of which stress the CPU differently. For the first test, I reencoded some massive game capture files to a much more manageable bitrate (700Mbps to 100Mbps), and second, I stressed the CPU with a Monero currency miner (xmr-stak). Thirdly, I used AIDA’s built-in stress test while the CPU was overclocked, for a bit of an “ultimate” stress.
The results:
| Idle | Load | |
| Media Encode | 29°C | 58°C |
| Monero Mining | 28°C | 40°C |
| Stress Test | 21°C | 85°C |
For both the media encode and stress test, the PC was used as normal, with the side panel on. For the mining test, the panel was kept off, as two installed graphics cards were also pushed to full load to mimic an actual mining rig better.
Under a normal stress, such as with media encoding, the TR4 280 kept temperatures well within reason. I was churning a lot of footage with that test, and it took over 2.5 hours to process – so for it to not exceed 58°C is quite nice. Mining, despite utilizing the CPU to 100%, makes more use of the cache than the cores, so it’s ultimately not a very good “stress test”.
What does make a good stress test is AIDA64, which pushes the chip as hard as possible to make it cry. 85°C is what I’d personally consider “too high”, but given the test, I wouldn’t personally be too concerned running that as a typical overclock, largely because during the entire 30 minute stress, the 4GHz clock didn’t skew at all. And that’s with a deliberately hardcore test; none of my personal workloads are going to exercise the CPU quite like AIDA’s stress-test will. Your mileage may vary, of course.
What’s interesting about that really hardcore stress is that the area around the CPU and cooler didn’t give the impression that the chip was actually running as hot as was reported. At the same time, noise wasn’t noticeable above other ambient noise, either.
And that’s one of the reasons I walk away so impressed with this cooler. It might not guarantee a 4GHz overclock (it can’t really), but it can let a 16-core chip like the 1950X churn away for hours on end without even breaking 60°C. It’s nice when you can render or encode and simply not have to worry about your CPU getting too hot, or its cooler making too much noise, for that matter.
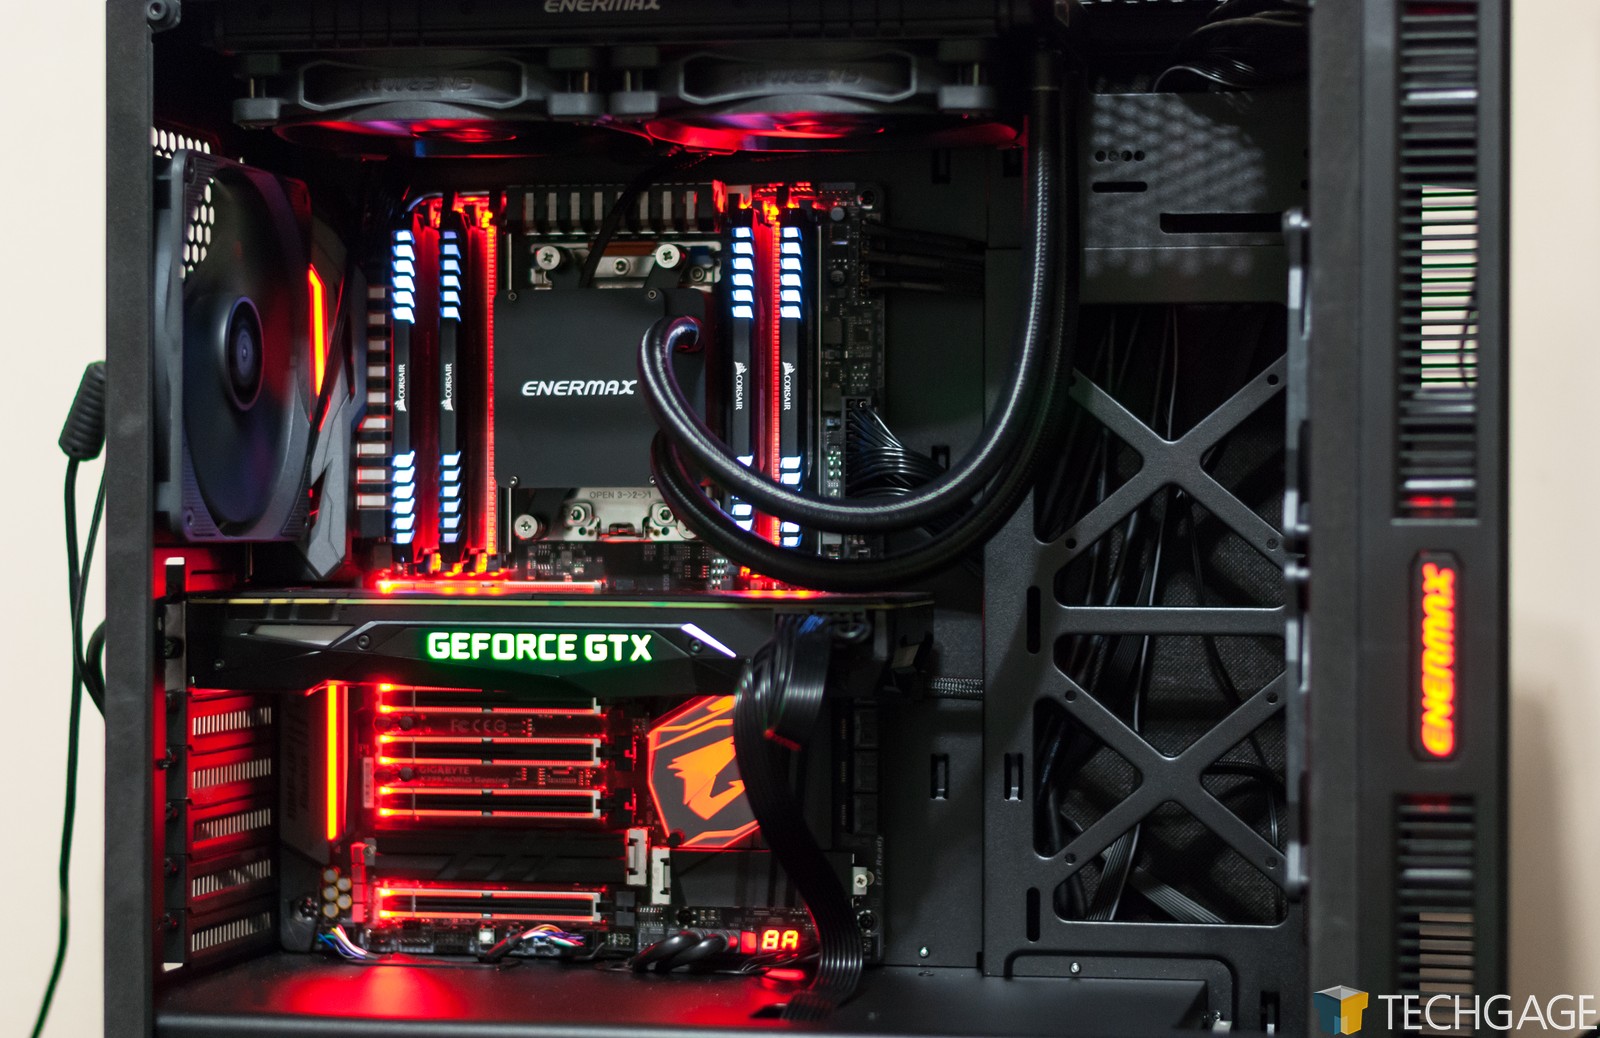
That about covers it for the cooler, but I can’t wrap-up without final thoughts on the chassis. Speaking of, here’s a parting shot:

Overall, I’m quite happy with the Equilence, although there are a couple of caveats that may keep some away from a purchase. The glossy front looks really good, but it’s a finger print magnet to the point where I feel like I would have rather seen a matte front. I don’t mind the lit-up Enermax logo on the sides, but some may prefer a cleaner aesthetic without them.
As I haven’t tested a whack of chassis against each other, I can’t say that the Equilence is “efficient” compared to others out there. But really, the goal of this chassis isn’t to deliver market-leading heat transfer efficiency. With this chassis, Enermax developed a nice blend of cooling and noise. Even if you remove the top panel to let an AIO breathe, the overall noise level is still very acceptable. If you want to watch a movie and keep things as quiet as possible, you can put it back on without overheating the CPU. You’d just want to remember to take it back off if you want to crank the workload up.
As mentioned before, this chassis and cooler are effective statures of our Threadripper build, and ideally, the only thing that will change in that rig in the foreseeable future is the graphics card or CPU (should a different SKU ever land on my desk). Because I will continue to use this setup, you can continue to ask questions about it, should any arise.
Pros
- Equilence: Clean design, a lot of attention to detail.
- Equilence: Built-in dampening does well to keep noise at a minimum.
- Equilence: Top ports light up so you can see them in the dark.
- Liqtech TR4 280: Efficient cooling at modest noise levels.
- Equilence & Liqtech TR4 280: Well-built. They give the impression of quality, and durability.
Cons
- Equilence: Glossy front is a finger print magnet.
- Liqtech TR4 280: Doesn’t offer software control.

Enermax Equilence & Liqtech TR4 280
The Liqtech TR4 coolers range from $85 to $140, depending on the which size radiortor you get, and the Equilence chassis goes for around $80 from various retailers.

Support our efforts! With ad revenue at an all-time low for written websites, we're relying more than ever on reader support to help us continue putting so much effort into this type of content. You can support us by becoming a Patron, or by using our Amazon shopping affiliate links listed through our articles. Thanks for your support!

Rob Williams
Rob founded Techgage in 2005 to be an 'Advocate of the consumer', focusing on fair reviews and keeping people apprised of news in the tech world. Catering to both enthusiasts and businesses alike; from desktop gaming to professional workstations, and all the supporting software.


