- Qualcomm Launches Snapdragon 4 Gen 2 Mobile Platform
- AMD Launches Ryzen PRO 7000 Series Mobile & Desktop Platform
- Intel Launches Sleek Single-Slot Arc Pro A60 Workstation Graphics Card
- NVIDIA Announces Latest Ada Lovelace Additions: GeForce RTX 4060 Ti & RTX 4060
- Maxon Redshift With AMD Radeon GPU Rendering Support Now Available
A Look at the SteamOS Beta on a Custom PC

Valve’s much-anticipated Linux distribution, SteamOS, is here – at least in beta form. Despite it being early days, we couldn’t wait to see what the OS brings to the table (at this point), and what it’d be like installing it to a custom PC (hint: it’s hit-or-miss). One thing we know for sure: Linux’s gaming future is bright.
Page 1 – Introduction, Installation Considerations & Using SteamOS
Valve impressed us back in September when it announced its own Linux distribution, and now, it impresses again: A mere two-and-a-half months after the announcement, a beta has become available.
I’ve spent quite a bit of time with the beta since its release late last week, so in this article, I’m going to talk about my experiences with it, give some tips, and then talk about what we should expect to see (and hope to see) in the future.
Given Valve’s undivided attention to Ubuntu Linux during the development of Steam for Linux, it seemed likely that it would become the base for SteamOS – but not so. Instead, Valve went with the base of Ubuntu and a billion other distros: Debian. Going the Debian route allows Valve to build a distro from the ground up and also deliver an underpinning that many Linux users are already familiar with.
A quick video tour of the SteamOS beta.
I’m not going to talk too much about the software that Valve ships with SteamOS outside of the interface that everyone will be using, but if you do happen to be interested in some specifics, I’d recommend checking out DistroWatch’s SteamOS page. An important takeaway is that SteamOS makes use of recent software; nothing is “outdated” here. Interestingly, despite Valve currently offering support for only NVIDIA graphics hardware, DistroWatch’s package list shows a bundled AMD driver (called ‘ati-driver’). Intel support might also be included, but its driver would come from the Linux kernel itself.
SteamOS Installation Considerations
On its “Build Your Own” page, Valve lists off a number of points to take note of before installing SteamOS. The most important of them all: Installing SteamOS will erase the entire primary hard drive. Unlike other distros, which allow you to modify the partitioning scheme, the SteamOS beta has one goal: Extract its image to the entire disk.
Hardware requirements are somewhat modest: A 64-bit AMD or Intel processor, 4GB of RAM, a 500GB hard drive (this isn’t a strict requirement), an NVIDIA graphics card, and a motherboard that supports UEFI.
One requirement there is easy to overlook: UEFI. This isn’t something many people would have expected, but it’s one that could restrict someone from installing SteamOS on a PC only a couple of years old. Hacks exist to get around this issue, but when it comes to an OS which is meant to be stable, I’m not sure I’d mess around with it outside of experimentation.
That being said, even if the motherboard does support UEFI, it doesn’t mean that booting-up into the SteamOS image will be that simple. Across four different machines I tested (ASRock Z87, ASUS X79, GIGABYTE X79, and GIGABYTE Z87), only two booted into the image correctly (ASRock Z87 and GIGABYTE X79). Further, the ‘SYSRESTORE.zip’ didn’t work for me at all, while ‘SteamOSInstaller.zip’, which Valve notes as the alternative, did.
I couldn’t figure out what it was that would prevent either of these images from booting up on a proper UEFI motherboard, and editing options inside of the EFI itself didn’t help. Where SteamOS’ installation is concerned, it’s best to just consider things hit-or-miss at this point. Things will improve.
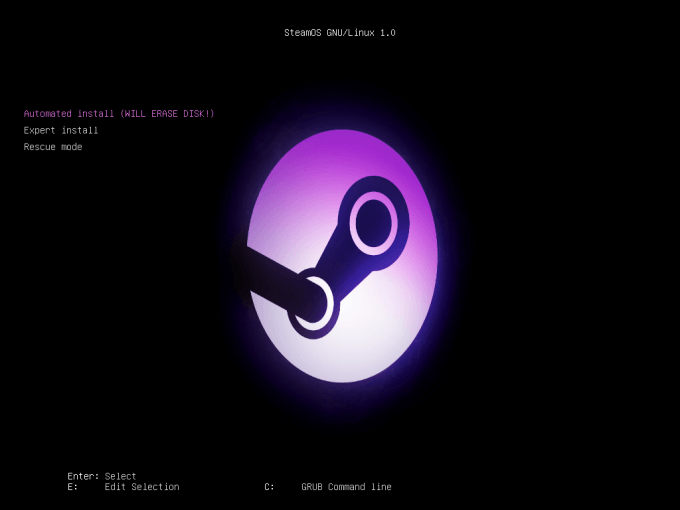
If you boot into the flash drive that Valve has you create and you see the exact GRUB bootloader above (that Steam logo is important), you should have no problems getting the OS installed.
For those without a test PC to install to, VirtualBox is a good alternative (although a little bit of a complicated one). I’d recommend checking out this guide; I followed it and things worked out well.
Post-install & Using SteamOS
Because the ‘SYSRESTORE’ version of SteamOS didn’t work for me, I had to conduct a couple of post-install steps that Valve mentions on its ‘Build Your Own’ page. After a couple of minutes and reboot, I was greeted by the main SteamOS screen.
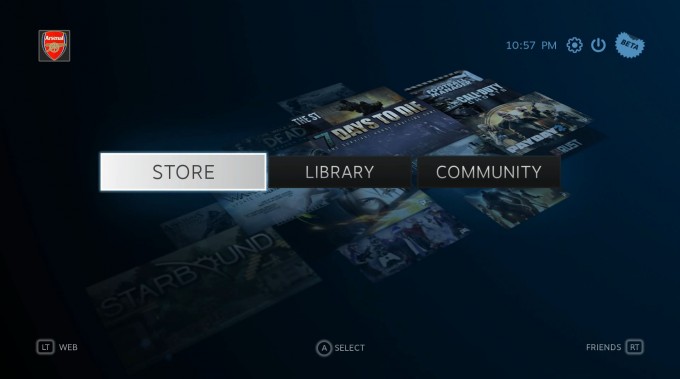
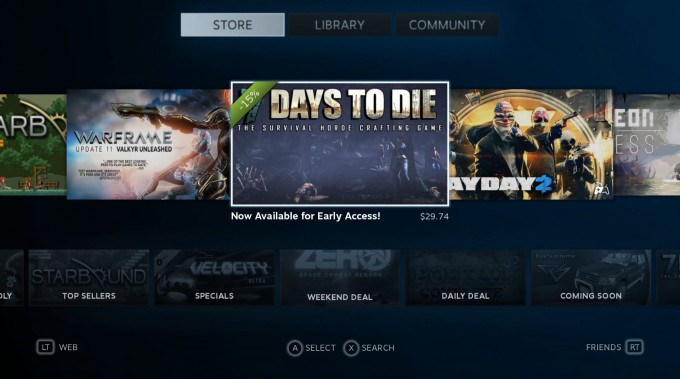
As you might be able to tell, SteamOS looks the same as Steam’s ‘Big Picture’, which I took a look at after its release last September. If you’ve used Big Picture before, you’ll feel right at home with SteamOS; the navigation remains identical. For this reason, I’m not going to post a bunch of screenshots, but would instead refer you to the YouTube video at the top of this page so you can see it in action.
One “beta” problem will be seen immediately: The titles displayed in your library or on the store are not Linux-specific. This of course means that most games seen will not be installable under Linux, which is going to prove frustrating for those who might be led to believe that a game they love (or have wanted) is now supported under the OS.
While the option to filter by Linux in your library exists, I don’t think the same ability exists in the store. So, if you’re interested in a game, you’ll have to select it and then move to the tab that provides OS support information. It’s a clunky design, that’s for sure, but one that Valve will undoubtedly fix soon.
In time, SteamOS will allow for the streaming of Windows games from another PC in the house, but that functionality is not present in this beta. This is one feature I’m anxious to test out though, as I’d love to see how it compares to GameStream on NVIDIA’s SHIELD.
Because the SteamOS interface is the same as Big Picture, there’s not too much more that can be said here, except that I think it’s a great, fluid interface that offers a minimal overall learning-curve.
If you’ve never used Big Picture before but are now curious, you can simply click the option for it in the top-right hand corner of your Steam client. If a gamepad is plugged in and active, you can control the interface with it instead of a keyboard and mouse.
Support our efforts! With ad revenue at an all-time low for written websites, we're relying more than ever on reader support to help us continue putting so much effort into this type of content. You can support us by becoming a Patron, or by using our Amazon shopping affiliate links listed through our articles. Thanks for your support!


