- Qualcomm Launches Snapdragon 4 Gen 2 Mobile Platform
- AMD Launches Ryzen PRO 7000 Series Mobile & Desktop Platform
- Intel Launches Sleek Single-Slot Arc Pro A60 Workstation Graphics Card
- NVIDIA Announces Latest Ada Lovelace Additions: GeForce RTX 4060 Ti & RTX 4060
- Maxon Redshift With AMD Radeon GPU Rendering Support Now Available
ASUS Xonar U1 USB Audio Station
Own a notebook and not impressed with the onboard sound solution? Would you like the ability to be a bit more “hands on” with your audio? Do you want something that’s different than what everyone else has? ASUS might just have the answer for you.
Page 1 – Introduction
ASUS recently jumped into the computer audio arena in a big way with the release of their Xonar D2 (and now D2X PCI-E). Rory took that card for a spin a few months ago and was left thoroughly impressed. In addition to offering fantastic audio reproduction and low distortion, it included a great software bundle and was well presented.
Once the D2 model was released, we found out that both a PCI-E and USB version of the card were en route. The USB “Audio Station” is arguably the more interesting of the two though, as it’s designed to offer superb external audio for both desktop PCs and notebooks with the help of EAX and DirectSound HW acceleration, all while having reasonable specs to boot.
How impressive could USB audio be? Because of the external nature and limited capabilities of the USB connector, it’s no surprise that the common audiophile don’t take USB audio too seriously, whether it be a sound card or head phones. We will evaluate potential issues later, but for now let’s take a peek at what the U1 brings to the table, shall we?
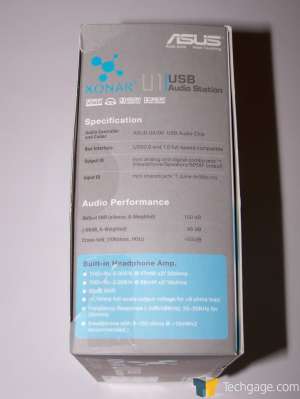
| Audio Performance | Output Signal-to-Noise Ratio (A-Weighted): 100 dB Output THD+N at 1kHz (A-Weighted): 0.0045% (87 dB) (-60dB, A-Weighted) 96 dB Analog Playback Sample Rate and Resolution: 48 KHz |
| Headphone Amp | THD+N< 0.005% @ 47 mW x2/ 32ohms THD+N< 0.006% @88 mW x2/16ohms 96 dB SNR >1.1Vrms full-scale output voltage for >8 ohms load Frequency response (-3dB/48KHz): 20~20 KHz for 32 ohms (headphone with 8~150 ohm @ >10mWx2 recommended) |
| Audio Processor | UA100 |
| I/O Ports | Bus Compatibility: USB Analog Output Jack & Digital S/PDIF Output Combo: Analog 2CH/Digital 5.1 Analog Input Jack: Yes, stereo recording |
| Driver Features | Operation System: Windows Vista (32 & 64 bit), Windows XP (32 & 64 bit) Dolby® Technologies: Dolby® Headphone, Dolby® Virtual Speaker, Dolby® Pro-Logic IIx, Dolby® Digital Live DirectSound3D Game Extensions 1.0/DirectX: DS3D GX 1.0 supports EAX gaming sound effects and DirectSound 3D hardware enhanced functions on Windows Vista. (DirectX/DirectSound 3D compatible) Smart Volume Normalizer™: Normalizes the volume of all audio sources into a constant level and also enhances your 3D sound listening range and advantages in gaming Magic Voice™: Modifies the sound of your voice, for VOIP and online chat applications Karaoke Functions: Music Key-Shifting and Microphone Echo effects Xear 3DTM Virtual Speaker Shifter: Virtual 7.1 speaker positioning Array Microphone: Reducing environmental background sounds and noises; keeping your front side voice input as clean as possible Other Effects: 10-band Equalizer/27 Environment Effects |
| Bundled Software Utility | Portable Music Processor Lite: Add Dolby Headphone, Dolby Virtual Speaker (w/ Pro-Logic II), and Smart Volume Normalization processing to your digital music files |
| Accessories | 1 x Optical S/PDIF adaptor cable 1 x Stereo Vertical Array Microphone |
All this is bundled into a package that could be mistaken for a salt or pepper shaker. Let’s take a quick look at the packaging.
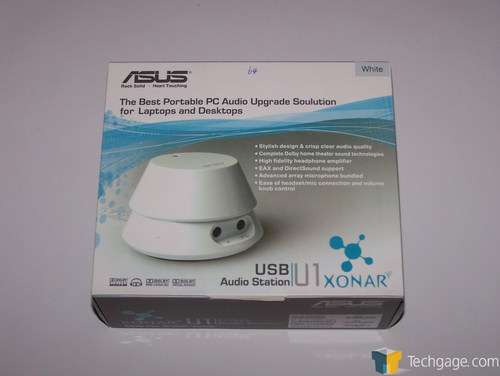
The front of the box shows a color shot of the U1 and lists all the Dolby effects along with an overview of the features, while the bottom has the serial number, part number, part name and bar codes for inventory control.
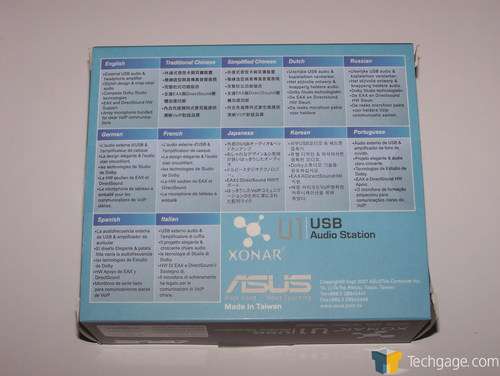
The rear of the box lists more features in twelve languages. Saves on packaging costs.
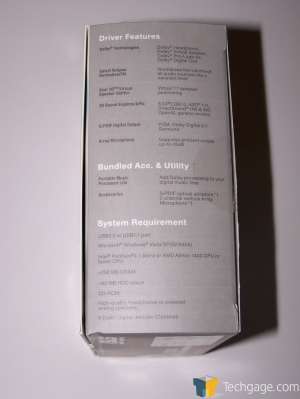
On one side, the package lists the driver’s features, bundled goodies and system requirements. While the other outlines the the hard specs, the audio pr0n if you will, which I’ve shown in the table. The tape on the flap illustrates that the flaps are a royal pain in the old posterior to open. I ripped the flap when I was doing a cursory examination of the U1 to make certain UPS hadn’t killed it.
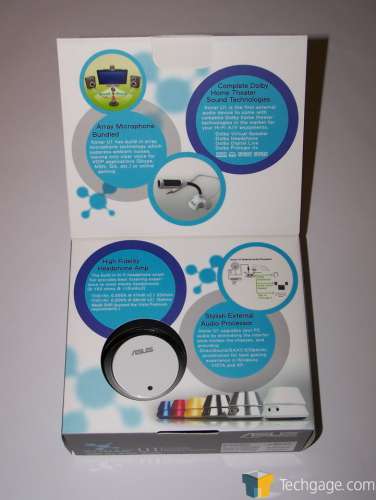
Opening the box flap (did I neglect to mention there being a flap on the front of the box? Shame on me) shows more of the same specs listed elsewhere on the box along with showing the various colors the U1 comes in (blue, red, yellow, black, polished and white) and a window shows you the color of the unit contained within the box.
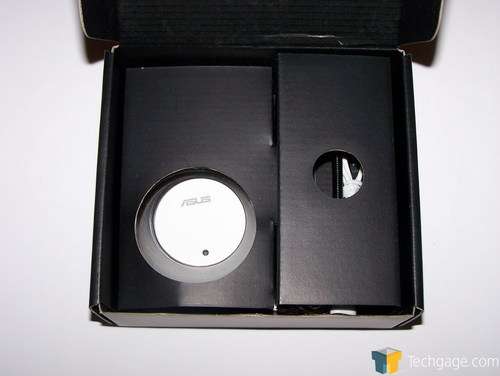
Opening the box reveals that the U1 is bundled away pretty securely, at least it should survive some less than TLC during shipping.
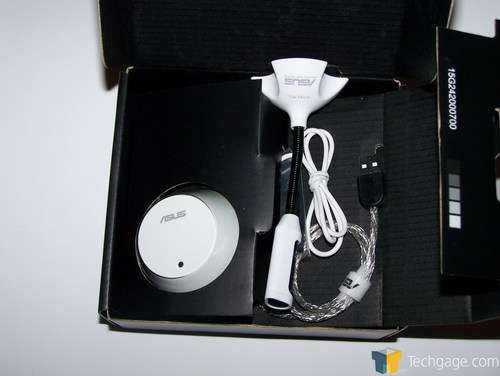
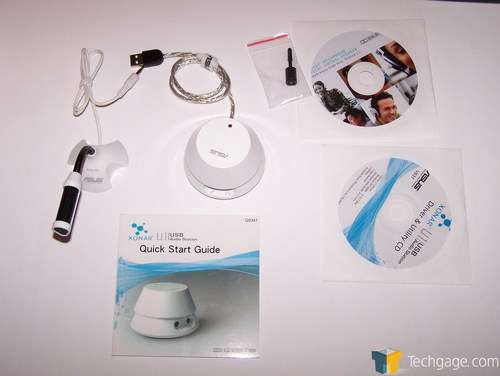
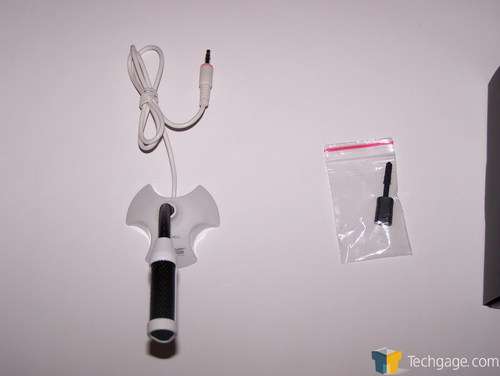
Popping open the flap not over the U1 reveals the array mic, the baggie with the SPDIF adapter and the (very short) cable for the U1. ASUS was kind enough to supply a hook/loop tie wrap for the cable on the U1, a nice touch if you’re planning to haul it around in your laptop bag. I wish they’d been as forward thinking for the mic cable though.
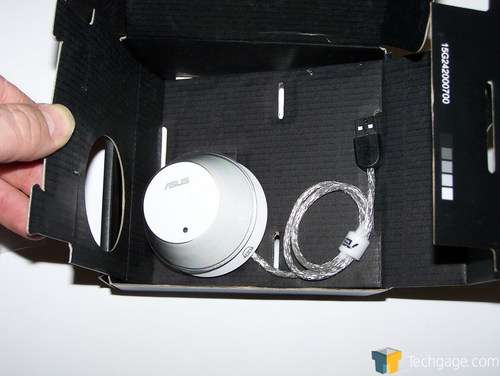
Lifting the flap over the U1 reveals it in all it’s salt shaker glory. The upper part of the U1 is the volume control slash mute button. To increase the volume a clockwise rotation is all it takes, Conversely turning it counter clockwise drops the volume while pushing the top down mutes the sound. Pretty handy, no pun intended.
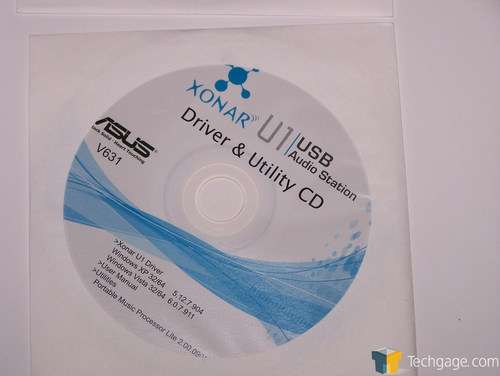
Under the U1 is a hidden compartment containing the quick start guide, driver CD and a demo DVD. The driver CD also features a utility called ASUS PMP lite and a text owner’s manual. PMP lite is a utility for ripping audio (which I didn’t play with, I’m content with WMP 10) and will only function when the U1 is connected to your system.
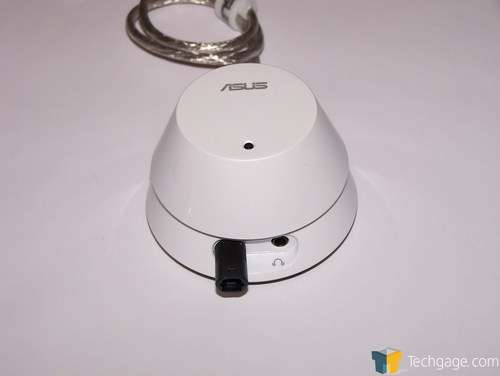
Here’s a shot of the U1 in all it’s glory with the toslink SPDIF adapter stuffed into the audio output. Oops, it’s in the input. Sadly, the input only serves double duty, it’s a mic input and line level input but it doesn’t do SPDIF duties. The output jack is the only one gifted with SPDIF capabilities. I imagine that SPDIF input would’ve increased the complexity of the unit past the point of being able to fit into the svelte profile ASUS used. Yes, it would be nice but those are the breaks.
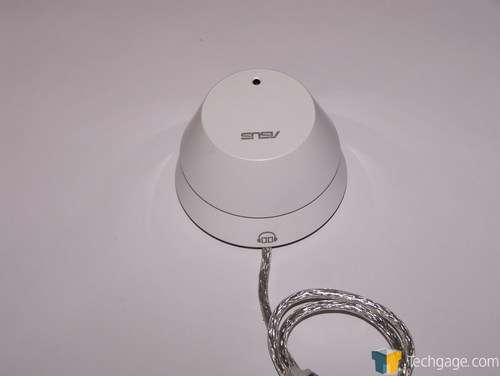
Spinning the U1 around we see that there’s a Dolby headphone logo imprinted into the back above the cable. Yes, it’s imprinted into the unit as are all the legends on the U1, they’re not merely silk screened on. This is on top of the fact that the U1 is made with a solid metal shell and has a non-skid rubber foot.
The metal shell will help insure that no stray interference messes with the quality of your audio and that it will survive a bit of rough handling. I say bit because the potentiometer used allows the top to wobble around a bit which doesn’t give it the most sturdy feel.
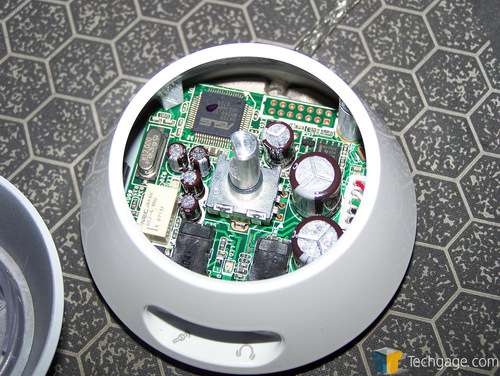
Here’s look inside the U1. I wanted to test it out fully before attempting to get it apart just on the off chance I killed it in the process, that’s why it’s sitting on my mouse pad rather than on the same backdrop I used for the rest of the shots.
If you look towards the top of the shot you’ll notice a metal mesh, it runs under the PCB, where the plastic base is, completing the faraday cage thereby making a complete shield. The caps are United Chemicon KMG series which is good and the OPAMP is a Texas Instruments part, Burr-Brown possibly? Given the SN/R numbers it’s a lower end part if it is Burr-Brown.
The potentiometer has a very slight detent action to it so that you get some feedback when the top is rotated. Pushing down on the top engages the mute function. There are also four tri-color LED’s on the PCB. They list two colors, blue while in use and red with the mute on but while I was installing the drivers, the LED’s lit violet before the drivers were fully installed. So, if you find that your U1 isn’t working look at the indicator on the knob, if it’s violet, you’ve gaffed the driver install somehow.
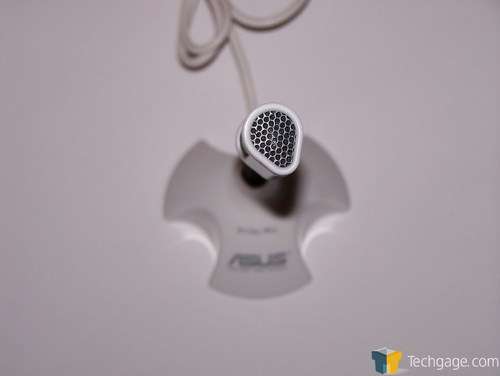
Here’s a closer look at the array mic, it’s on a short flexible stalk. The array mic is a passive noise reducing design that drops ambient background noise by 15db while giving up to 60db boost to sources in front of the mic. ASUS claims that it’s even capable of driving voice recognition software, a nice bonus if you’re not into headsets.
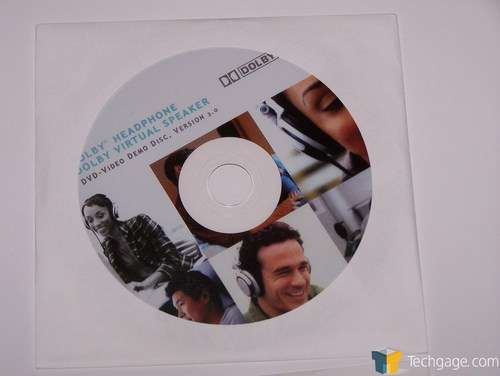
Here’s a quick look at the bundled disks, the DVD disk has various scenes on it encoded with different audio enhancements versus plain two channel audio so you can get and apples to oranges comparison of what the enhancements bring to the table without having to switch through them. I’ll go into the enhancements in a bit.
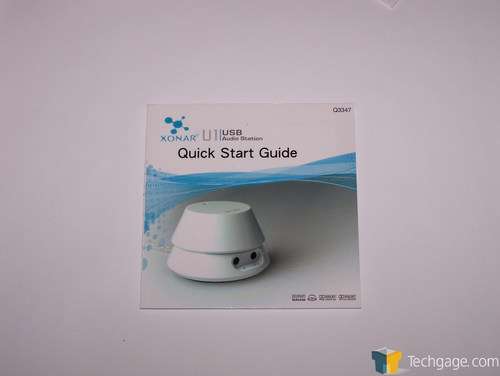
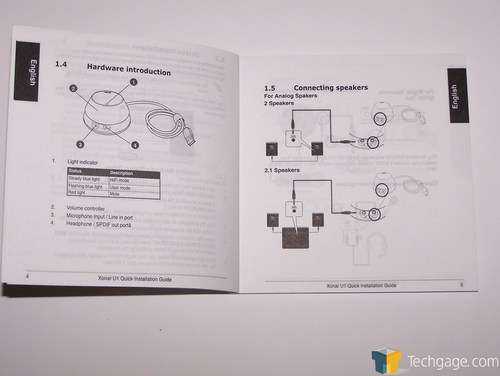
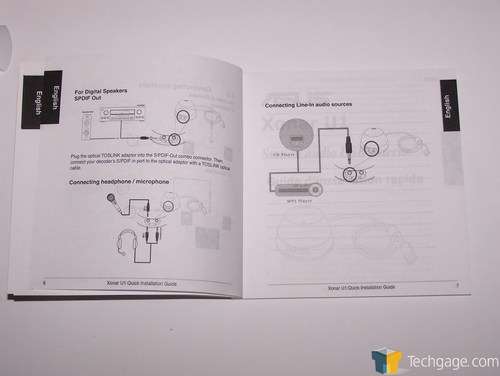
The quick start guide is pretty simple and gives you the needed info on everything from driver installation to hooking up various devices to your U1.
No mention is ever made about the violet light, I just figured that bit out on my own during the driver install, I’ll recount that in a bit.
As you can see, you can hook audio devices to the mic input, just bear in mind that you’ll be using an analog signal path. The sound won’t be as sharp as if you ripped the audio to your PC or played it directly on your PC (in the case of CD players).
The SPDIF is a nice concept but there are a few caveats. The PC will need to be close to the decoder unless you want to use an expensive extended length toslink cable or you use a USB extension cable to place the U1 closer to the decoder. Not a major deal for someone using this little gem to encode Dolby for an HTPC rather than a more expensive discrete audio card but for users wanting to hook up their notebook to a home theater receiver it’s something to ponder.
|
|
Support our efforts! With ad revenue at an all-time low for written websites, we're relying more than ever on reader support to help us continue putting so much effort into this type of content. You can support us by becoming a Patron, or by using our Amazon shopping affiliate links listed through our articles. Thanks for your support!


