- Qualcomm Launches Snapdragon 4 Gen 2 Mobile Platform
- AMD Launches Ryzen PRO 7000 Series Mobile & Desktop Platform
- Intel Launches Sleek Single-Slot Arc Pro A60 Workstation Graphics Card
- NVIDIA Announces Latest Ada Lovelace Additions: GeForce RTX 4060 Ti & RTX 4060
- Maxon Redshift With AMD Radeon GPU Rendering Support Now Available
ASUS Blitz Extreme & Formula Motherboards

There are numerous P35 boards available, so what does a company have to do to have an edge? Well, as far as ASUS is concerned, they should produce feature-packed boards that also come with many extras, including a game and 3D Mark 06. Oh… not to mention a water-cooled northbridge!
Page 1 – Introduction
|
|
When Intel first launched their P35 chipset, it took little time before the market became saturated with many offerings from motherboard manufacturers. ASUS themselves had seven right off the bat, two of which we’ve already taken a look at. Both boards impressed us. They offered superb performance compared to the competition and came feature-packed. Being of the Deluxe variety, they also included WiFi capabilities, which is nice to see on a consumer motherboard.
One area where the board performed well was with overclocking. Though not incredible, both the P5K and P5K3 hit 475FSB with relative ease, though could go no further. Enthusiast overclockers have hit well over 500FSB on other boards, so 475FSB is considered modest by some, although it’s far from it. Personally, I’m happy with anything in the ~450FSB area, especially for a 24/7 rig.
All of that doesn’t matter though, because ASUS has come along and released two new motherboards geared towards the enthusiast overclockers, Blitz Extreme and Blitz Formula, both of which we will be taking a look at today.
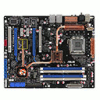
Both boards look identical, the only difference is that the Extreme uses DDR3 while the Formula utilizes DDR2. Other than that, finding physical differences between the two boards is difficult. This is different from how ASUS handled their own P5K3 and P5K boards, which used slightly different passive heatsinks and DIMM colors. I am glad to see that they kept things similar here.
The Blitz boards use Intel’s P35 chipset and pack more features than you can shake a stick at. I am not remotely kidding. The boards should both be called Bling Extreme. But what exactly is here that makes me say such a thing?
Well first, we have better Crossfire capabilities, thanks to the usage of a special chipset called CrossLinx, which effectively makes each PCI-E slot function as 8x, instead of the 16x 4x combination that we saw with the ASUS Commando. Sadly, I do not have any ATI cards on hand, so I will be unable to test out the feature. However, I don’t have any reason to believe that the feature will not function as promised. I am unsure who creates the chipset to pull this off, but it’s not ASUS. From what I understand, I believe they currently have exclusive rights to it for now.
That aside, we also have a northbridge with heatsink ready for water, Voltiminder LEDs, Extreme Tweaking ability, external LCD Poster, Supreme FX II sound card, on-board power on/off and reset, in addition to a quick BIOS reset, Q-Connector, spare chipset fans, feet for an external install, temperature diodes, STALKER and 3D Mark 06. Bling Extreme, indeed.
Before we jump into all of the available features, let’s look at the motherboards themselves. Because the boards are both identical for the most part, we will be only taking a close look at the Extreme version.
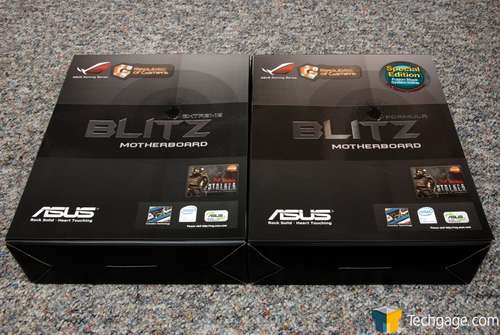
The Blitz boxes are similar in size to most motherboard offerings, although it’s slightly higher because it includes a whack of accessories. For some reason, the Formula version of the board includes a sticker noting the water-block feature, but both include the same feature-sets. The front of the box has a flap which lifts up to show off all the features of the product.
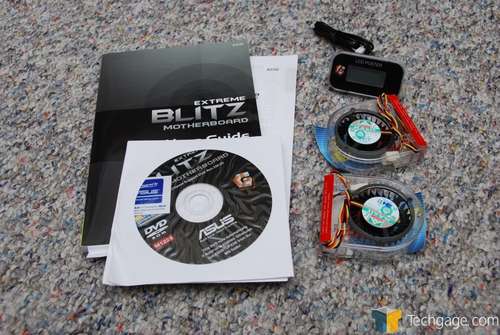
Once opened, you will find the motherboard itself inside a safe plastic shell, and then an accessory box which includes everything else. Along with the Blitz manual and software, the first things taken out were the two optional chipset fans and the LCD poster. This ‘poster’ connects to a port on the motherboard and can sit on your computer or desk. Whenever the BIOS makes a query, it will display on this poster. When nothing is going on, a digital clock is displayed instead. This is all done on a very bright blue backlit screen.
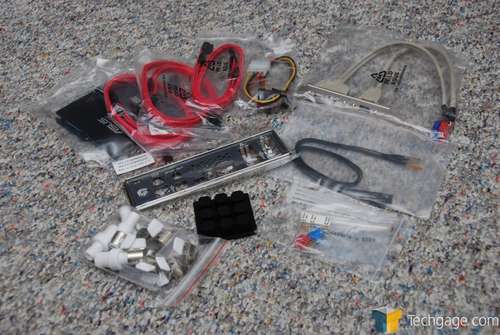
Shown in the picture below are all the required peripheral connectors, I/O panel, water-block stuffs, Q-Connector, diodes and a PCI-slot panel that offers access to two USB ports and one firewire. The black feet shown here are for those who don’t wish to install the board in a chassis. Stick them to a table and set the board on top for great airflow.
With the initial look out of the way, let’s move right into a look at the board itself.
|
|
Support our efforts! With ad revenue at an all-time low for written websites, we're relying more than ever on reader support to help us continue putting so much effort into this type of content. You can support us by becoming a Patron, or by using our Amazon shopping affiliate links listed through our articles. Thanks for your support!


