- Qualcomm Launches Snapdragon 4 Gen 2 Mobile Platform
- AMD Launches Ryzen PRO 7000 Series Mobile & Desktop Platform
- Intel Launches Sleek Single-Slot Arc Pro A60 Workstation Graphics Card
- NVIDIA Announces Latest Ada Lovelace Additions: GeForce RTX 4060 Ti & RTX 4060
- Maxon Redshift With AMD Radeon GPU Rendering Support Now Available
Tagan A+ Black Pearl Full Tower
The chassis market is full of common names, but it’s not often a new player comes along that really impresses. Tagan is one of those rare companies who delivers a full-size case that is well worth your consideration.
Page 5 – Installation
There is a reason that I personally prefer larger cases like the Black Pearl. In the past, I have either owned or evaluated PC cases of all sizes. With larger cases, you have plenty of room to work in and I personally appreciate that. It’s not to say that smaller cases are worse, but for me, I enjoy working in a case with plenty of room to move around in.
I have also found that the larger the case, the more room there is to hide unwanted cables on the power supply. To some this is cheating but to me, it’s easy.
Before we get too far into the installation, the following is a list of the hardware being installed in the Black Pearl. This hardware should be familiar to most as it’s the hardware we have used in our most recent chassis reviews.
- CPU: Intel E6600 @ 2.4 GHz cooled using a Zalman 9700CNPS
- Motherboard: Asus Commando
- Memory: Kingston DDR2 PC-9200 2GB at DDR2-800 4-4-4-12 1T (If possible)
- Video: Sapphire x1900 XTX
- Sound: Onboard HD Audio
- Storage: 2 Seagate Barracuda 750 GB SATA hard drives
- PSU: Tagan Silver Power 1KW PSU
- Etcetera: Windows XP Professional w/ SP2
To start out with, we are going to put the hard drives into the case. With only a pair of 750GB Seagate Barracudas to install, we are obviously not going to need all eight bays. Out of cabling convenience, we are going to use the drive cage closest to the middle of the case.
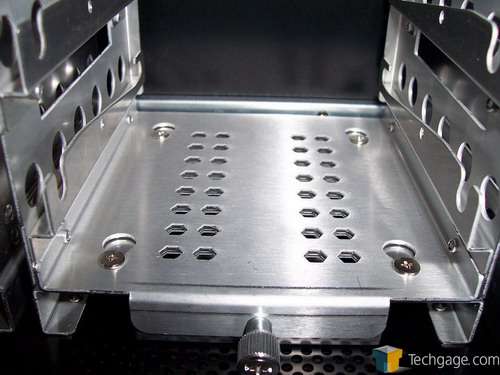
The drive cages are held onto the chassis with a thumb screw and that thumb screw in turn, keeps the cage securely locked into place on four posts.
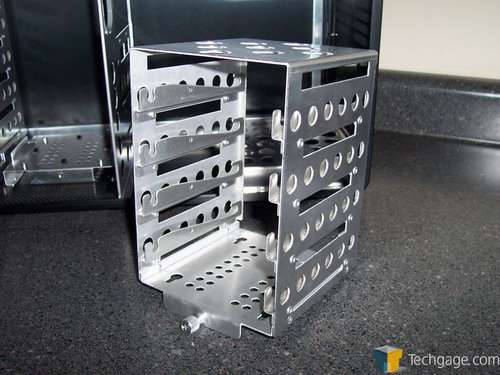
With the drive cage removed, we can take a closet look at the cage itself.
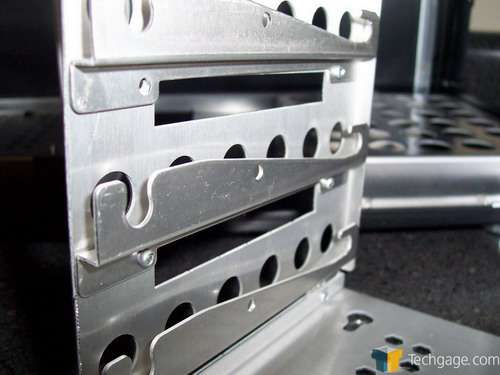
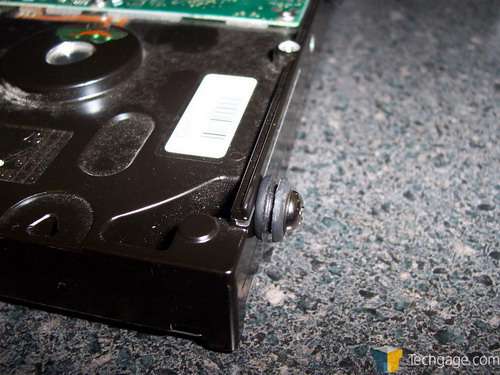
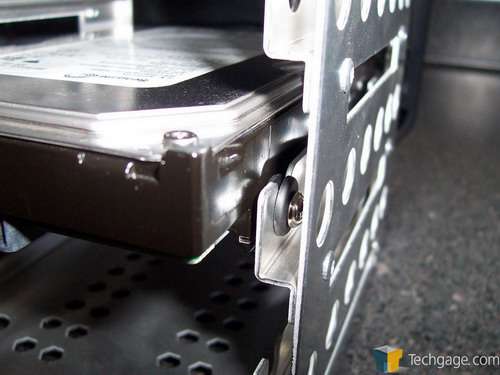
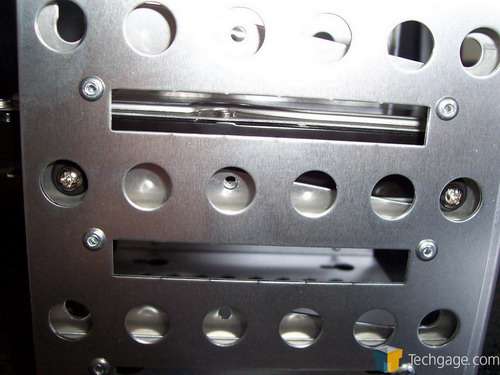
The first thing we noticed was the attached rails on the sides of the cages. This is different than any other case that we have worked with in the sense that the drive isn’t screwed onto the cage at all. Instead, the hard drive sits on these rails with the help of a rubber grommet.
The rubber grommets are similar to the way hard drives are installed in the Antec P180 and P182. This was personally my favorite aspect of the Antec case and with the Black Pearl, its nice to see someone else has adopted this method.
With the grommets installed, the drives slides down the rails and into place. Once at the end of the rail, the front grommets simply lock into place by pressing downward on the hard drive itself. This is a method that I personally love and is seems as if the hard drive is floating. That and it helps dissipate a good majority of the vibrations caused by the hard drive spinning.
For long hauls, or the extremely paranoid, the drive can be locked to the cage with one screw in the middle of the drive. This is useful for when transporting the PC anywhere, say a LAN party like Stompfest or AsylumLAN.
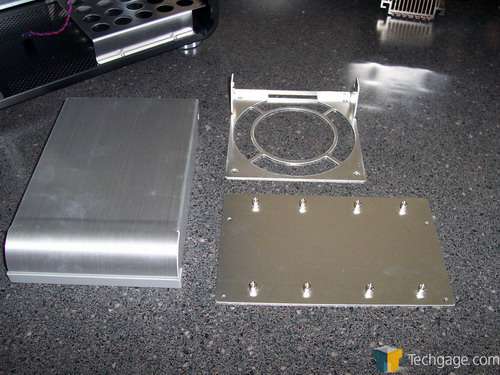
To aid in installation, Tagan has provided all the essential hardware and then some. Included with the Black Pearl is the fan shroud and an motherboard extender plate.
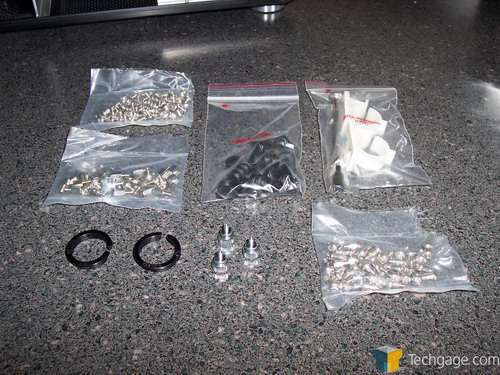
Also included is all of the needed hardware, including motherboard standoffs, thumb screws, spaced bolts for the rubber grommets, and motherboard standoff screws. Also included in the package is plastic rings to place in the top holes should water tubes be passed through as well as cable management equipment such as zip ties and cable locks.
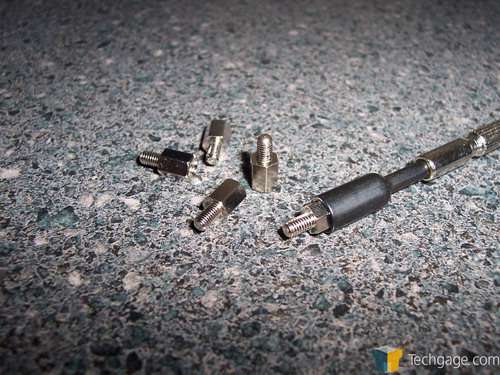
Finally, Tagan has included a small tool to properly tighten down the standoffs. Again, a small little tool, worth less than a quarter, adds a lot to the overall package and again shows off Tagan’s attention to detail.
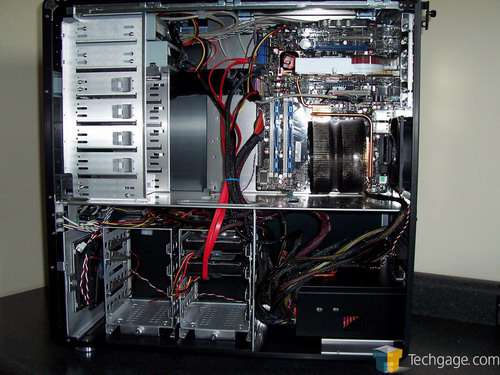
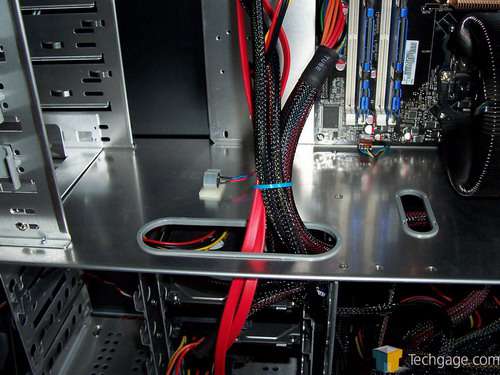
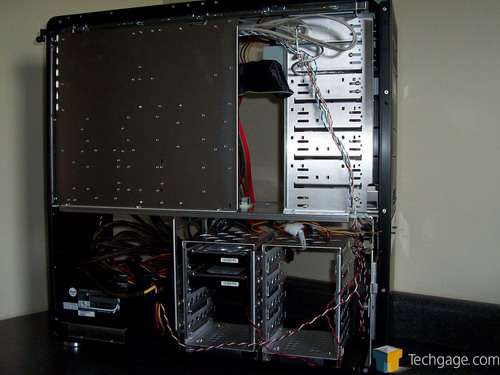
Once everything is installed, the cables need to be run from the power supply and the hard drives to the motherboard. This is made simple with the openings in the bottom of the upper chamber (or at the top of the lower chambers if you want to look at it that way).
There is also a small notch on the back of the case, just above the power supply to route cables in. This kept the auxiliary 8-pin power cable well out of sight which helped add to the total look of the finished product. At the bottom, time can be taken to make sure the cables are nice and orderly or they can be simply pushed out of the way. After all, this area is going to be well hidden behind the side panel. The choice is up to you.
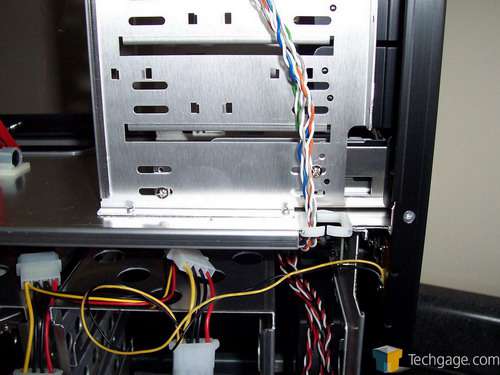
There is also a small open area towards the front of the case behind the motherboard tray. With the left side panel removed, this area can be used to route unsightly cables to the motherboard. We chose to route the front panel cables through this area as the motherboard pin headers were located on this side. It would have been idea to route the 24 pin power cable this way as well but unfortunately was not long enough.
|
|
Support our efforts! With ad revenue at an all-time low for written websites, we're relying more than ever on reader support to help us continue putting so much effort into this type of content. You can support us by becoming a Patron, or by using our Amazon shopping affiliate links listed through our articles. Thanks for your support!


