- Qualcomm Launches Snapdragon 4 Gen 2 Mobile Platform
- AMD Launches Ryzen PRO 7000 Series Mobile & Desktop Platform
- Intel Launches Sleek Single-Slot Arc Pro A60 Workstation Graphics Card
- NVIDIA Announces Latest Ada Lovelace Additions: GeForce RTX 4060 Ti & RTX 4060
- Maxon Redshift With AMD Radeon GPU Rendering Support Now Available
Thermaltake WATER3.0 Extreme Liquid CPU Cooler Review

Need big cooling performance behind that big CPU? That’s exactly what Thermaltake’s WATER3.0 Extreme has been designed for. Featuring a double-length radiator design and strapped with two 120mm high CFM fans, the Extreme is preparing itself for a good fight, whether it’s against an overclocked quad-core, or brawny six-core.
Page 1 – Introduction & Tour of the WATER3.0 Extreme
For as long as I’ve known it to be an option, I’ve opted to go the liquid route for keeping my PCs cool. Versus air solutions, I’ve preferred liquid for its increased efficiency, generally lower noise, smaller footprint, and, if we’re going to get petty, the aesthetics.
Years ago, liquid cooling (or “water cooling”) was a do-it-yourself endeavor, and I did happen to dabble in it once. As much as I loved the results, though, I didn’t care too much for the overall cost, and especially the amount of research required to make sure that what you’re buying into is going to last you a while – and of course, not rot out before the end of that expected life cycle. When all-in-one solutions first hit the market, I knew that they were designed for people like me – those who prefer the perks over air as mentioned above, but don’t want to invest too much money and time into a proper DIY solution.
Admittedly, the only all-in-one solutions I’ve used up to this point have been from Corsair, starting with the Nautilus500. Remember that thing? While I loved it at the time, Nautilus500 simply wasn’t an elegant solution, but Corsair showed us what was with the release of its Hydro series way back in 2009.
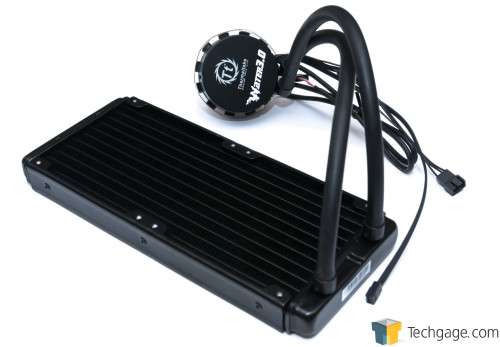
Thermaltake’s WATER3.0 Extreme
After this point, the AIO market just seemed to explode, with companies we didn’t expect to jump into the cooling market, doing just that. That’s been helped by the fact that most of these companies don’t build their products from the ground-up. Instead, they opt to buy a proven design from a manufacturer (Asetek or CoolIT, for example), tweak it to their liking, and then release it with their name on it. Overall, this has largely worked out great for everyone involved.
Last fall, I took a look at Thermaltake’s WATER2.0 Performer and Pro, and overall, liked what I saw. Of the two, the Performer impressed me the most with its high performance to cost ratio, but both coolers had their perks, and both were very easy to install.
As we’ve been teasing a bit lately on our Facebook and Twitter, we’ve been building a brand-new GPU test bench, and because we’ll be packing in a next-gen Ivy Bridge-E processor (more on that shortly), I thought the perfect cooling solution would be Thermaltake’s recently launched WATER3.0 series – the Extreme edition in particular. Fortunately, the company was kind enough to send one our way. Normally, Ryan heads all of our cooling content, so I have no real basis for comparison here. However, as the test PC is currently packing the biggest and baddest Intel chip around, it’s going to be getting a thorough test.
First, let’s establish what makes the Extreme so extreme:
| Performer | Pro | Extreme | |
| Radiator | 151 x 120 x 27mm | 151 x 120 x 49mm | 270 x 120 x 27mm |
| Fan(s) | 1x 1000~2000 RPM, 20dBA, 99 CFM | 1x 1000~2000 RPM, 20dBA, 99 CFM | 2x 1000~2000 RPM, 20dBA, 99 CFM |
| Pump | 2900±150 RPM | 2900±150 RPM | 2900±150 RPM |
| Tube | 326mm, Rubber | 326mm, Rubber | 326mm, Rubber |
| Weight | 876g | 1132g | 1071g |
| Software? | No | No | Yes |
| Price | $75 | $95 | $110 |
In a nutshell, the Extreme model WATER3.0 is a double-length radiator solution – it’s in effect a Performer, but twice as long, and with software integration as an added perk. Of them all, the Extreme is likely to offer the best blend of performance and reduced noise.
Let’s take a quick trip around the Extreme, shall we?
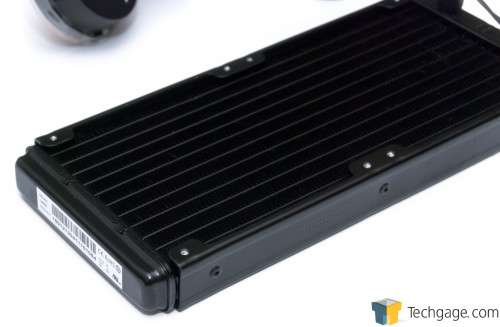
The shot below shows just how modest the Extreme’s radiator is in thickness, but thanks to its double-length, its performance potential is high. If your chassis allows you to mount two 120mm fans side-by-side, installing the Extreme should be no problem at all.
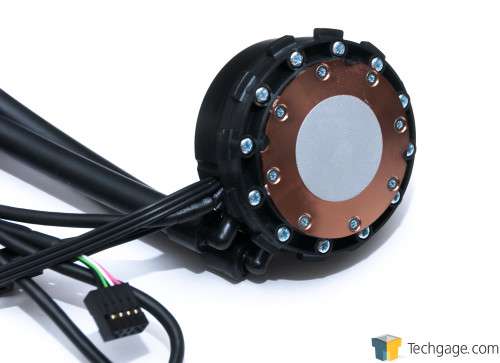
The Extreme’s pump is pre-dabbed with some thermal interface material, but if you’re like me, you’re going to be careless and have to scrape it off and put some fresh stuff on. On that topic, the fingerprint seen on the block didn’t come with it.
Not entirely pictured in the above shot: Coming out of the block are a couple of wires. First, there’s a fan header joiner that allows you to plug in both included fans so that you don’t waste more headers on the motherboard than you really need to. Once those are installed, a 3-pin header from the block plugs into the CPU_FAN header on your motherboard. Seen in the pic above is the USB header. This plugs straight into – you guessed it – an available USB 2.0 header on the motherboard; this is what allows you to interface with the cooler via software in Windows.
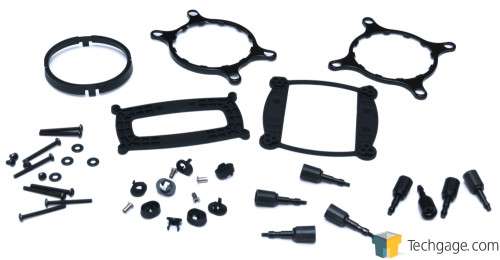
With its WATER3.0 lineup, Thermaltake supports all recent CPU sockets – even including the LGA1366 one that a lot of manufacturers have been quick to drop. While all of these components may make the installation seem a bit daunting, you’ll only need about half of the small pieces, regardless of socket.
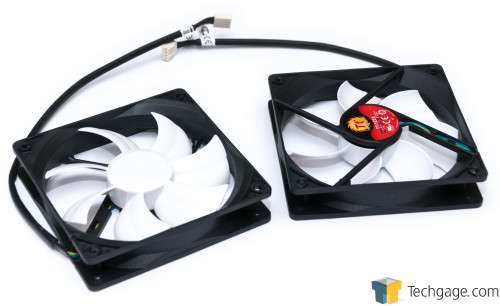
The fans included with all WATER3.0 coolers are spec’d at 20 dBA and 99 CFM. While most fan vendors report the dBA as max, Thermaltake has for some reason opted to report the minimum, which is what 20 dBA here is. A true 20 dBA 120mm fan @ 99 CFM would be rather brilliant.
During normal use, I found these fans to be quite ideal – they’re barely audible. When ramped up, you’ll definitely be able to hear them, but it’s hardly overbearing. Fortunately, that kind of noise would be a rarity, only during overclocked load states, and again, it’s not loud on the ridiculous level – but it does stand out.
Support our efforts! With ad revenue at an all-time low for written websites, we're relying more than ever on reader support to help us continue putting so much effort into this type of content. You can support us by becoming a Patron, or by using our Amazon shopping affiliate links listed through our articles. Thanks for your support!


